The Recycle Bin is where all our unwanted files go when we hit the delete key. From there, you can delete the files or restore them permanently. But what if you see the Recycle Bin is corrupted error on your Windows 11 system? In such a case, you can’t access your deleted files. Don’t worry, though, as this guide will show you how to fix the issue.
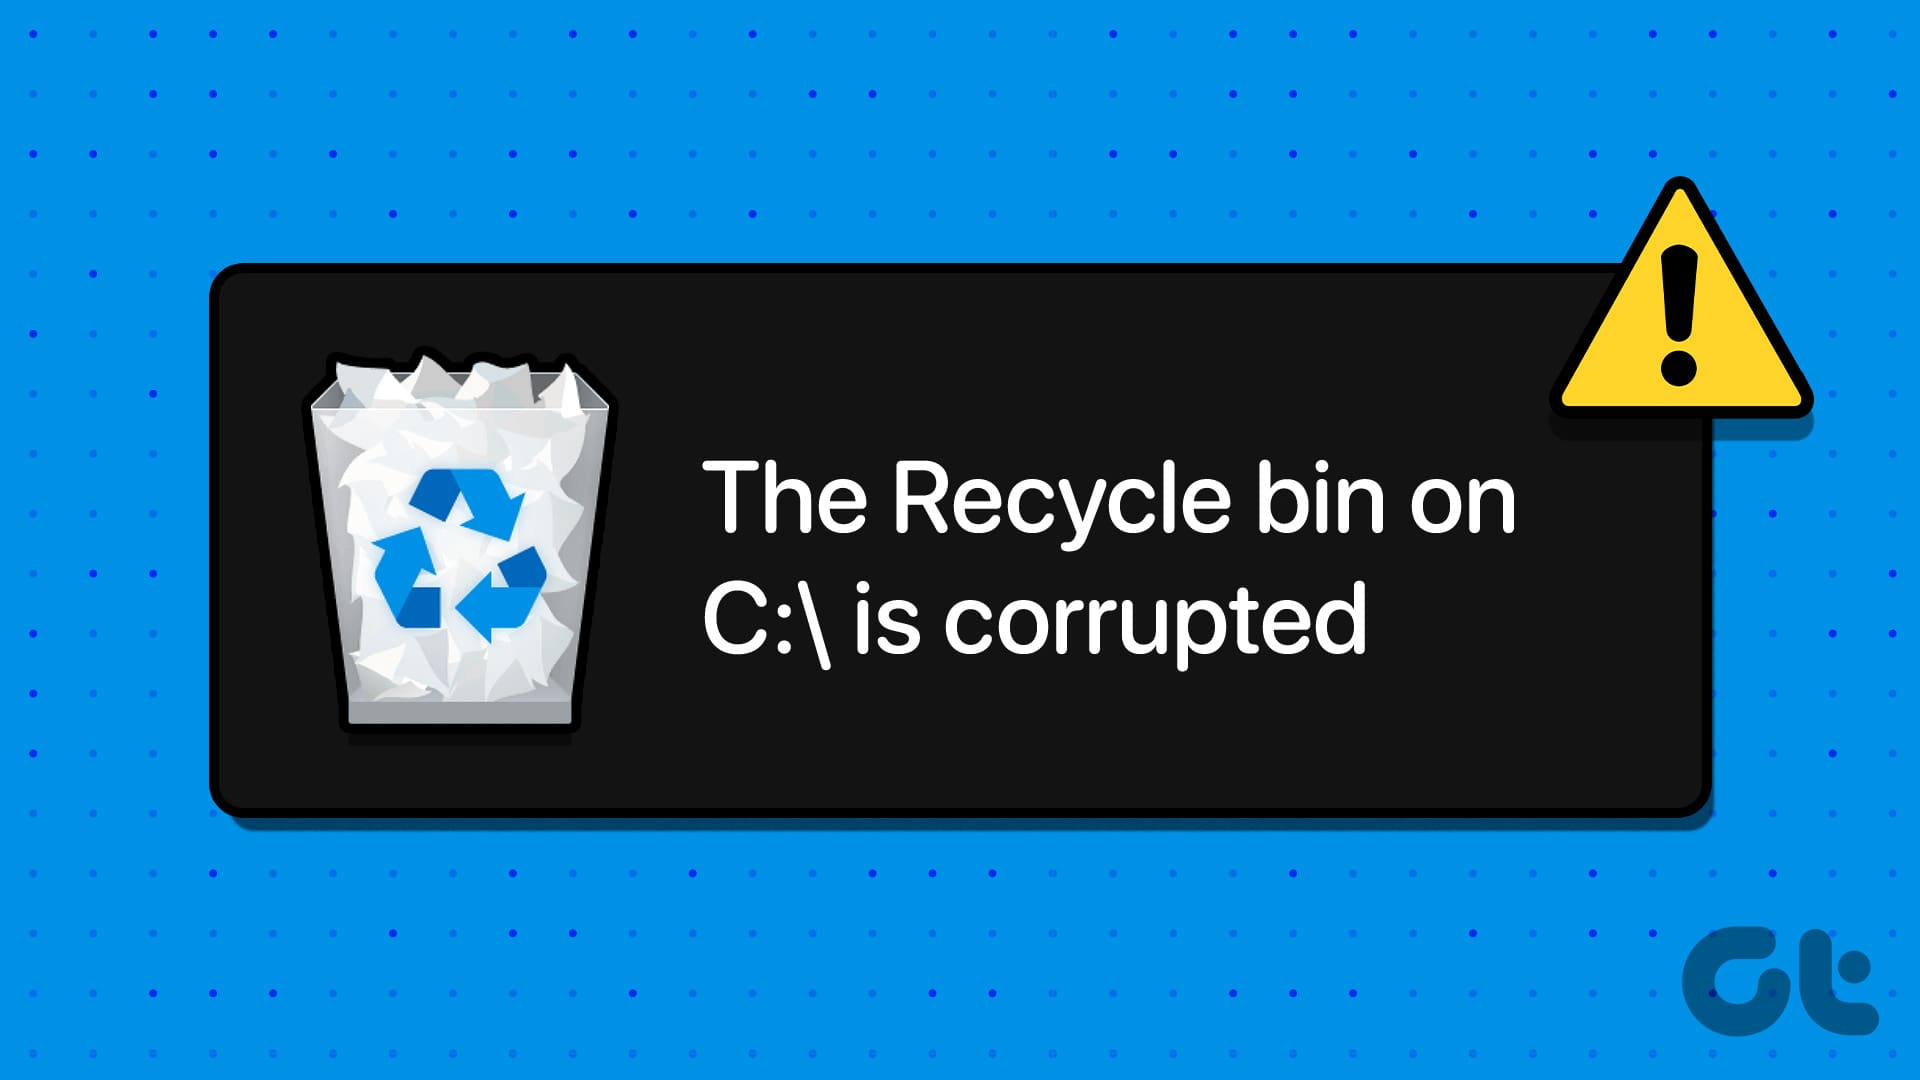
You can always try emptying the Recycle Bin to make space on your computer and counter the issue. If that doesn’t help, a simple restart can rescue you. If you’ve already tried these workarounds and are still facing the error, follow the fixes below for a sureshot resolution.
1. Repair Using CHKDSK Utility
CHKDSK is a system tool to scan and fix system errors. You can run the CHKDSK tool using Command Prompt or PowerShell with a single command. The steps are as follows:
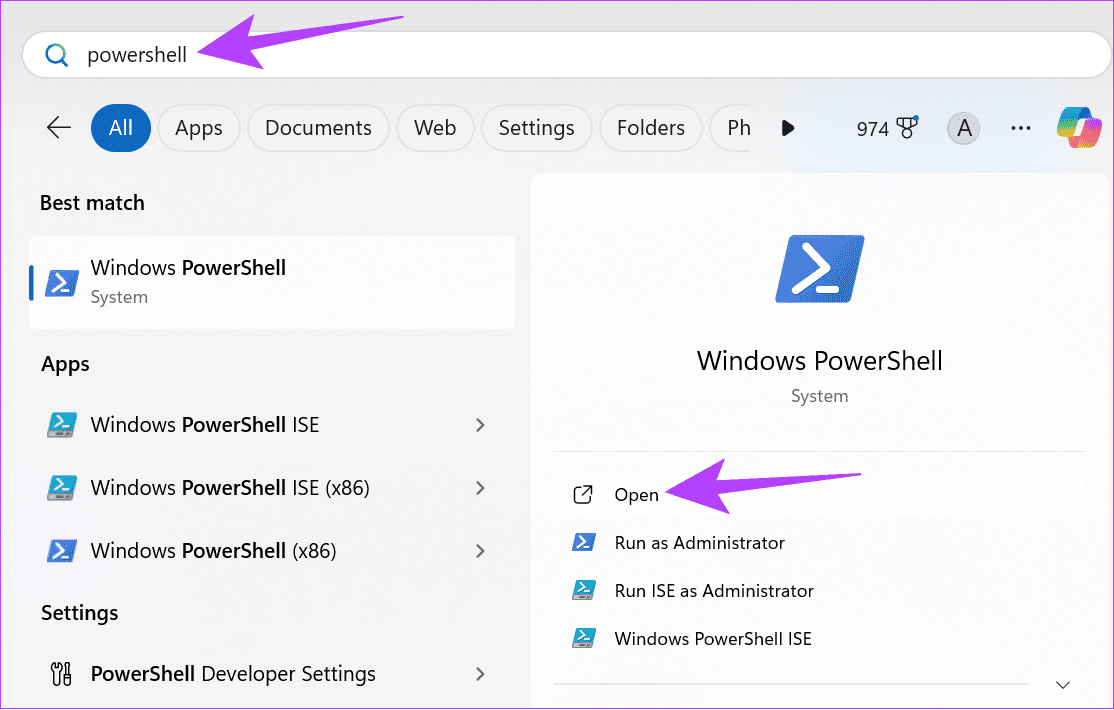
Step 1: Click on the Start button to search and open Windows PowerShell.
Note: You can also use Command Prompt by following the same steps. Both tools perform mostly the same for this guide.
Step 2: Type the following command and press Enter.
chkdsk X: /R
Note: Replace the letter X in the above command with the letter of the drive where you’re facing the corrupted issue.
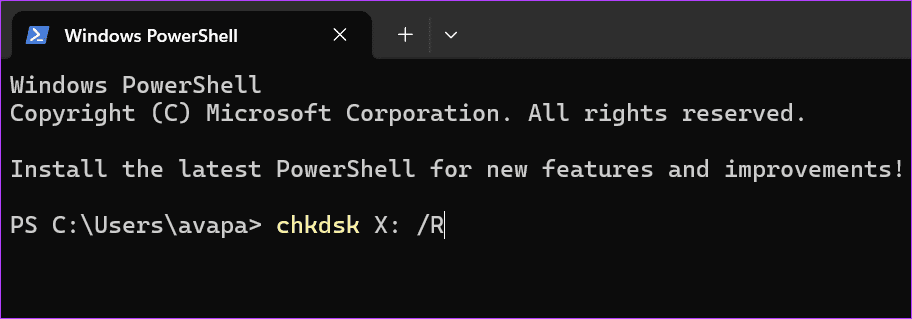
Wait until the process is completed. If any errors are found, CHKDSK will fix them. Once done, you can restart your Windows PC and try accessing the Recycle Bin.
2. Run SFC to Repair Files
Like CHKDSK, You can also use the help of SFC (System File Checker) to scan and repair files. Instead of scanning and fixing issues in a single drive, SFC scans the entire system. Hence, it might need some extra time to fix all the issues.
Step 1: Open Command Prompt. You can search for and open it using the Start menu by following the steps mentioned above.
Step 2: Type the following command and hit Enter.
sfc /scannow
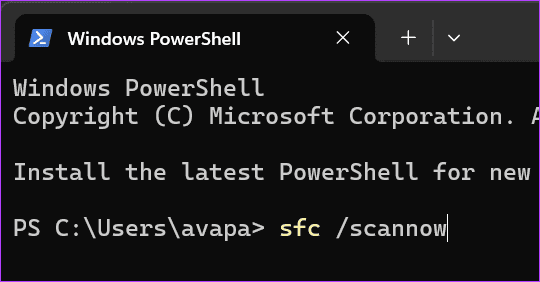
After this, sit back and let SFC do its work. Once completed, restart your system for good measure.
3. Delete and Reinstall the Recycle Bin
Clearing all the data in the Recycle Bin can help you fix the issue on Windows 11. Here’s how to go about it:
Step 1: Open File Manager and click on the three dots at the top.
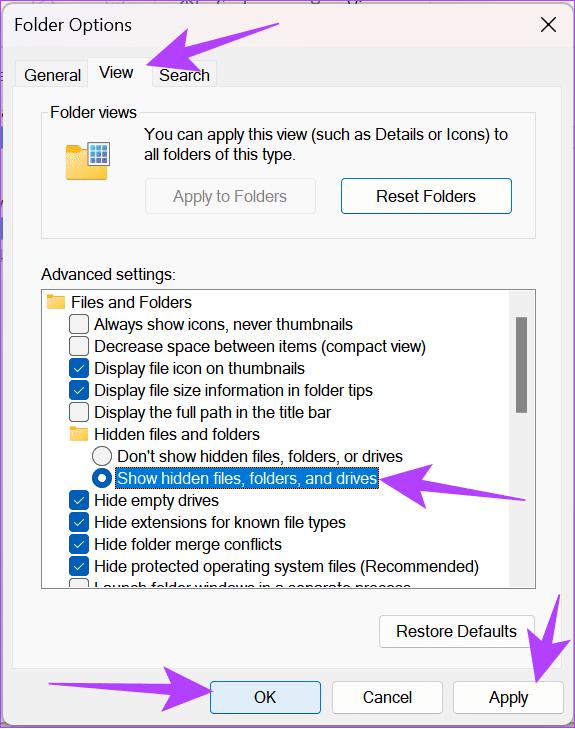
Step 2: Click Options (gear icon).
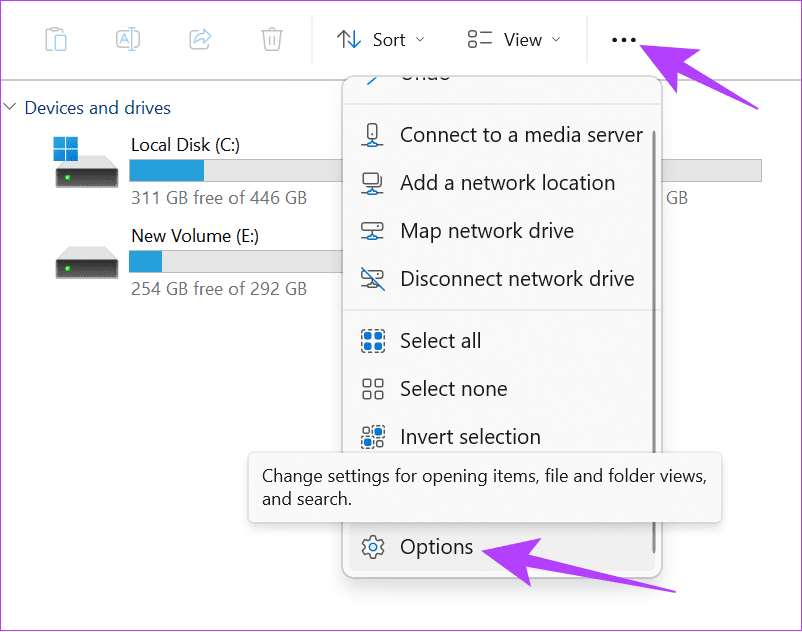
Step 3: Select View in the new Window.
Step 4: Here, choose ‘Show hidden files, folders and drives’ under ‘Hidden files and folders.’
Step 5: Once done, click Apply and hit OK.
Step 6: Now, type the following in the address bar and hit Enter.
C:\$Recycle.Bin
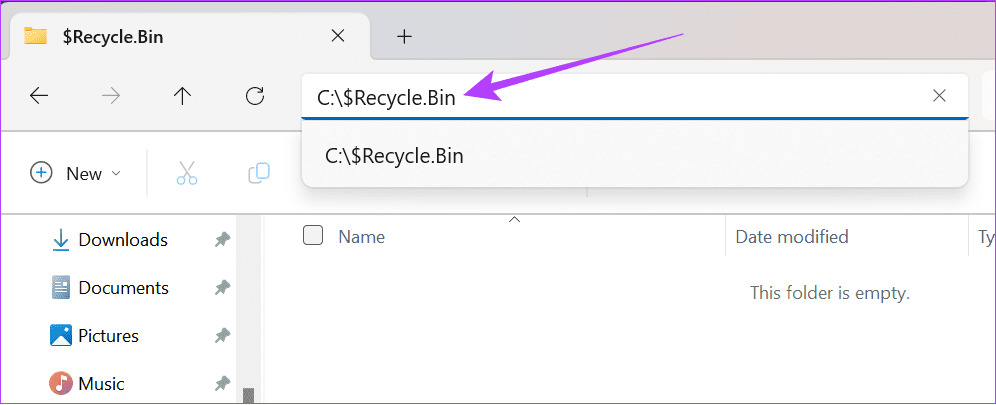
Step 7: Delete all the contents inside this folder and restart your PC.
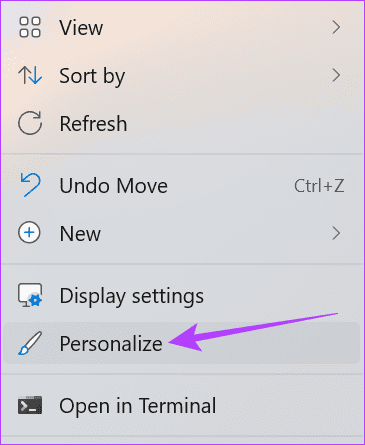
Step 8: Now, right-click on your desktop and choose Personalize.
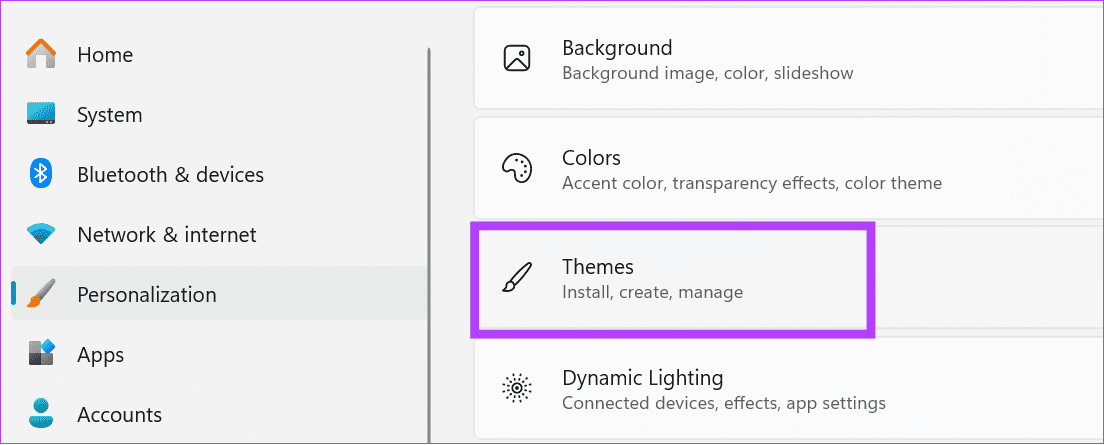
Step 9: Click on themes.
Step 10: Choose ‘Desktop icon settings’.
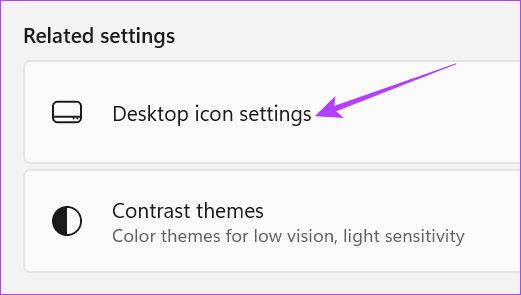
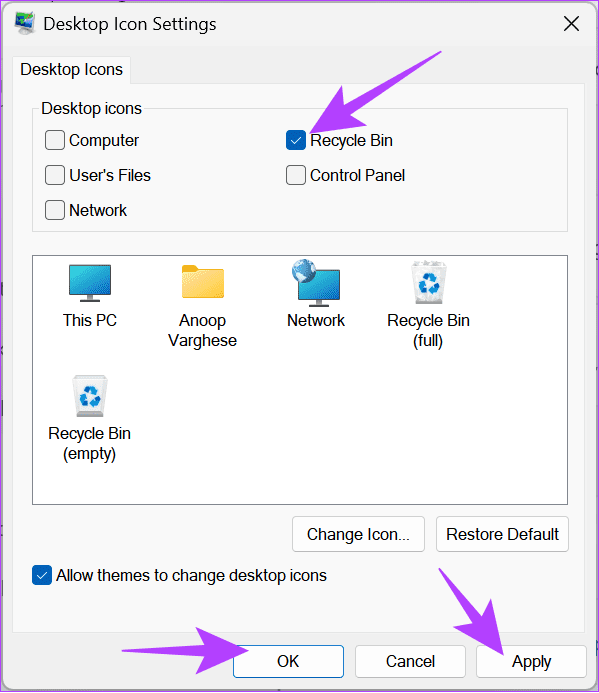
Step 11: Enable Recycle Bin. If it’s already enabled, click on the checkbox to disable it and enable it again. Click Apply and hit OK.
4. Reset Recycle Bin Using Command Prompt
You can also reset the Recycle Bin using Command Prompt to fix the Recycle Bin on C/D is corrupted issue. Here are the steps to follow:
Step 1: Open Command Prompt. You can search for and open it using the Start menu by following the steps mentioned at the top.
Step 2: Then, enter the following command and hit Enter.
rd /s /q X:\$Recycle.bin
Note: Ensure to replace the letter X with the letter of the drive you’re facing the issue.
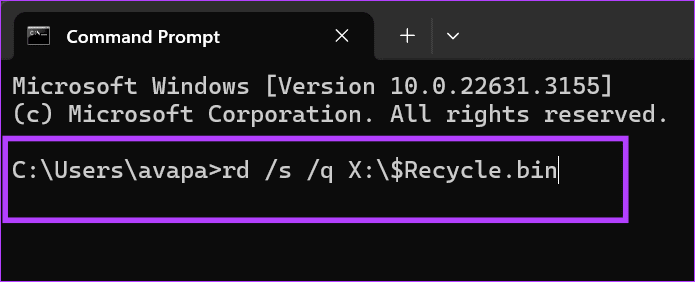
Step 3: Once the process is complete, restart your PC.
5. Scan Your PC for Viruses or Malware
Usually, Recycle Bin faces issues with deleting files when your computer is affected by malware. Hence, the easiest solution to fix a corrupted Recycle Bin is to check and remove any possible malware on the PC. Here are the steps to follow:
Step 1: Open Windows Security and click on ‘Virus & threat protection’.
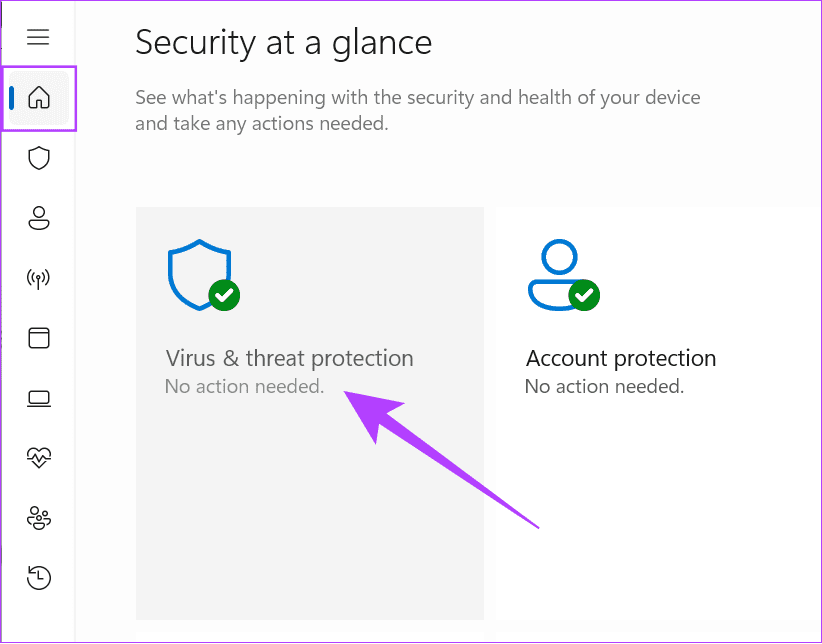
Step 2: From here, choose any of the Scan Options.

Windows Defender will now scan your PC. If it finds any threats, it will allow you to remove them. You can access the Recycle Bin once the malware is neutralized.
6. Restore From a System Restore Point
If you have created a system restore point before, use the system restore tool in Windows to fix the black screen issue in the Recycle Bin.
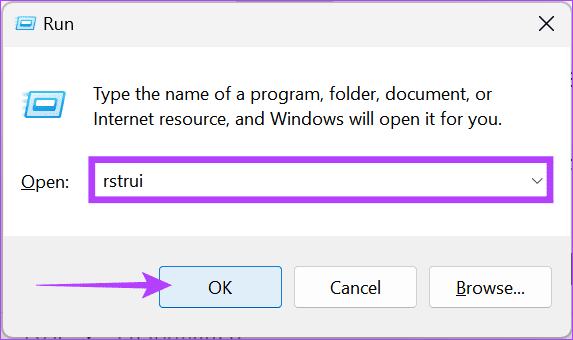
Step 1: Use the Windows + R keys to open the Run application.
Step 2: Type the following and hit Enter.
rstrui
Step 3: Choose the oldest restore point and click Next.
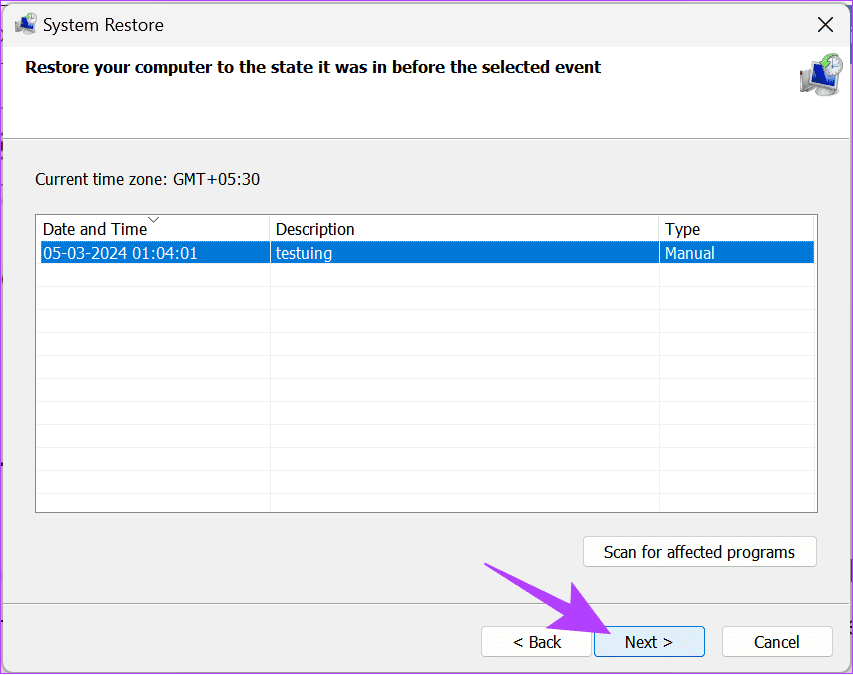
Step 4: Once done, click Finish.
Delete Files and Issues
Now that you know how to fix the Recycle Bin corrupted error on Windows 11, you can delete all your files without issues. However, if you have queries or suggestions, feel free to drop them in the comments section.
Was this helpful?
Last updated on 14 March, 2024
The article above may contain affiliate links which help support Guiding Tech. The content remains unbiased and authentic and will never affect our editorial integrity.

