Windows services are an integral part of the operating system, responsible for carrying out various tasks in the background. Consequently, when a service fails or crashes, it can compromise the stability of your system. One such example is when the Microsoft GameInput service starts misbehaving, causing your Windows PC to become unresponsive and crash.

Fortunately, there’s no need to put up with such annoyance, as it is possible to stop the Microsoft GameInput service from crashing your Windows PC. Before we show you how to do that, let’s go over what the Microsoft GameInput service does on your PC.
What is the GameInput Service on Windows
The Microsoft GameInput service is an API that allows games to access and interact with gaming input devices, such as gamepads, keyboards, and mice. It is a background service that reduces latency and improves input accuracy for a better gaming experience on Windows.
What to Do if GameInput Service Keeps Crashing Your Windows PC
Being a Microsoft service, you’d expect GameInput to work flawlessly on your Windows PC. However, that may not always be the case. If GameInput keeps crashing your Windows PC, work your way through the following solutions to fix the issue.
1. Uninstall Microsoft GameInput
One of the most effective ways to stop Microsoft GameInput from crashing your Windows 10 or 11 PC is to remove it. Several users on a Reddit thread reported fixing the issue with this trick. Hence, it’s the first thing you should try.
Step 1: Right-click on the Start icon and select Installed apps from the list.

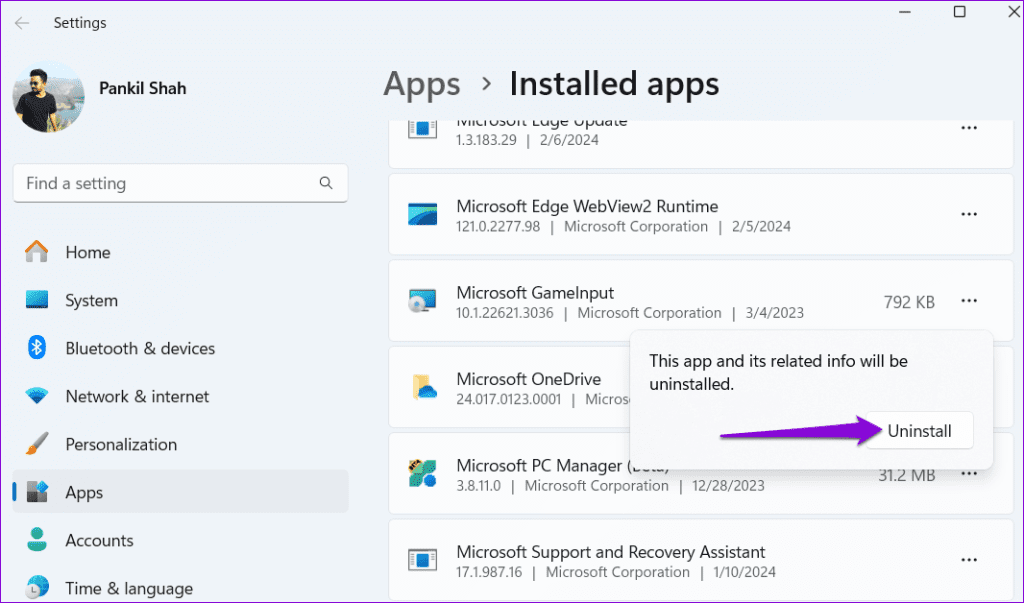
Step 2: Use the search tool or scroll through the list to locate Microsoft GameInput. Click the three-dot icon next to it and select Uninstall.
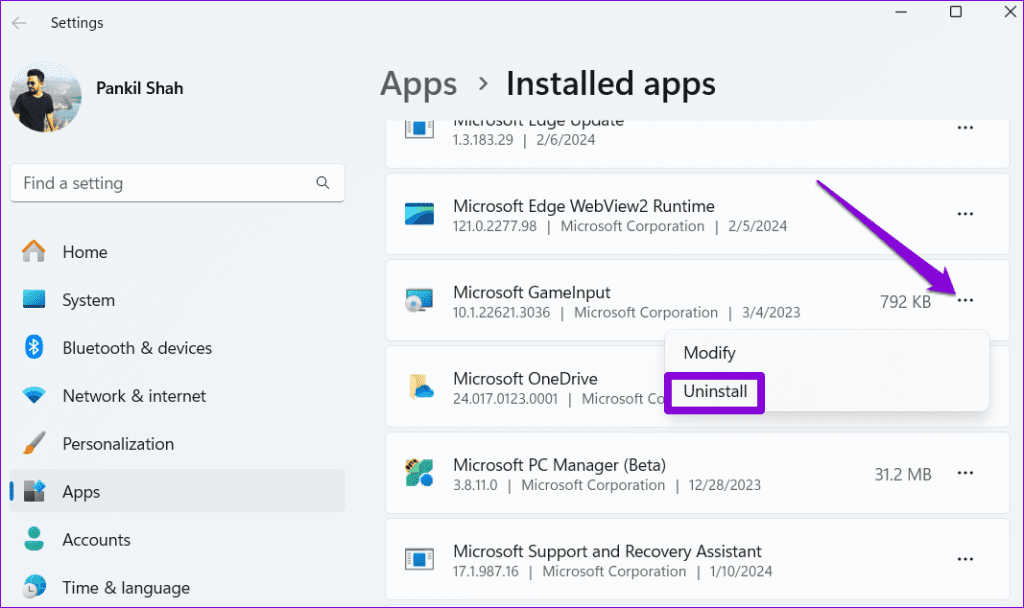
Step 3: Select Uninstall to confirm.
2. Rename or Delete the GameInput Folder
In addition to uninstalling Microsoft GameInput, you should also delete the associated files from your system. Here are the steps for the same.
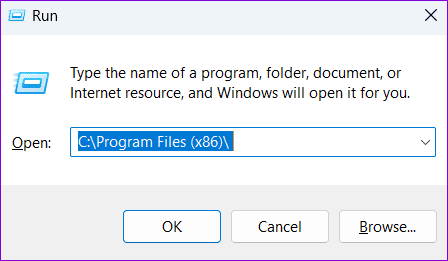
Step 1: Press the Windows key + R to open the Run dialog box. Type C:\Program Files (x86)\ in the box and press Enter.
Step 2: Locate and select the Microsoft GameInput folder. Then, click the trash icon at the top. If you don’t wish to delete the folder, you can also rename it.
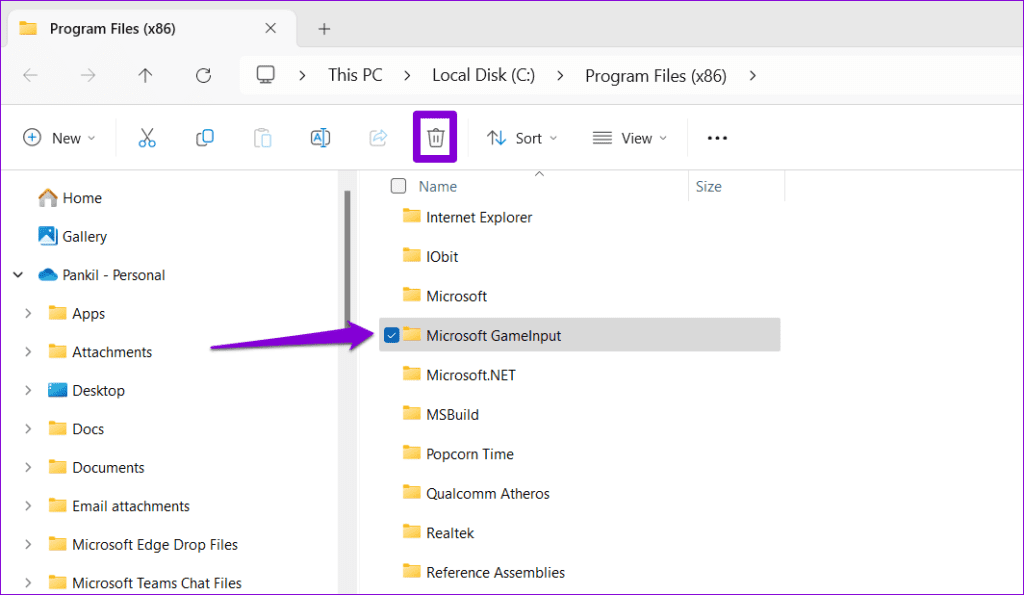
Completing the above steps should help you get rid of Microsoft GameInput for good. As such, Windows should now be able to create a new GameInput folder, fixing any issues.
3. Configure the GameInput Service
The Services app on Windows makes it simple to manage background services on your system. You can use it to disable the GameInput service, preventing it from running on your PC or reinstalling itself.
To configure the GameInput service, use these steps:
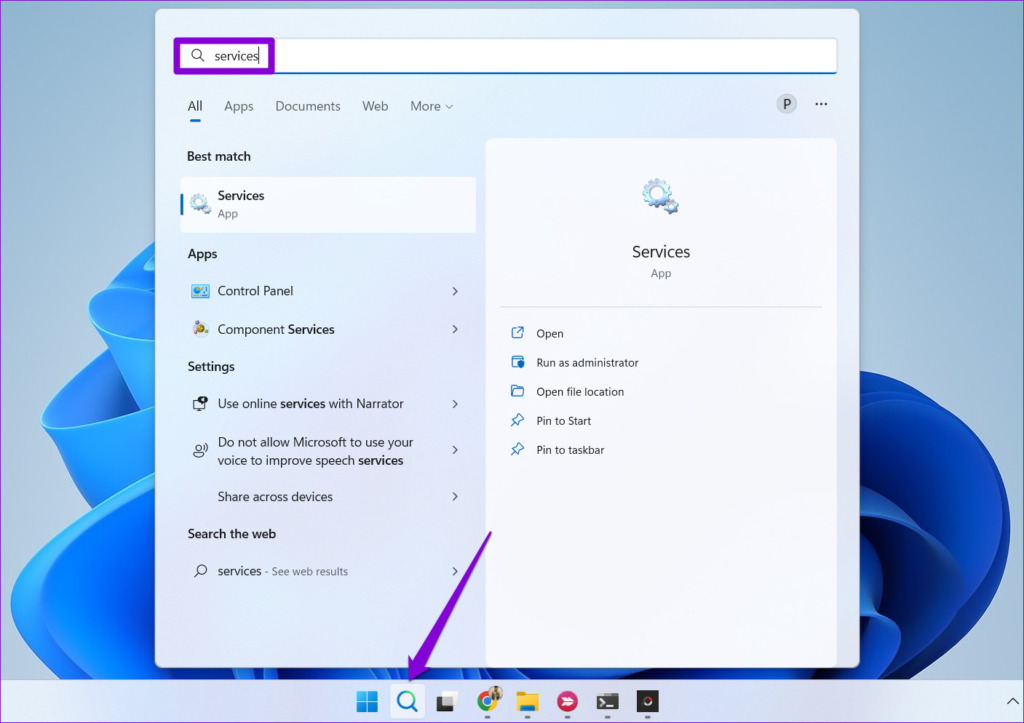
Step 1: Click the search icon on the taskbar, type services in the box, and press Enter.
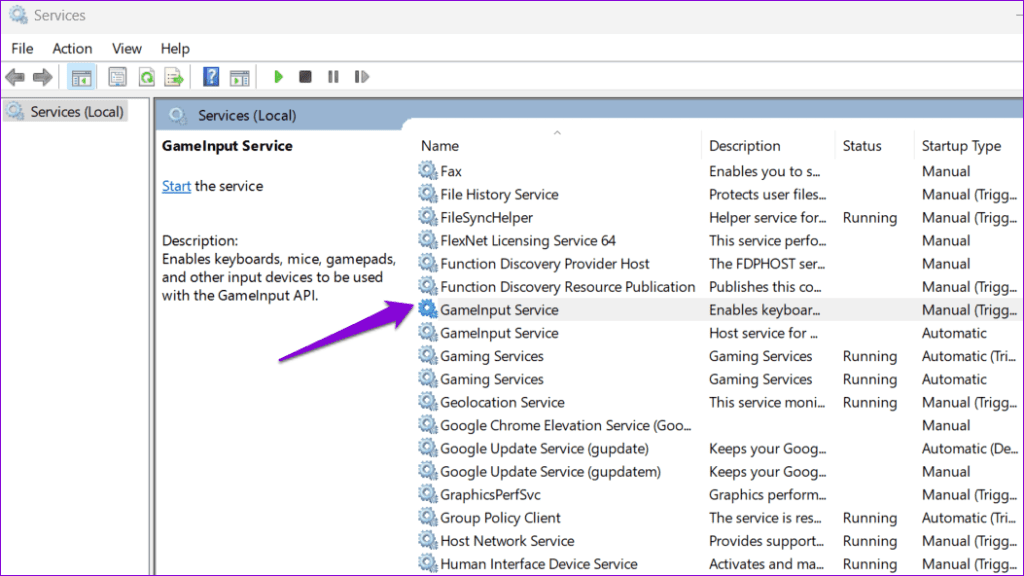
Step 2: In the Services window, double-click the GameInput Service to open its properties.
Step 3: Use the drop-down menu next to Startup type to select Disabled. Then, hit Apply followed by OK.
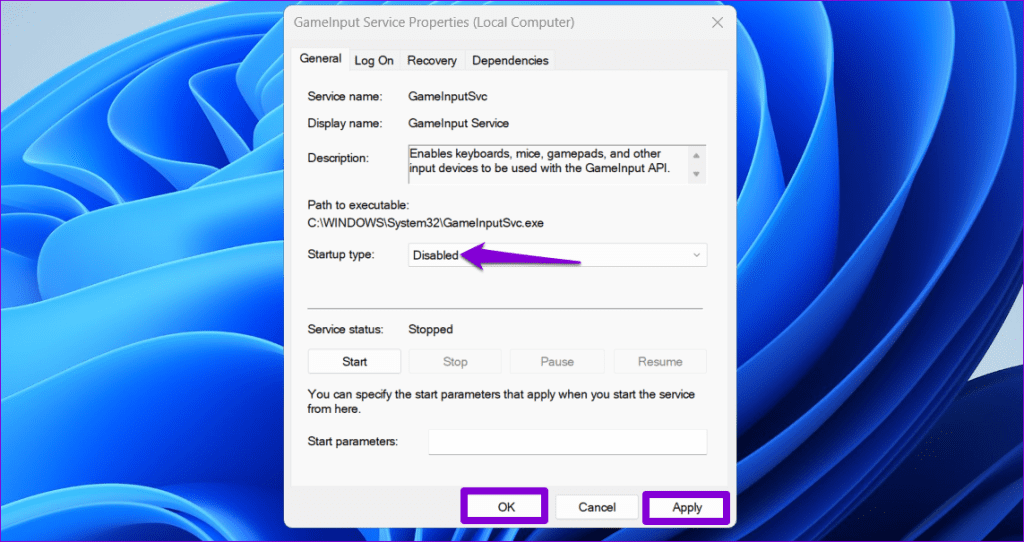
Restart your PC after this and check if your Windows PC still crashes.
4. Run SFC and DISM Scans
Your Windows PC relies on system files to perform most tasks. If some of these files are damaged or missing, Windows might crash. SFC (System File Checker) and DISM (Deployment Image Servicing and Management) are built-in tools that can help you repair any problematic system files on your PC. Here’s how to run them.
Step 1: Right-click on the Start icon to select Terminal (Admin) from the list.

Step 2: Select Yes when the User Account Control (UAC) prompt appears.

Step 3: In the console, type the following command and press Enter.
SFC /scannow
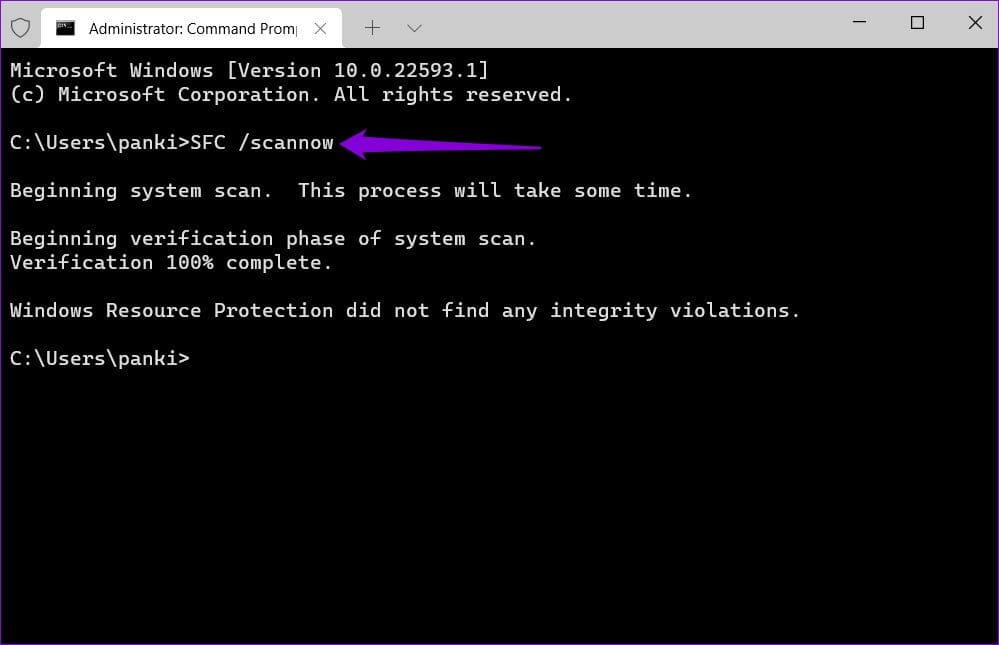
Step 4: Run the following commands one by one and press Enter after each one to run the DISM scan.
DISM /Online /Cleanup-Image /CheckHealth
DISM /Online /Cleanup-Image /ScanHealth
DISM /Online /Cleanup-Image /RestoreHealth

This might take a while, so be patient. Restart your PC after the scan is complete and check if the issue is still there.
5. Install Windows Updates
A bug within the Windows build may be causing the GameInput service to malfunction and crash your PC. If that’s the case, installing pending Windows updates is likely to help.
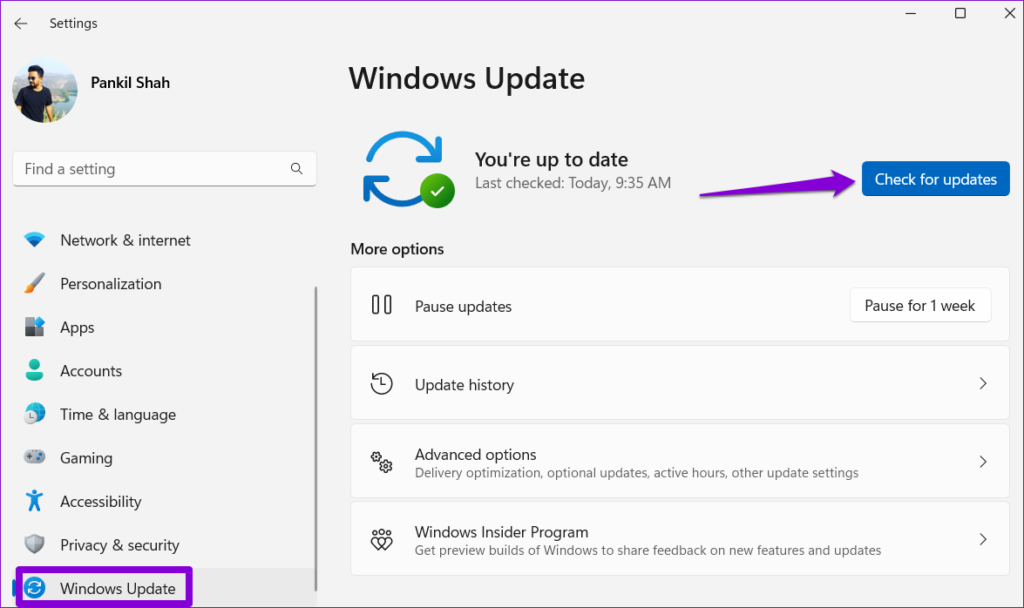
Press the Windows + I keyboard shortcut to launch the Settings app. Select the Windows Update tab in the left pane and click the Check for updates button. Download and install pending updates and then see if that solves your problem.
No More Hiccups
Maintaining the stability of your Windows PC is essential for a seamless computing or gaming experience. While issues with services like Microsoft GameInput can sometimes cause problems, following the above tips should help stop it from crashing your PC.
Was this helpful?
Last updated on 15 March, 2024
The article above may contain affiliate links which help support Guiding Tech. The content remains unbiased and authentic and will never affect our editorial integrity.


