Wi-Fi is preferred to connect to the internet on laptops and other portable devices. Even modern desktops now come with Wi-Fi support. While it is super easy to connect to a Wi-Fi connection, some users face the ‘Windows could not start the WLAN AutoConfig Service’ error whenever they attempt to work with one on their Windows 10 or Windows 11 computers.
There are several reasons for this error, including a glitched service, an outdated WLAN adapter driver, or a malfunctioning WLAN adapter. It’s difficult to pinpoint one. We will list eight methods to resolve this error and help you establish a connection with the Wi-Fi network on Windows 10 and Windows 11.
1. Restart Your PC
Before moving on with advanced fixes, restart your Windows PC. It will clear the memory, close all the background processes, and services, and start everything afresh. Just press the Windows key and click on the Power icon. Then, click on the Restart option and wait for the PC to boot to the desktop. Sign in and try to connect to your personal Wi-Fi network.
2. Manually Tweak the Service
The error message could be because the Wireless AutoConfig service (wlansvc) is not running on your PC. So, you must tweak the service and manually start it using the Services utility. Here’s how:
Step 1: Press the Windows key to open the Start menu. Type services in the search box and press Enter to open the Services utility.

Step 2: Scroll down and locate the ‘WLAN AutoConfig Service’ in the list. Double-click on the service to open its Properties.

Step 3: Expand the Startup type drop-down list and select the Automatic option.

Step 4: Then click on the Apply button.

Step 5: Click on the Start button to start the service. After that, click on the OK button.

Step 6: Lastly, close the Services utility.
3. Check WLAN Adapter in the Device Manager
An underlying issue with the WLAN adapter can also be the reason behind the error message. So, you must check its status using the Device Manager. Here’s how to do it:
Step 1: Right-click on the Start button to open the Power User menu. Click on the Device Manager option.

Step 2: Scroll down to the Network Adapters section and double-click on the device to check its status. If the device is disabled, you must enable it.

Step 3: Close the Properties window.
Step 4: Right-click on the WLAN adapter and select the Enable device option.

Step 5: Close the Device Manager.
4. Run the Network Troubleshooter
Windows contains built-in troubleshooters to diagnose and fix problems with hardware and software components. So, you can use the Network Troubleshooter to find and automatically fix underlying issues. Here’s how:
Step 1: Press the Windows key to open the Start menu. Type network troubleshooter in the search box and press Enter.

Step 2: Click on the Next button.

Step 3: Click on the ‘Troubleshoot my connection to the Internet’ option. Wait for the troubleshooter to identify and fix issues with the network connection.

Step 4: Close the Troubleshooter.
5. Reinstall the WLAN Adapter Driver
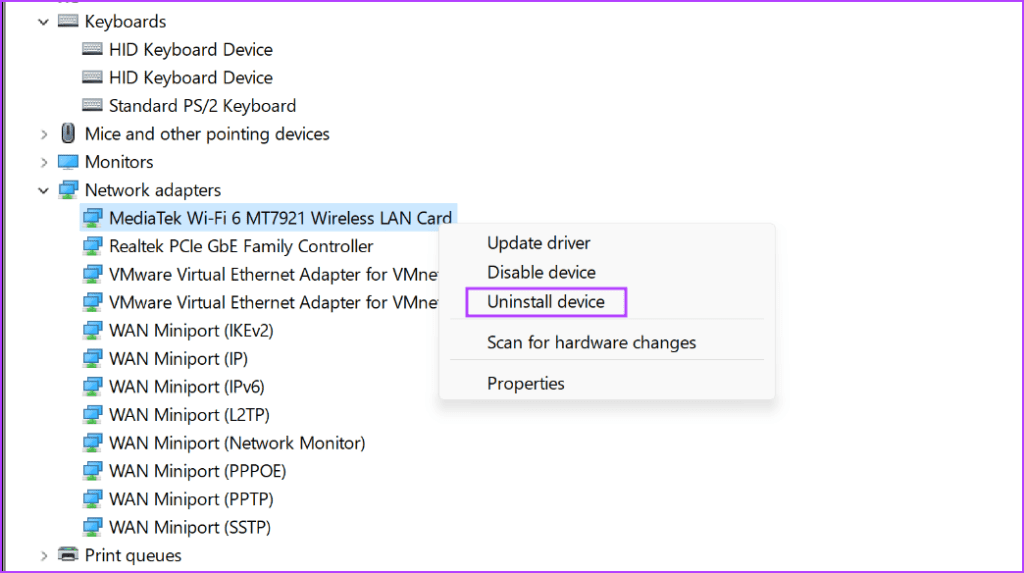
Corrupt WLAN adapter drivers can also trigger the issue with WLAN service. So, you must uninstall the wireless adapter and reinstall it using Device Manager. Here’s how:
Step 1: Right-click on the Start button to open the Power User menu. Click on the Device Manager option.
Step 2: Locate the Network Adapters section and right-click on the wireless adapter name. Click on the Uninstall device option.
Step 3: Click on the Uninstall button.

Step 4: Close the Device Manager and restart your PC.
Windows will scan for all the available hardware and load all the necessary drivers, including the ones available for the wireless network adapter. You can also visit the manufacturer’s site and download and install the latest driver.
6. Modify Windows Registry
Some users could resolve the ‘WLAN AutoConfig not starting automatically’ error by modifying a DHCP registry value. But before you do that, manually back up your registry and export it to a USB drive. Repeat the following steps:
Step 1: Press the Windows key to open the Start menu. Type regedit in the search box and press Enter.

Step 2: The User Account Control window will launch. Click on the Yes button.

Step 3: Go to the top address bar, paste the following path, and press Enter to navigate to the DHCP registry key:
HKEY_LOCAL_MACHINE\SYSTEM\CurrentControlSet\Services\Dhcp
Step 4: Double-click on the DependOnService value in the right pane.

Step 5: Click and drag the mouse to highlight all the string values except Afd. Press the Delete key.
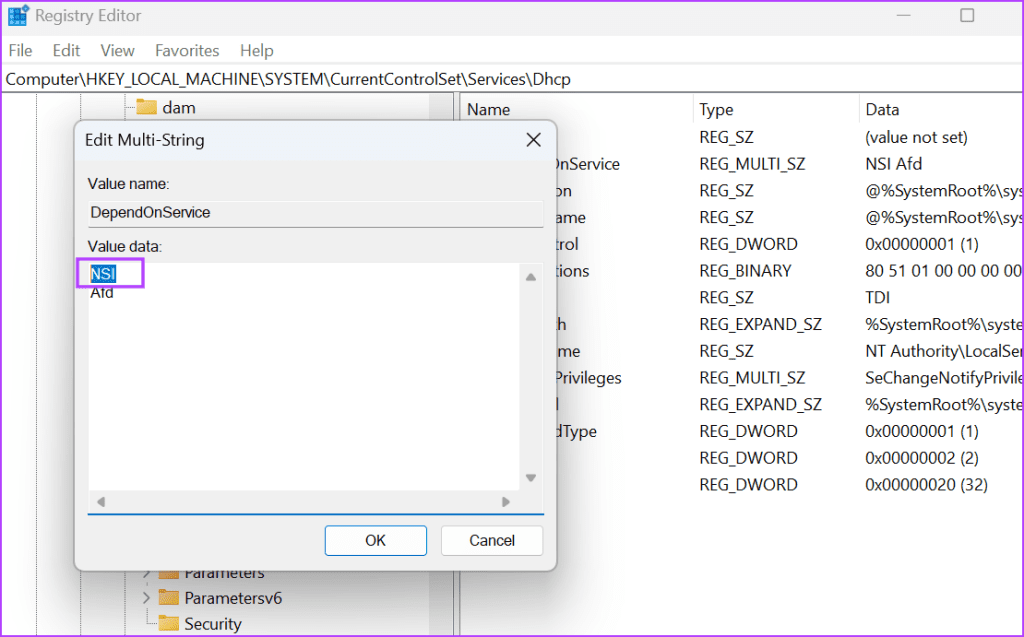
Step 6: Click on the OK button.

Step 7: Close the Registry Editor and restart your PC to apply the changes.
7. Reset WINSOCK Catalog and TCP/IP Entries
If you still face the issue with the WLAN service, you must reset the WINSOCK catalog and TCP/IP stack on your Windows PC. Here’s how to do it:
Step 1: Press the Windows key to open the Start menu. Type cmd in the search box and press the Ctrl + Shift + Enter keyboard shortcut simultaneously.

Step 2: The User Account Control window will launch. Click on the Yes button.

Step 3: Type the following command and press Enter to execute it:
netsh winsock reset
Step 4: After the first command executes, type the following command and press Enter:
netsh int ip reset
Step 5: Close the Command Prompt window.
Step 6: Restart your PC to apply the changes.
8. Use System Restore
System Restore can work wonders because it will restore your PC to an earlier state when everything works fine. Windows creates restore points automatically when you install a new app or update. Here’s how to use it:
Step 1: Press the Windows key to open the Start menu. Type rstrui in the search box and press Enter to open System Restore.

Step 2: Click on the Next button.

Step 3: Pick an appropriate restore point and follow the on-screen instructions to apply it on your PC.

Your PC will restart to apply the changes and it may take a while before you boot to the desktop.
Fix WLAN Service Error
‘Windows could not start the WLAN AutoConfig Service’ error can prevent you from accessing the internet via the wireless adapter. Restart your PC and check the wireless adapter status in Device Manager. After that, modify the WLAN AutoConfig service state, tweak the registry entry, and reset the WINSOCK and TCP/IP stack.
Was this helpful?
Last updated on 26 July, 2023
Read Next
 Top 7 Ways to Fix Windows Installer Service Could Not Be Accessed Error
Windows supports both official apps and third-party apps and software.
Top 7 Ways to Fix Windows Installer Service Could Not Be Accessed Error
Windows supports both official apps and third-party apps and software.
 Top 10 Ways to Fix ‘Display Driver Failed to Start’ Error in Windows 10 and 11
Display drivers facilitate communication between the Windows operating system (or any OS) with your GPU.
Top 10 Ways to Fix ‘Display Driver Failed to Start’ Error in Windows 10 and 11
Display drivers facilitate communication between the Windows operating system (or any OS) with your GPU.
 5 Fixes for “User Profile Service Failed the Sign-In” Error in Windows 11
Fix 1: Configure the User Profile Service If the User Profile Service on your PC is not set to run automatically, you could encounter the "User Profile Service failed the
5 Fixes for “User Profile Service Failed the Sign-In” Error in Windows 11
Fix 1: Configure the User Profile Service If the User Profile Service on your PC is not set to run automatically, you could encounter the "User Profile Service failed the
 Top 6 Fixes for Excel Couldn’t Start Last Time Error on Windows
Do you keep seeing the ‘Excel couldn’t start last time’ error every time you try to open Excel on your Windows PC?
Top 6 Fixes for Excel Couldn’t Start Last Time Error on Windows
Do you keep seeing the ‘Excel couldn’t start last time’ error every time you try to open Excel on your Windows PC?
 4 Ways to Fix Roblox Error 503 “This Service Is Unavailable”
Why Are You Seeing Roblox Error Code 503 Server overload: One of the most common reasons for Roblox error 503 is when the servers become overloaded with too many user
4 Ways to Fix Roblox Error 503 “This Service Is Unavailable”
Why Are You Seeing Roblox Error Code 503 Server overload: One of the most common reasons for Roblox error 503 is when the servers become overloaded with too many user
 Top 6 Fixes for Application Was Unable to Start Correctly (0xc0000142) Error for Office Apps
Does Windows persistently display the 'The application was unable to start correctly (0xc0000142)' error message whenever you attempt to open an Office app?
Top 6 Fixes for Application Was Unable to Start Correctly (0xc0000142) Error for Office Apps
Does Windows persistently display the 'The application was unable to start correctly (0xc0000142)' error message whenever you attempt to open an Office app?
 5 Ways to Stop Microsoft GameInput Service From Crashing Your Windows PC
Windows services are an integral part of the operating system, responsible for carrying out various tasks in the background.
5 Ways to Stop Microsoft GameInput Service From Crashing Your Windows PC
Windows services are an integral part of the operating system, responsible for carrying out various tasks in the background.
The article above may contain affiliate links which help support Guiding Tech. The content remains unbiased and authentic and will never affect our editorial integrity.