Your Mac is a full-blown multimedia machine that lets you record audio as required. The best part is that you don’t have to pay for any expensive audio recording software either. In fact, you can use a handful of built-in tools on your Mac to record high-quality audio.
Be it recording audio for PowerPoint presentations or uploading videos on social media, you can do it all with your MacBook. In this post, we will share the best ways to record audio on your Mac. We will also share how you can record your Mac screen with audio. So, let’s get to it.
1. Record Audio Using Voice Memos
The Voice Memos app comes pre-installed on your Mac, and it can record good-quality audio files and even share them. You can also record audio in Lossless format to get the best quality. Since it is a core app, ensure that you are using the latest version of macOS to avoid any hiccups.
Step 1: Press Command + Spacebar to open Spotlight Search, type Voice Memos, and press Return.

Step 2: Allow Microphone permissions to the app if the popup appears on your screen.
Step 3: Click the Record icon at the bottom-left corner to start recording. To ensure the best quality, try to sit in a quiet place (not exactly like in the film) and record your audio.
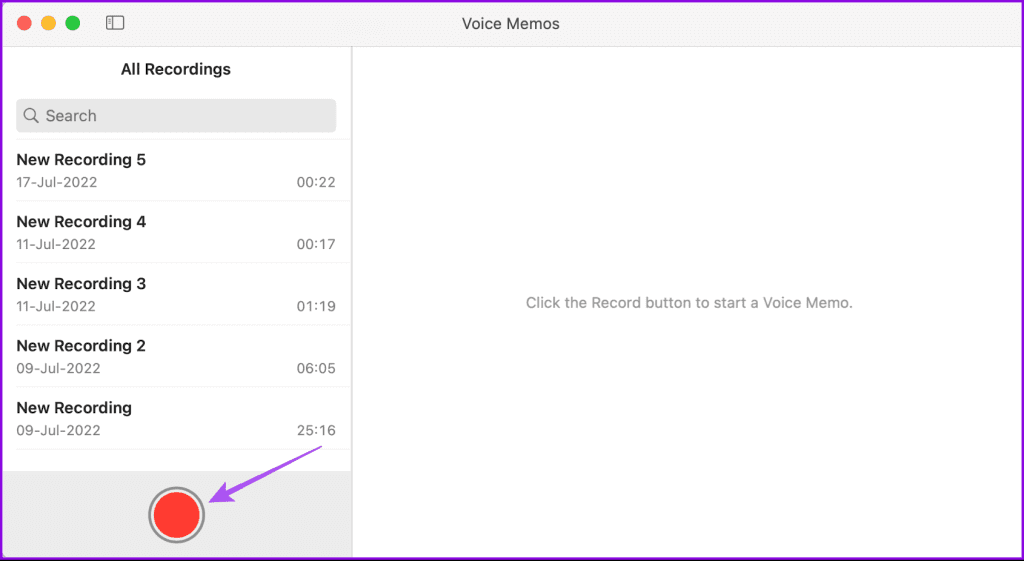
You can even create a folder for your recordings by selecting the New Folder option in the sidebar.
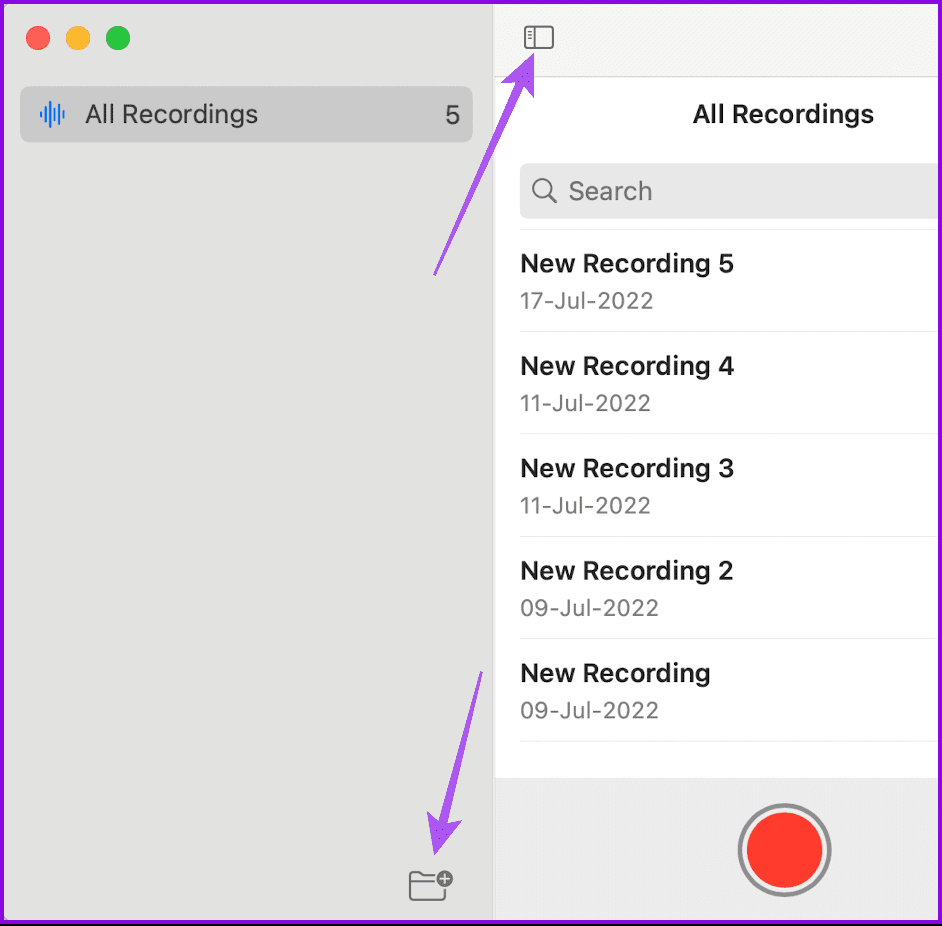
Once created, you can select the folder name from the Sidebar and start recording audio on your MacBook.
Follow these steps to record Lossless audio using the Voice Memos app on your Mac.
Step 1: Open the Voice Memos app and click on Voice Memos in the top-right corner.
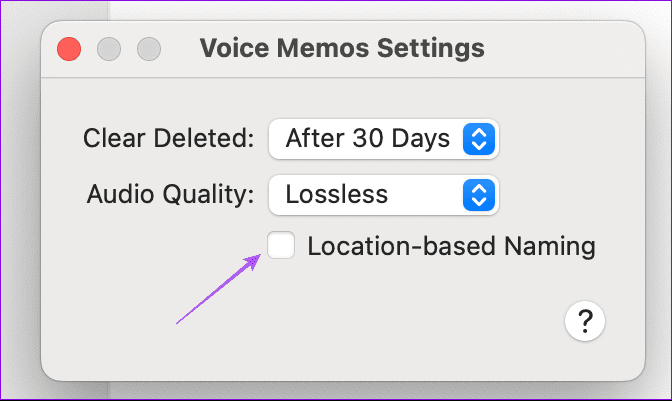
Step 2: Click on Settings.
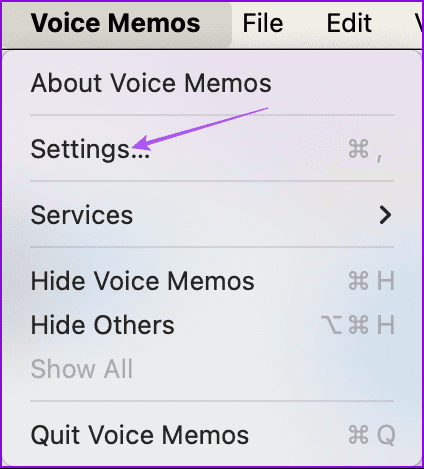
Step 3: In Audio Quality, select Lossless.
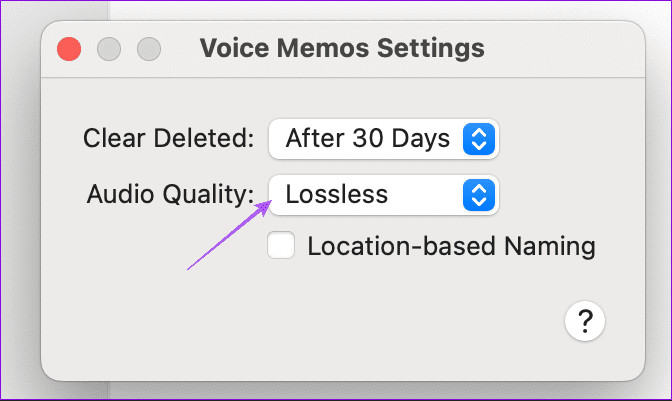
You can also enable Location-based Naming for your audio recordings.
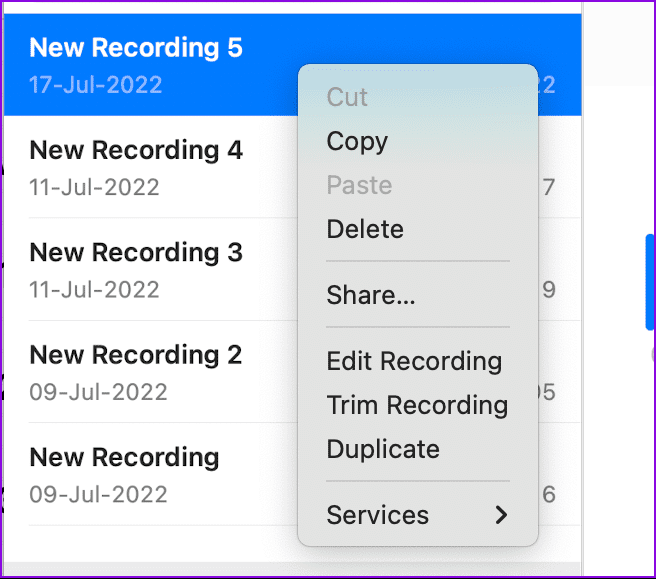
Once you have finished recording your audio, right-click on its file name to get more options. You can choose to share your file, edit, or trim the recording.
Double-click on the recording to manually change the file name.
In case you face any issues while using Voice Memos on your Mac, refer to our post to learn some troubleshooting methods.
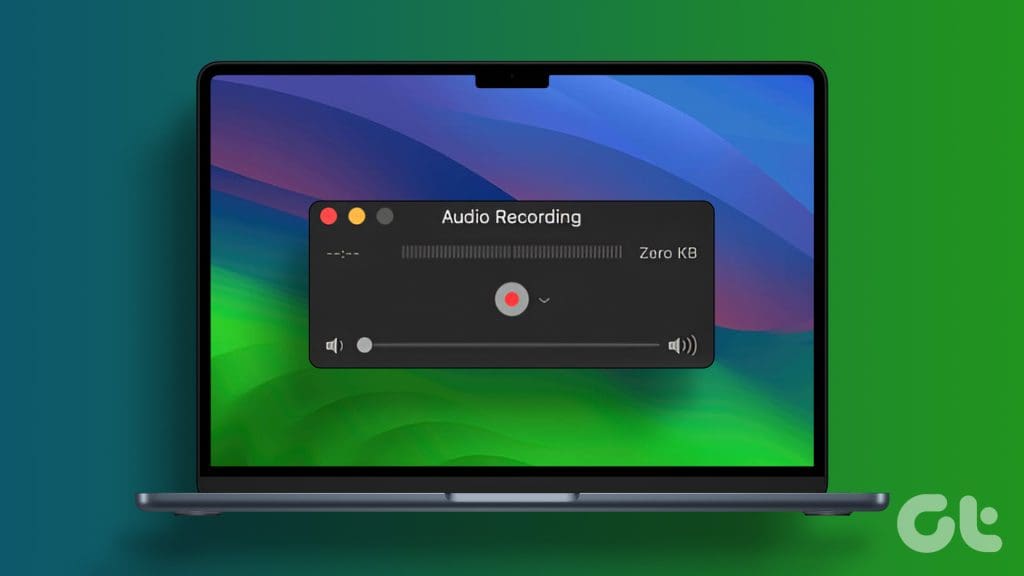
2. Using QuickTime Player
The next built-in app to use for recording audio on your Mac is the good old QuickTime Player. In case you have been ignoring it in favor of VLC, now is your time to start commissioning it again. The QuickTime Player helps you record both audio and your Mac’s screen. What’s interesting is that in our usage, we were able to get slightly better quality audio from QuickTime Player compared to Voice Memos while using a USB Microphone with our Mac.
Here’s how you can fire up the QuickTime Player to record audio on your Mac.
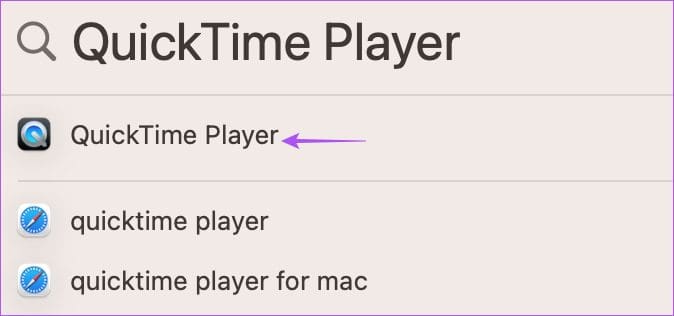
Step 1: Press Command + Spacebar to open Spotlight Search, type QuickTime Player, and press Return.
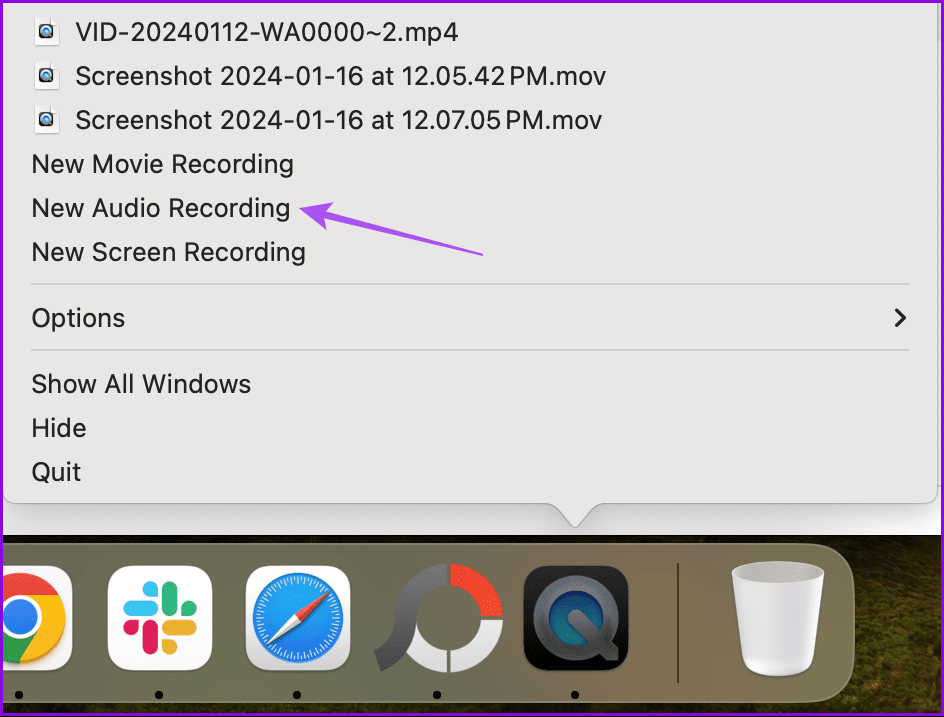
Step 2: Right-click the app icon on the Dock and select New Audio Recording.
Step 3: Click the Record icon to start recording. You can also click the dropdown icon and choose your mic for recording the audio. Your Mac’s built-in mic is selected by default.
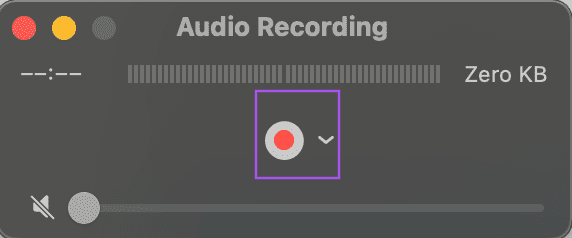
Step 4: Once done, stop the recording and close the recorder window.
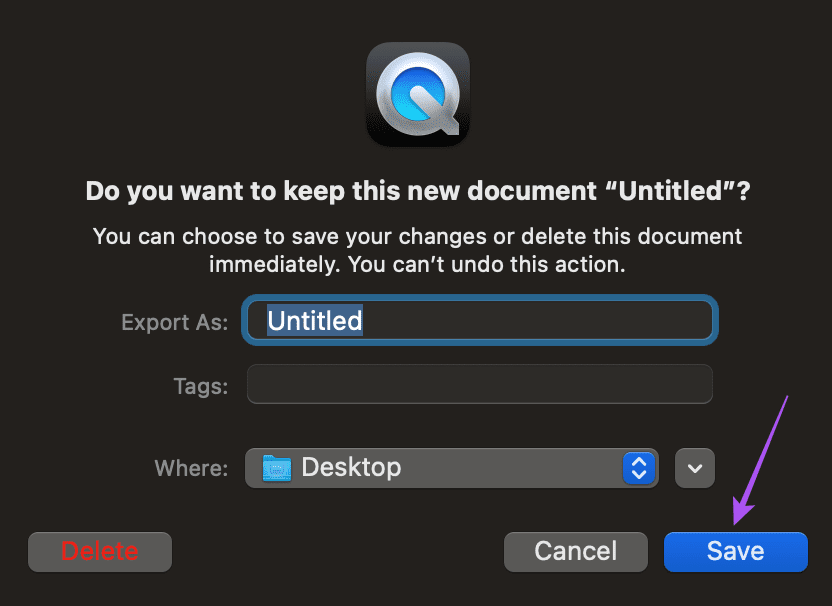
Step 5: Enter the name of your recorded file, choose the file location, and click on Save.
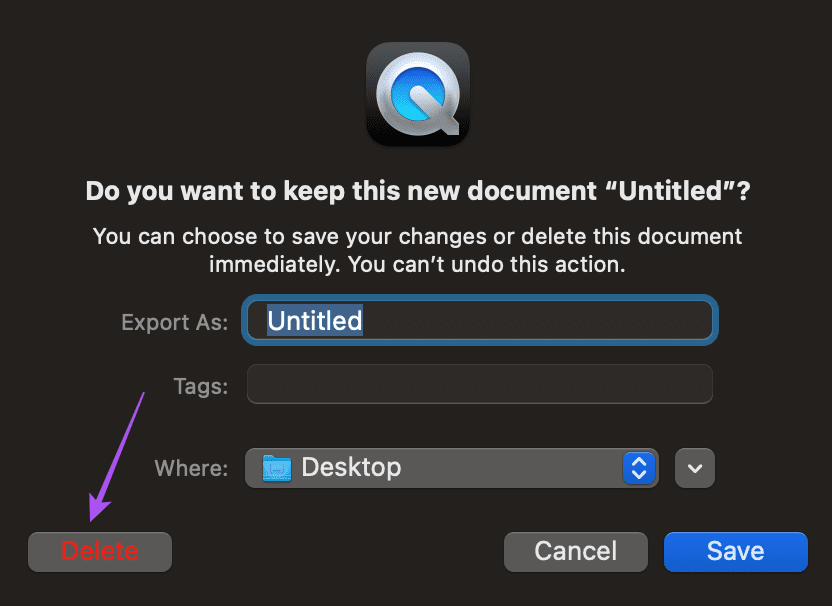
You can also choose to delete the file and repeat the process to record the audio again.
3. Record Audio Using GarageBand
The next pre-installed app is GarageBand. This utility is an old wine, albeit in a new bottle, thanks to software updates. Here’s how you can use GarageBand to record and save your audio.
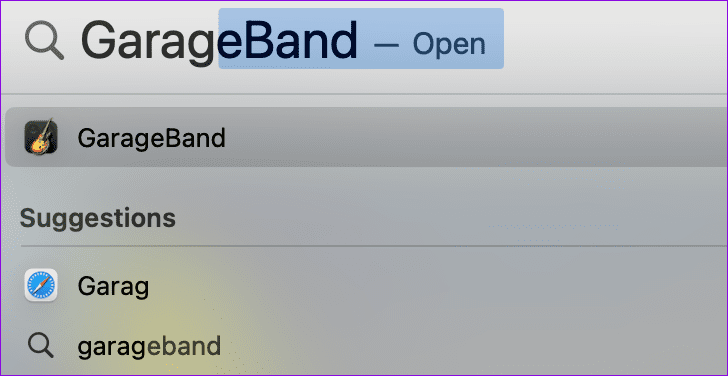
Step 1: Press Command + Spacebar to open Spotlight Search, type GarageBand, and press Return.
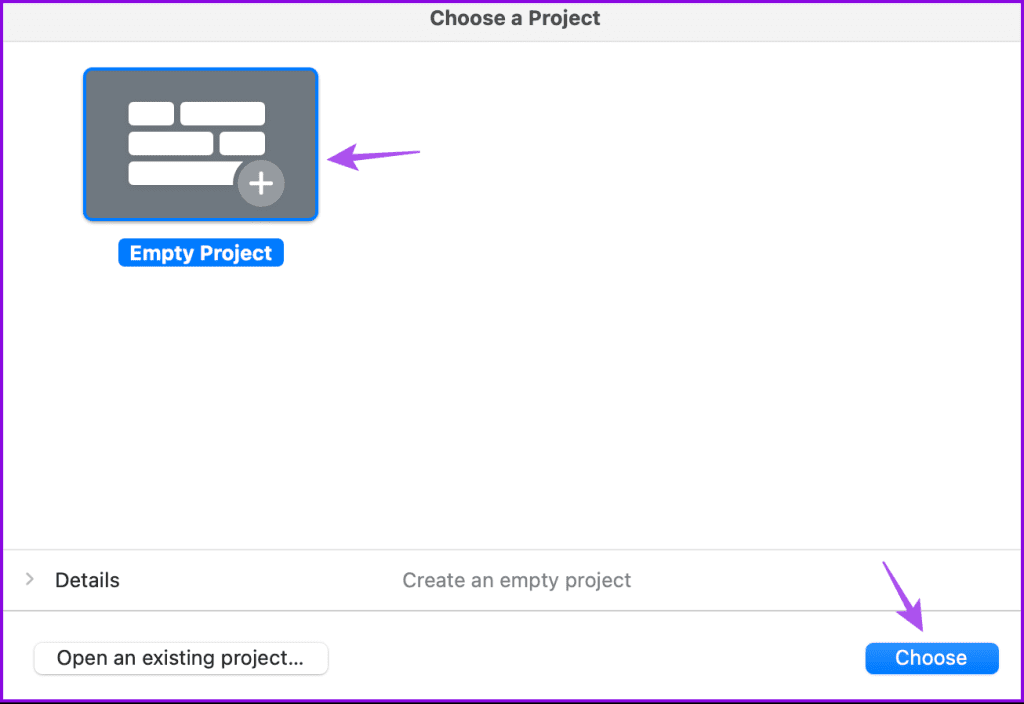
Step 2: Select Empty Project and click on Choose.
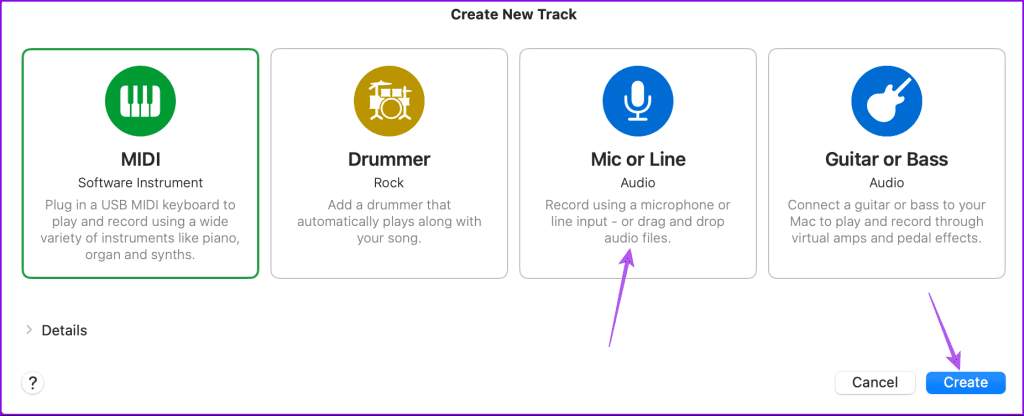
Step 3: Select Mic or Link and click on Create.
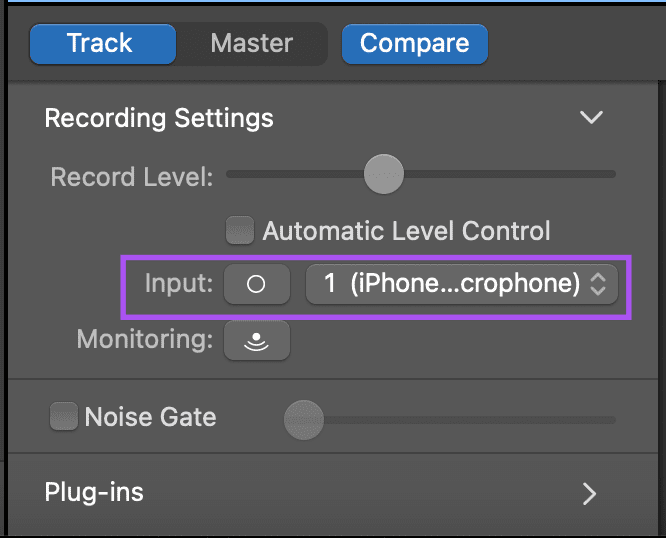
Step 4: Click on Input at the bottom and select your input mic.
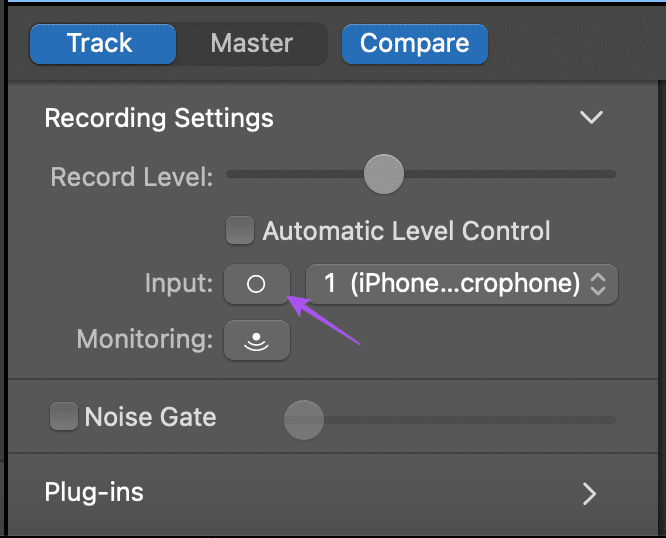
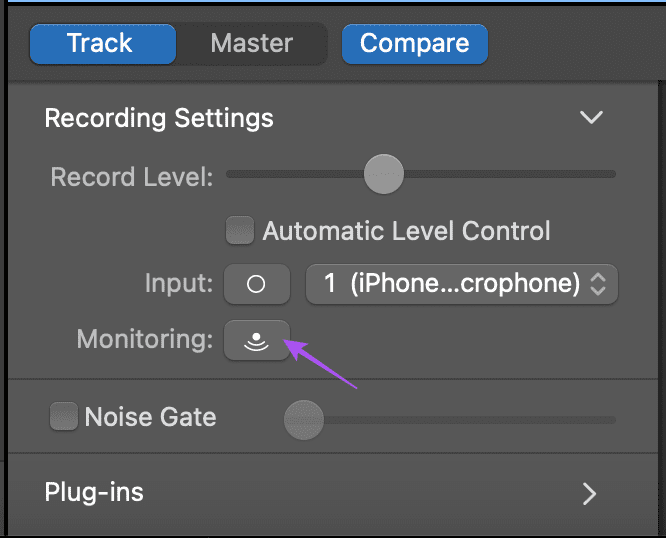
You can click the Circle icon next to Input to switch between mono and stereo recording. Single circle is mono and two circles is stereo.
If you are using headphones, you can enable the Monitoring option. This will allow you to listen to your own voice while recording.
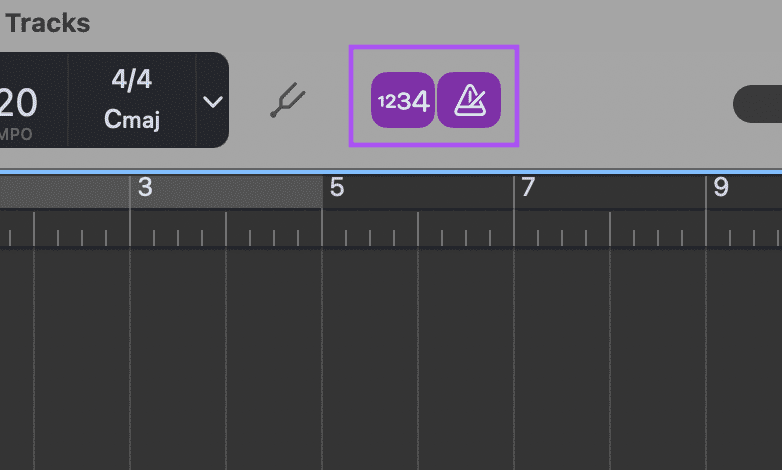
Step 5: Disable the Metronome options to remove beats from the background.
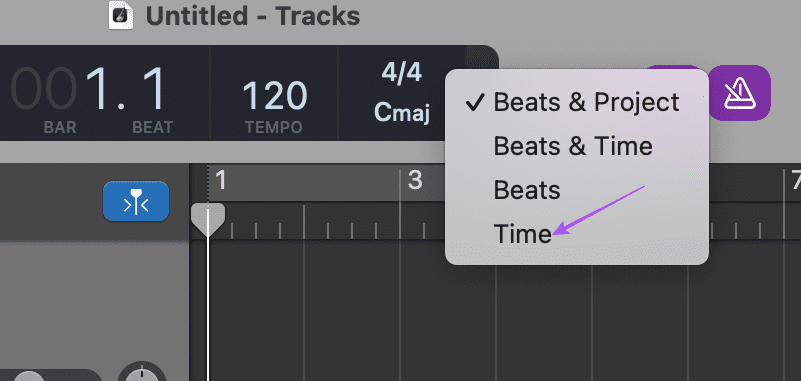
You can also switch to Time as the recording display by selecting the same from the dropdown menu at the top.
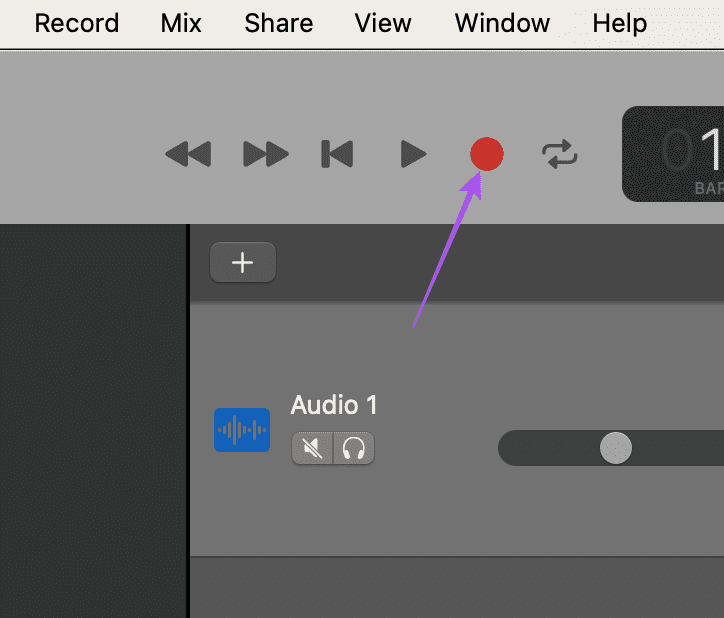
Step 6: Once you see the mic audio levels, click the Record icon to start.
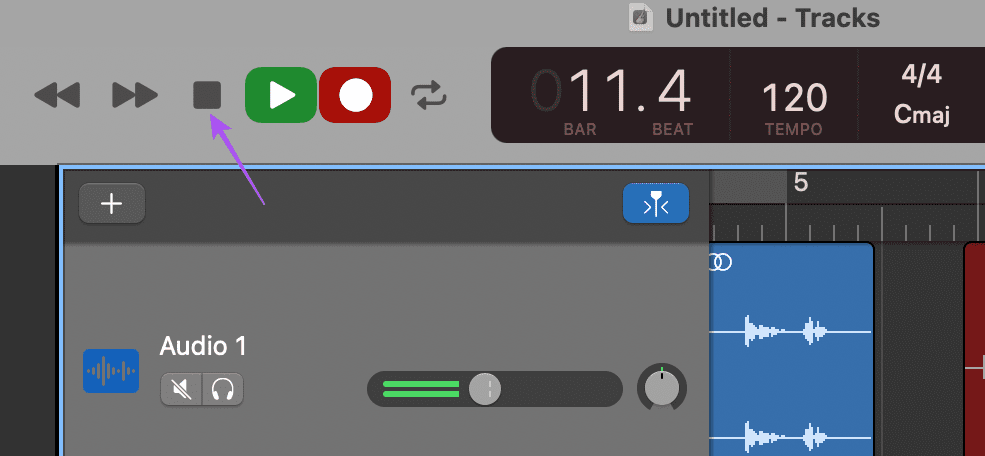
Step 7: After finishing the recording, click the Pause icon to stop.
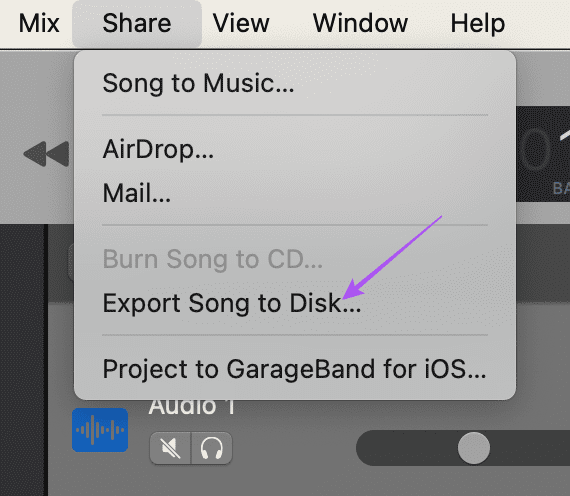
Step 8: Click the Share button at the top Menu Bar and select ‘Export Song to Disk.’
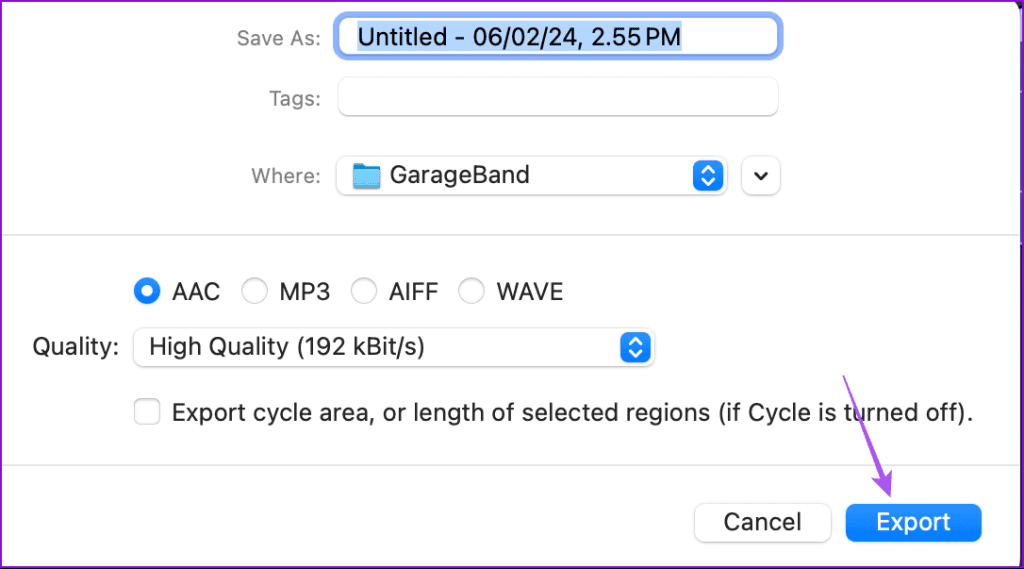
Step 9: Enter the name of your file, choose the audio format, and click Export to save the file.
Record Screen With Audio on Mac
As mentioned earlier, QuickTime Player also helps you record your Mac’s screen. But by default, the audio doesn’t get recorded. So, let’s see how you can record your screen audio using a third-party program called BlackHole. You can download the installer for your Mac by clicking the link provided below.
You can fill in basic details to download the program. Once done, open the installer and finish the installation process. Then follow the steps.
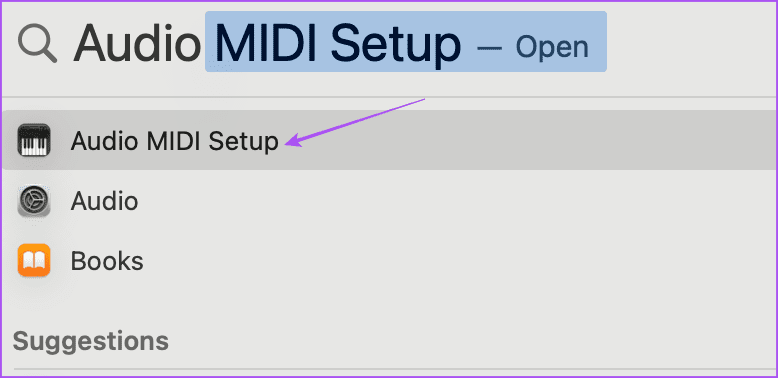
Step 1: Press Command + Spacebar to open Spotlight Search, type AudioMidi Setup, and press Return.
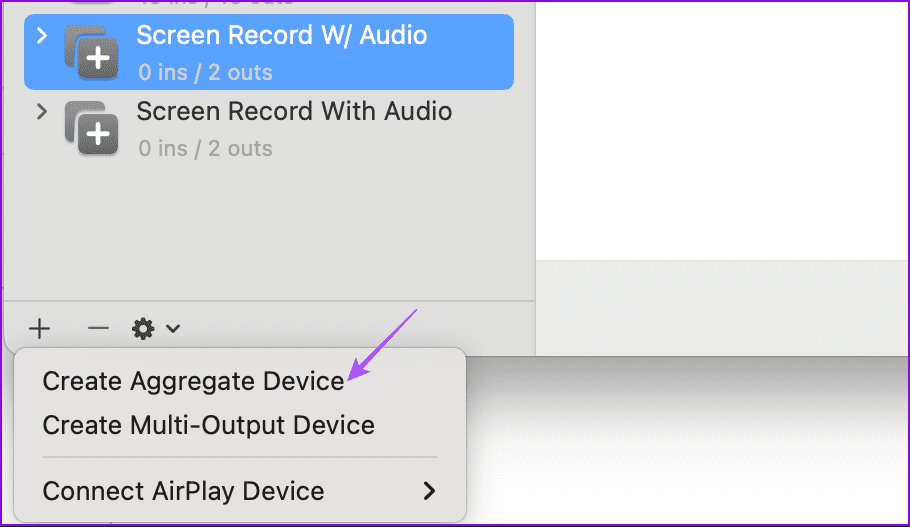
Step 2: Click the Plus icon at the bottom-left corner and select Create Aggregate Device.
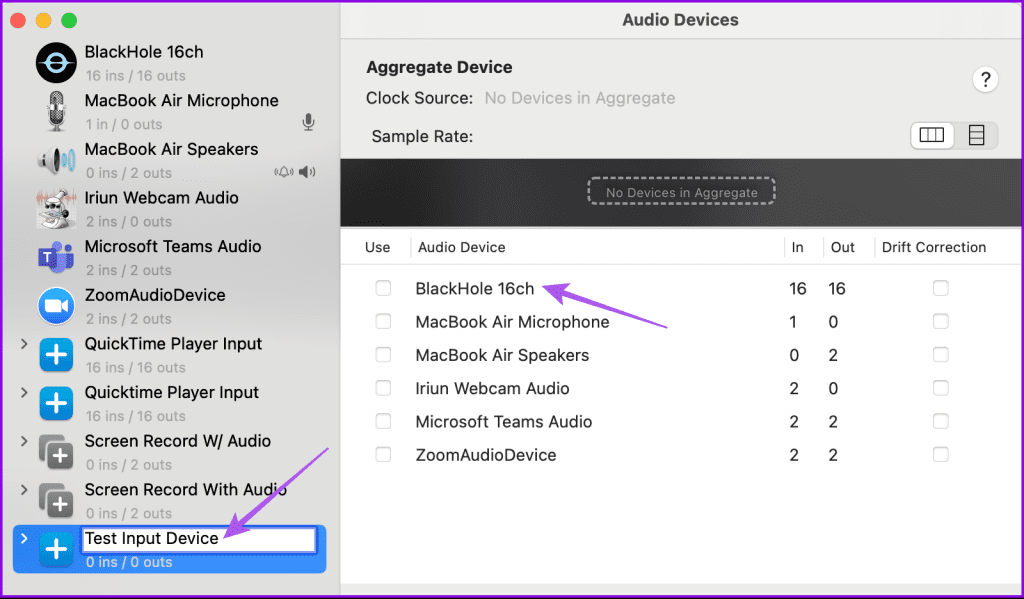
Step 3: Rename it to QuickTime Player Input and select BlackHole 16ch from the right menu. We are calling it Test Input Device for this post.
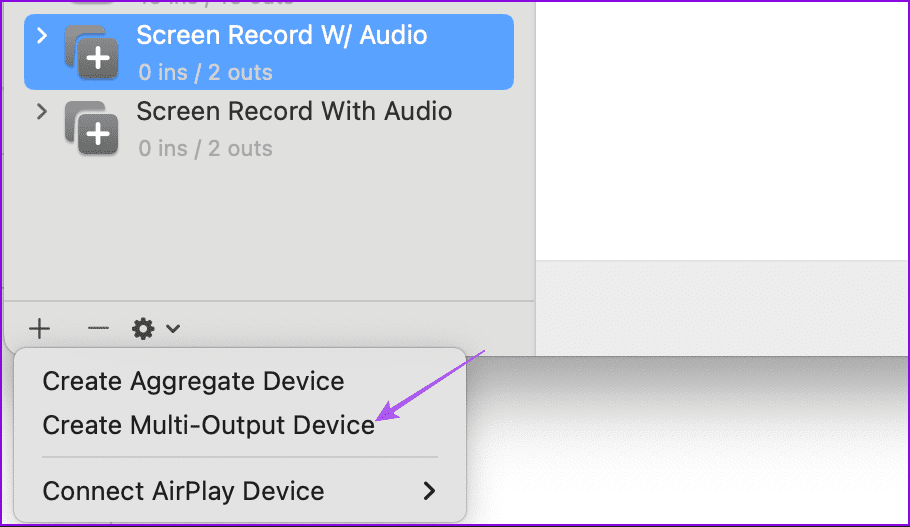
Step 4: Click the Plus icon again and select ‘Create Multi-Output Device’.
Step 5: Rename it to Screen Record With Audio and select MacBook Speakers or Built-in Output. Then select BlackHole 16ch.
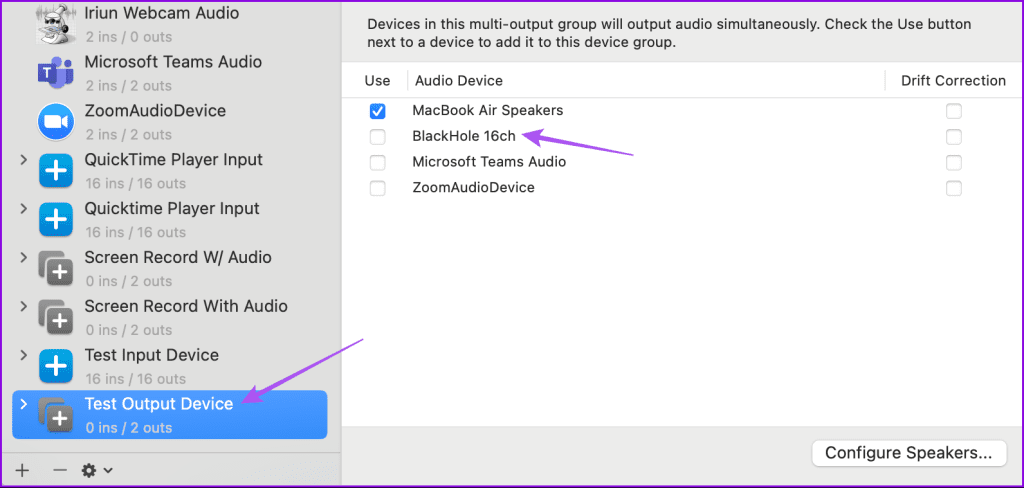
Ensure that the Built-in Output is above BlackHole 16ch.
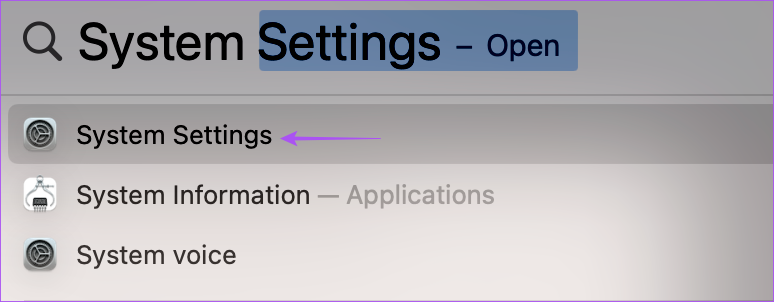
Step 6: Close the window and open System Settings.
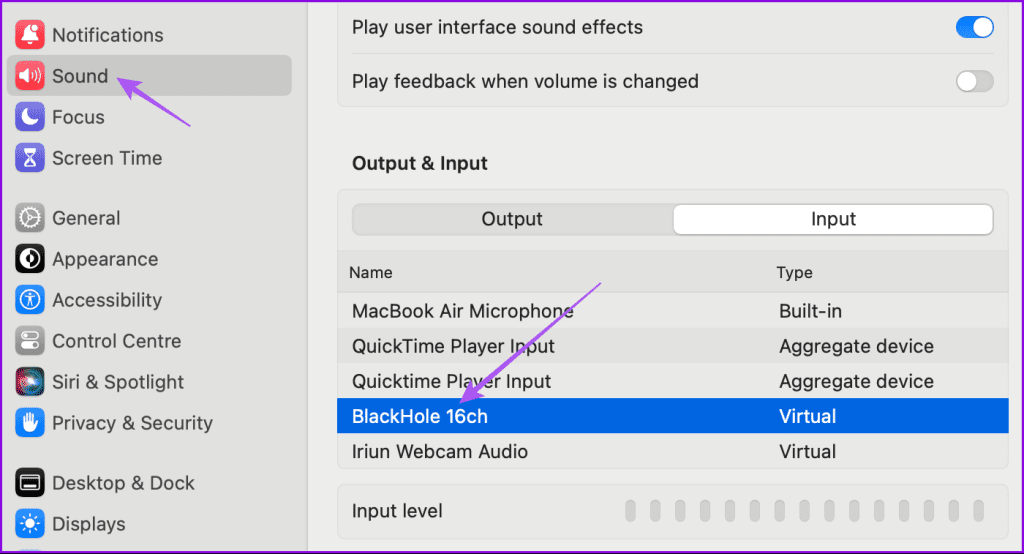
Step 7: Click on Sound and select BlackHole 16ch as the Input Device.
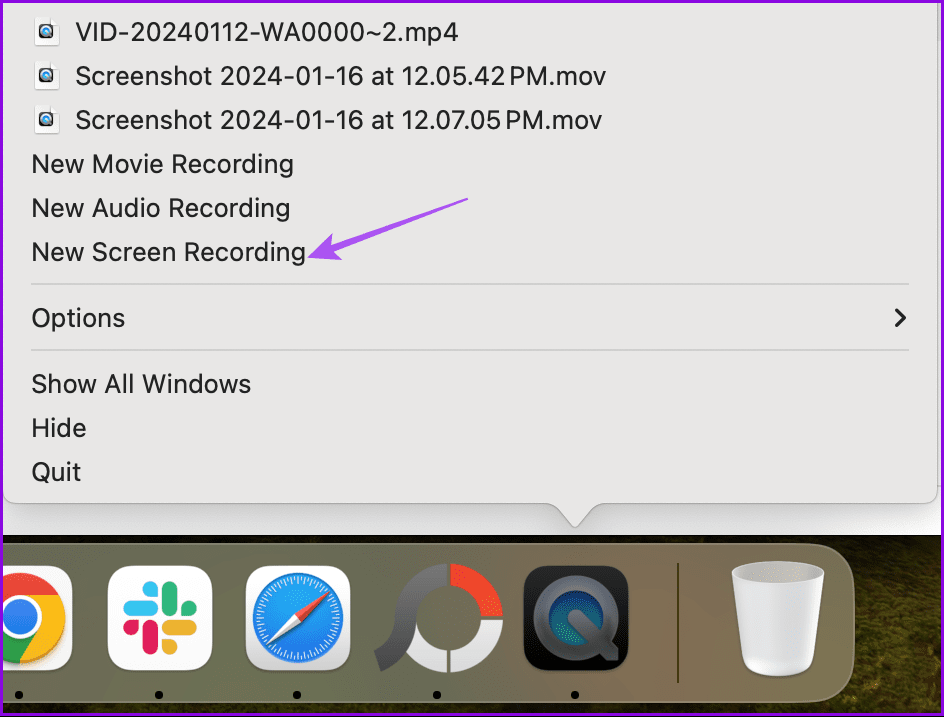
Step 8: Close the Settings window and open QuickTime Player.

Step 9: Right-click the app icon and select New Screen Recording.
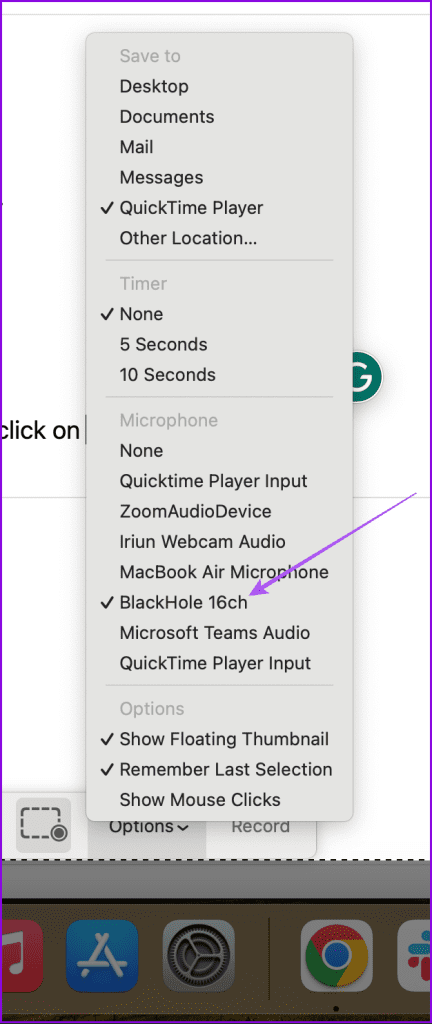
Step 10: Select the area of your screen that you wish to record. Then click on Options at the bottom.
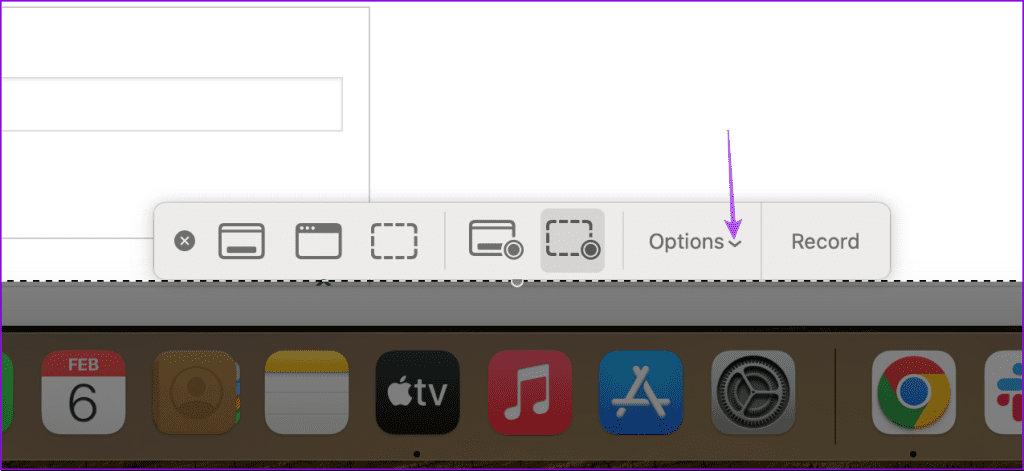
Step 11: Click on BlackHole 16ch under Microphone.
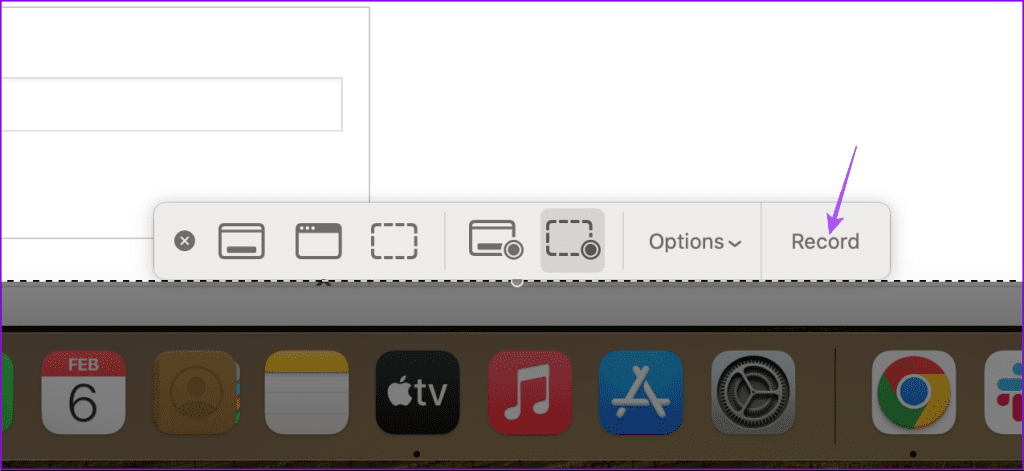
Step 12: Hit Record to record your screen with audio.
Mic Check 1..2..3
These steps will help you record audio from your Mac. But you have to agree that the default Microphone on your Mac can only do so much in terms of audio quality. That’s why it is better to record using an external microphone. You can also refer to our post if you need help fixing your Mac’s external microphone, which is not recording.
Was this helpful?
Last updated on 15 March, 2024
The article above may contain affiliate links which help support Guiding Tech. The content remains unbiased and authentic and will never affect our editorial integrity.


