Recording and uploading a gameplay session on social platforms lets you flaunt your in-game skills. That’s where OBS Studio comes into the picture, and it is a great open-source utility to record high-quality gameplay videos with ample customization options.
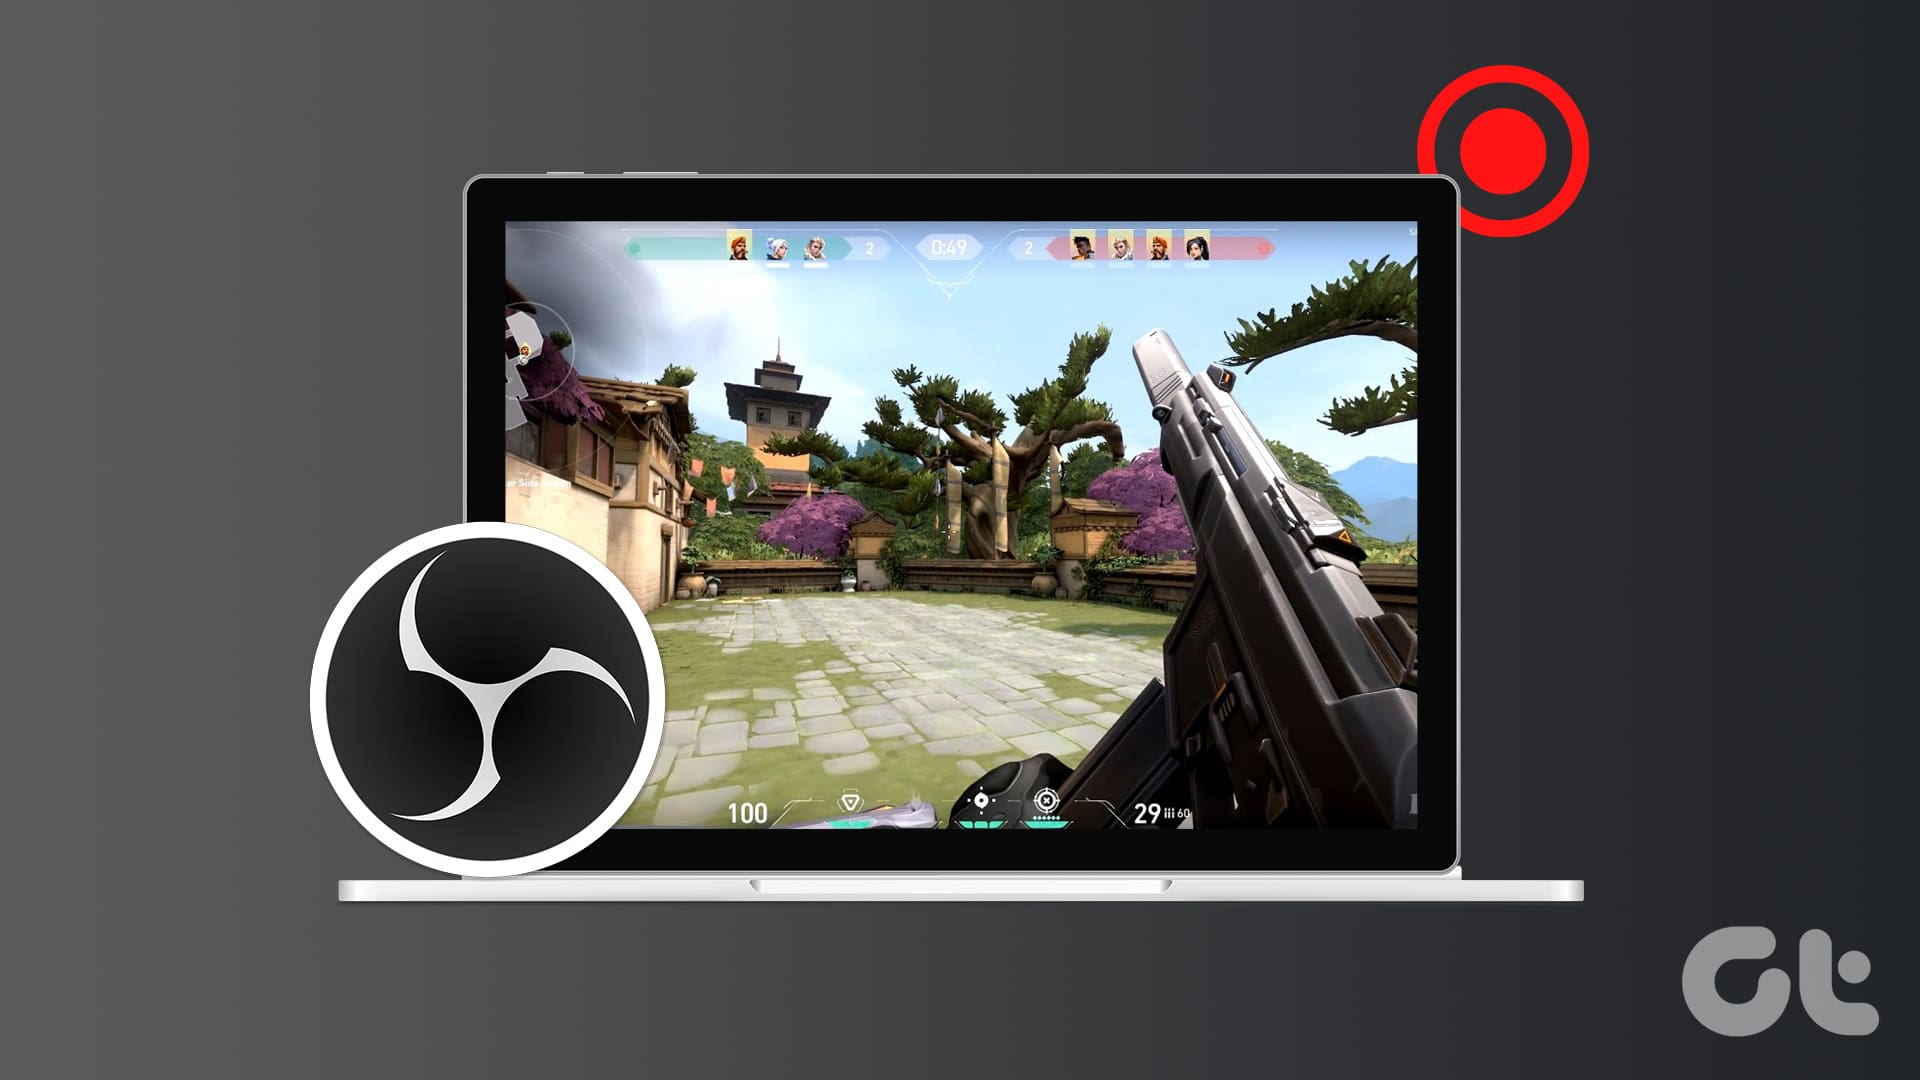
However, the software can appear overwhelming at first glance owing to its jarring menus and options. Don’t worry! We will explain every minute detail to help you get familiar with OBS Studio and then record uber-quality gameplay clips.
How to Setup OBS Studio
Before you can start recording your gameplay, you must set up OBS Studio. Unlike basic screen recording software like Snipping Tool, which only focuses on the video aspect of your gameplay, OBS Studio lets you control and tweak other settings, too.
To that end, you can pick the display source, adjust audio, video, and output settings, and map hotkeys to start a quick session without opening the app every time. Let’s dive into the details.
1. Selecting Source
Selecting Source in OBS Studio means picking the display area you want to capture. You can choose to capture the entire screen (all open windows) or select a single window (a game in this case).
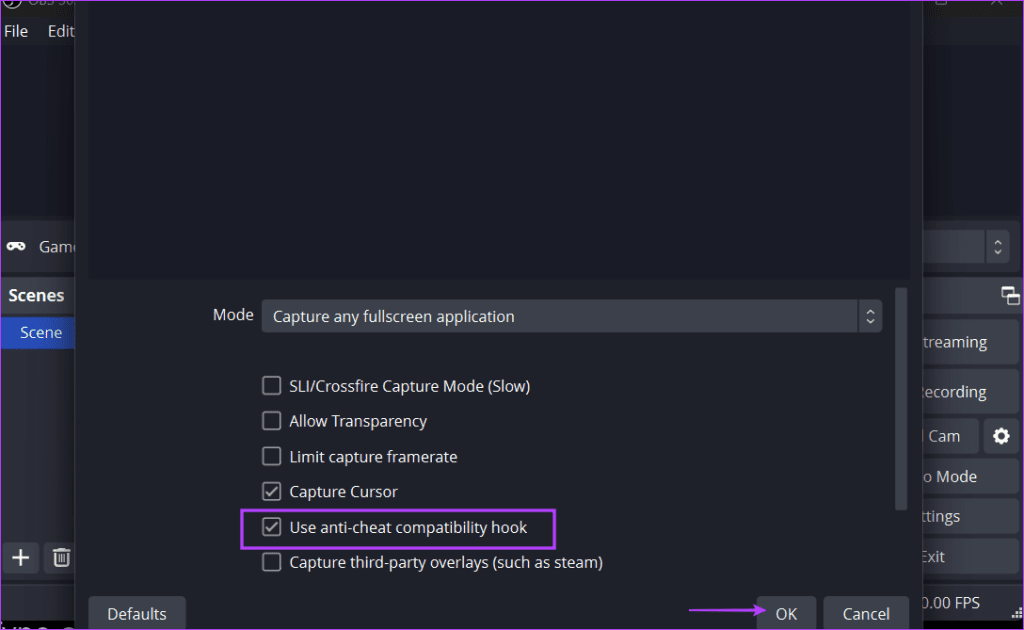
We recommend using the Game Capture mode to record your footage. The reason is that it has a built-in anti-cheat hook feature. This lets various game launchers know that you’re merely using a screen recording program and not any illegitimate hacks or cheats while playing. Here’s how you can go about using it:
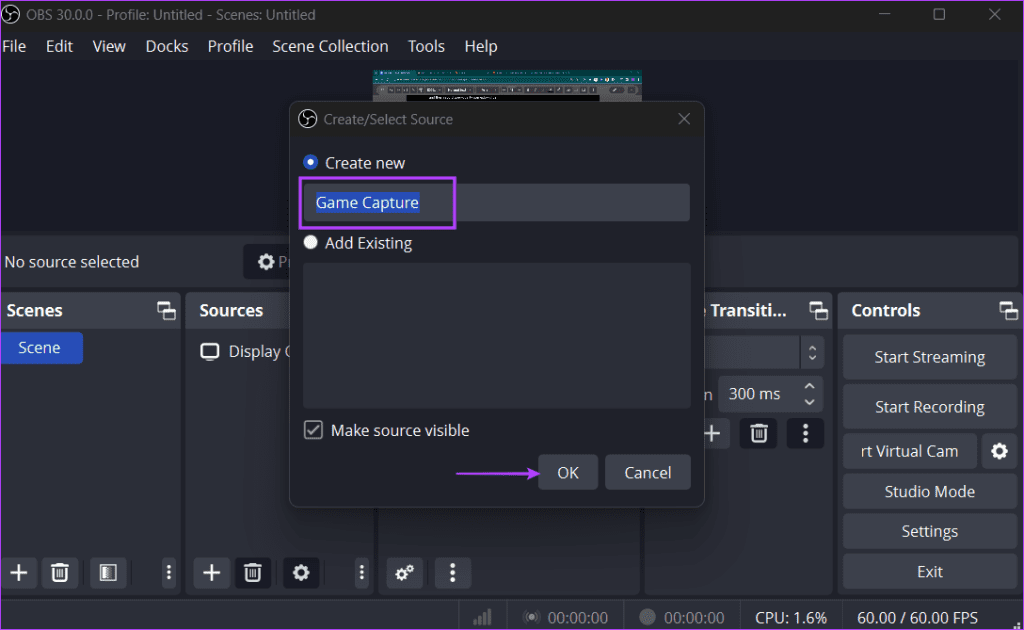
Step 1: Click on the plus button in the Sources section. Select the Game Capture option.
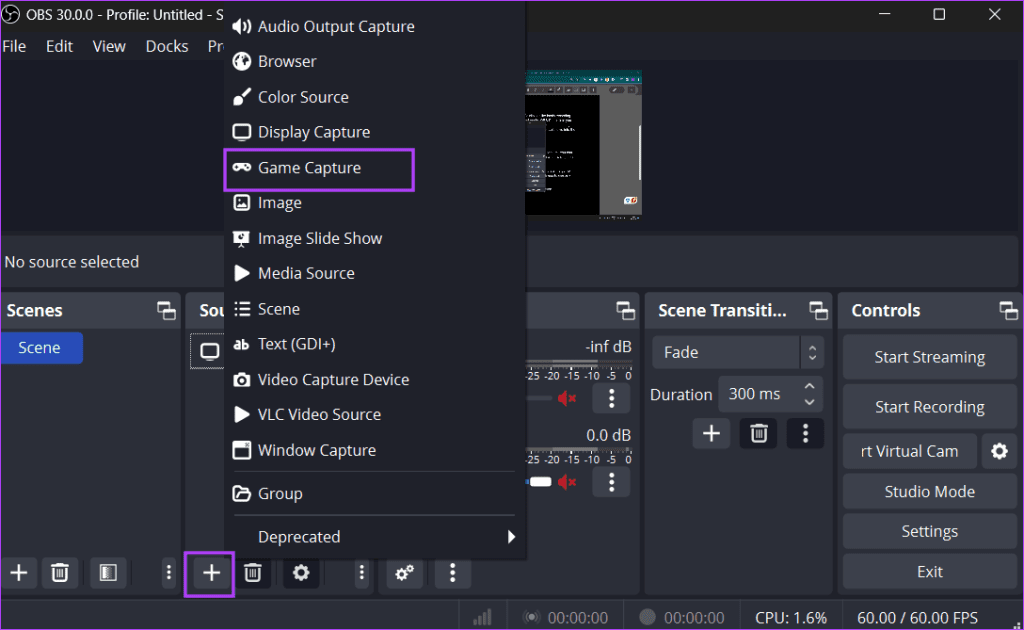
Step 2: Type a name and click on the OK button.
Step 3: Select the ‘Use anti-cheat compatibility hook’ option and click OK.
Once done, your game capture window will be ready.
2. Configuring Audio and Video Settings
Next, you must configure the audio and video capture settings in OBS Studio. Click on the Settings option in the bottom right area. Then, click on the Audio option.
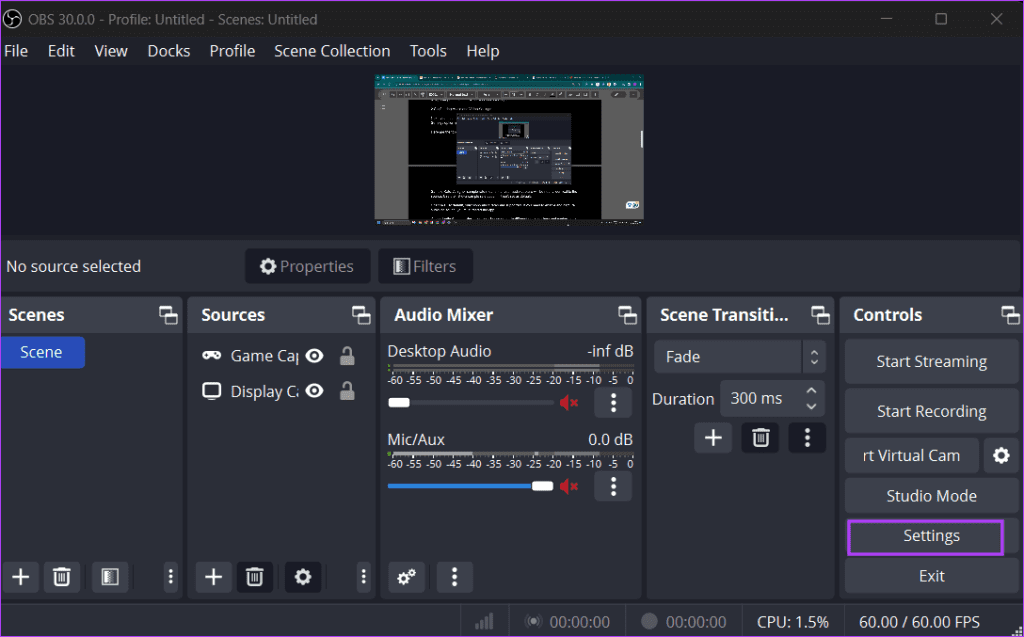
Audio Settings in OBS Studio
Here are the following settings you must check:
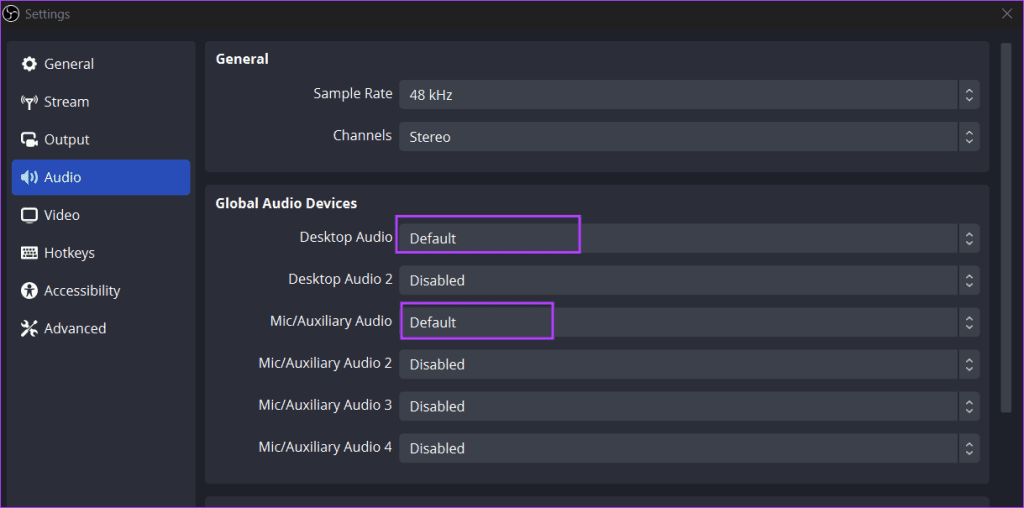
Sample Rate: A higher sample rate means your audio capture will be nearly identical to the source. Use the 48 kHz sample rate option if it isn’t set as default.

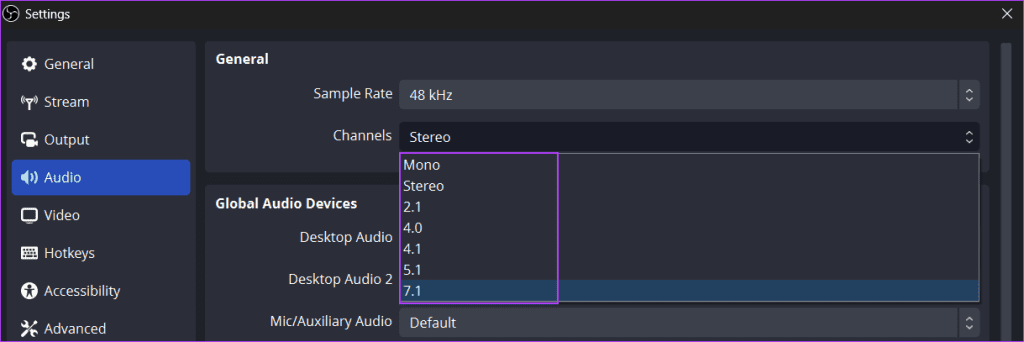
Channels: By default, only Mono and Stereo are supported. If you need to enable and capture surround sound, you must restart the app.
Global Audio Settings: Here, you can choose up to six different audio devices and capture their audio. However, the desktop and microphone audio should suffice for most users.
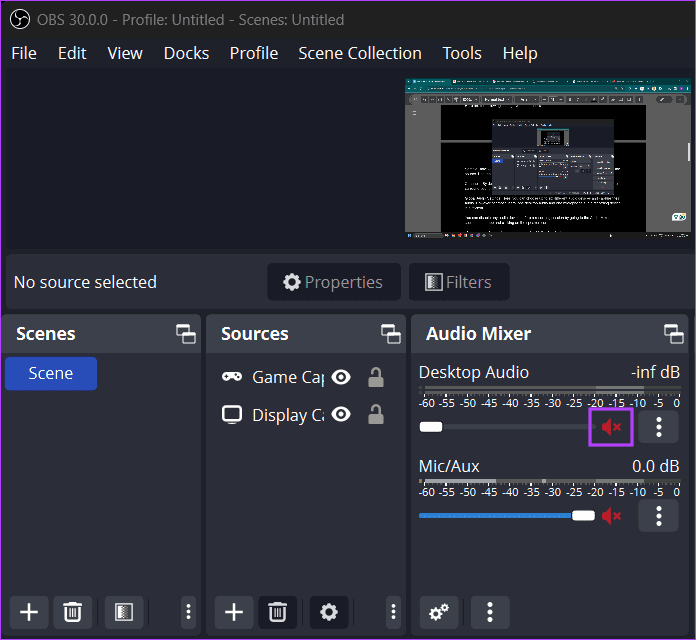
Notably, you can disable any audio device before a recording session, too. So, if you wish, you can go to the Audio Mixer section in the app and disable any audio source by clicking on the speaker icon.
The rest are advanced settings that we will discuss in a different article. For now, these presets should help you get up and running quickly.
Video Settings in OBS Studio
Moving on to the Video settings in OBS. Click on the Video option in the settings to switch to it. Here are a few settings with their meanings:
Base (Canvas) Resolution: It is the resolution in which you want to record the gameplay. While you can pick 1080p and 720p as a base resolution, we suggest you pick the one that matches your monitor’s resolution.

Output (Scaled) Resolution: This refers to the resolution in which you want the final output video. Keep it the same as the Base resolution unless you want to downscale the output.

Downscale Filter: Only applicable if you set the output resolution lower than the base resolution. We recommend using it with default settings.
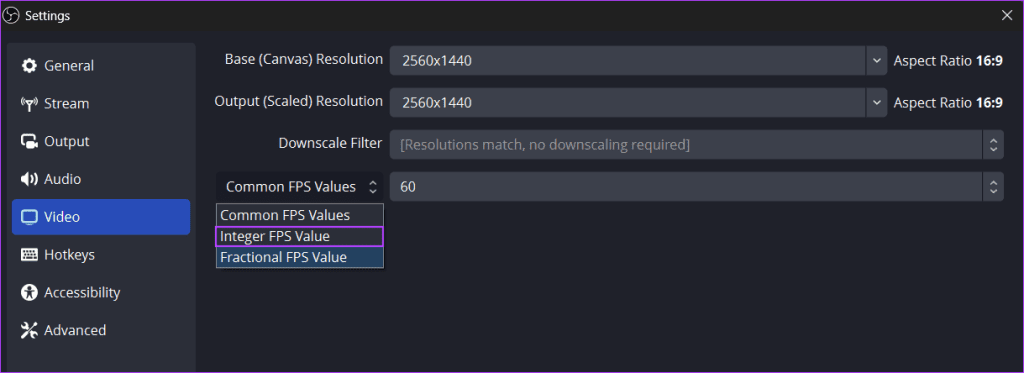
Common FPS Value: By default, OBS Studio will capture video at 60 FPS, enough for uploading and streaming.
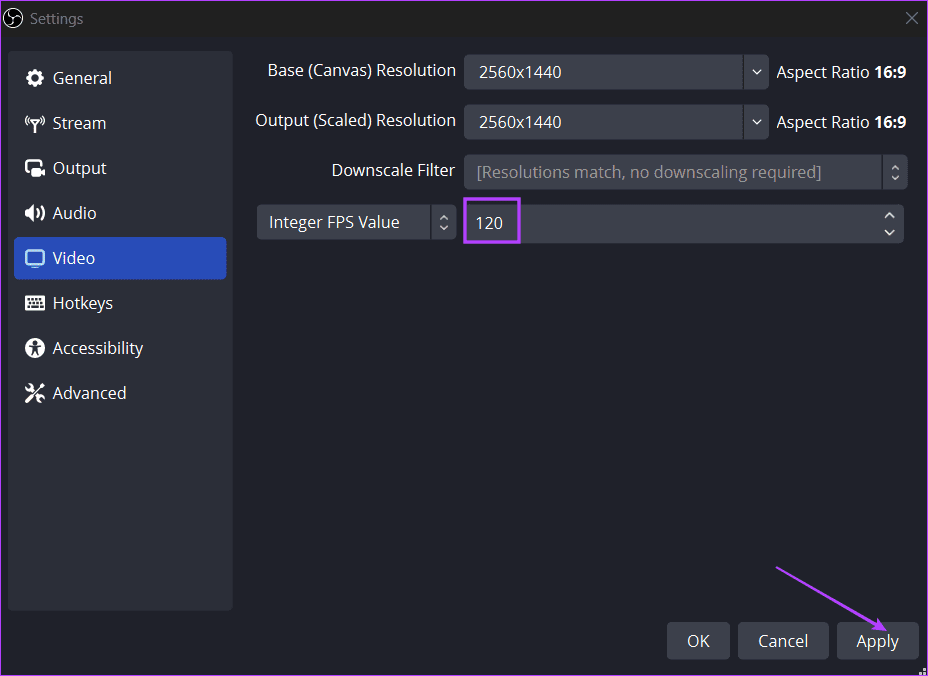
That being said, if you want to capture gameplay in 120 FPS, repeat the following steps:
Step 1: Click on the arrow icon and select the Integer FPS Value option.
Step 2: Then, type 120 in the box and click on the Apply button.
Remember that recording at 120 FPS will put an extensive load on your PC. Use an FPS checker to determine the maximum FPS you are getting with the current game settings.
3. Configuring Output Settings
Next are the output settings, which control the location, formats, and encoders used for the gameplay recording. Switch to the Output tab in the OBS Studio and go to the Recording section.
Recording Path: This is the location where OBS will save the recorded clip. By default, it is the Video folder in Windows File Explorer.
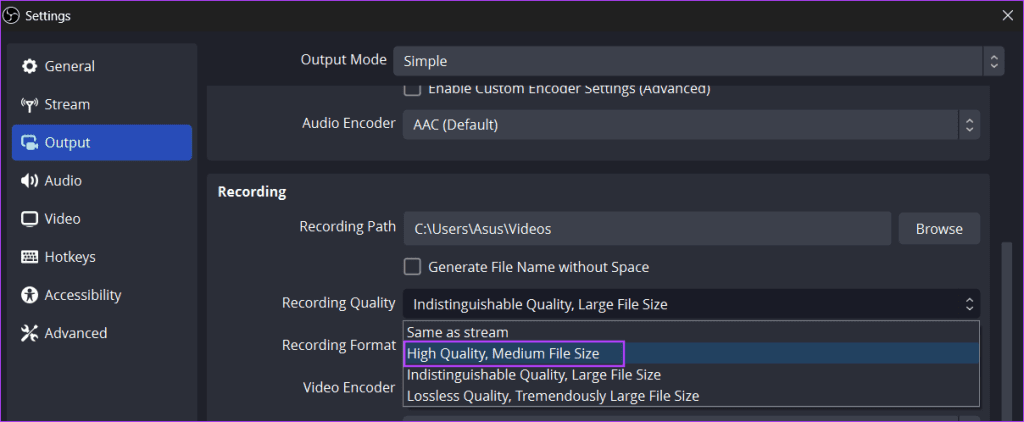
Recording Quality: This indicates the final quality and clarity of the output video. By default, it is set to the High-Quality option, which produces a moderate-sized video clip of decent quality. You can choose the Indistinguishable Quality option, but be prepared for bigger files that eat into a sizeable portion of your storage.
Recording Format: This refers to the file format of the video clip. OBS uses MKV as the default format, but you can use MP4, MOV, or FLV, too.
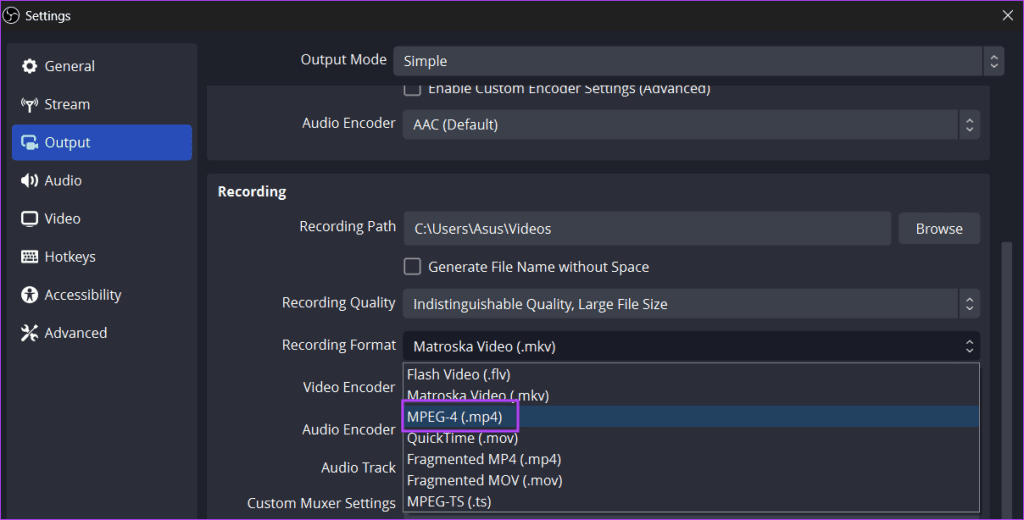
Click on Apply to save the changes. Don’t change the Audio Encoder, Video Encoder, and Audio Track settings.
4. Mapping Hotkeys
Switching to the OBS window every time you want to record a clip is a cumbersome process. Instead, you can map hotkeys for basic actions to start, pause, or end a recording.
Repeat the following steps:
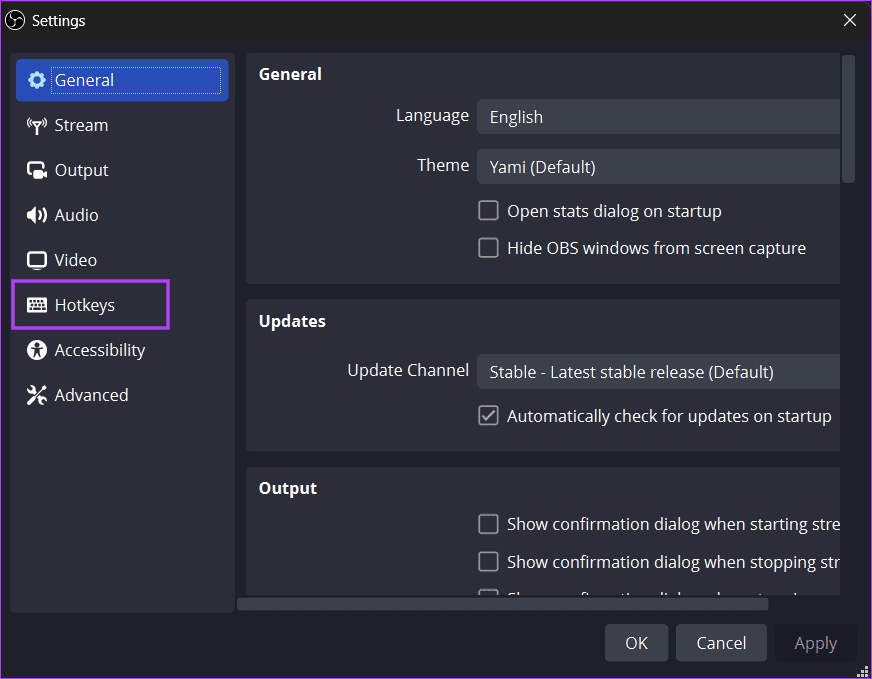
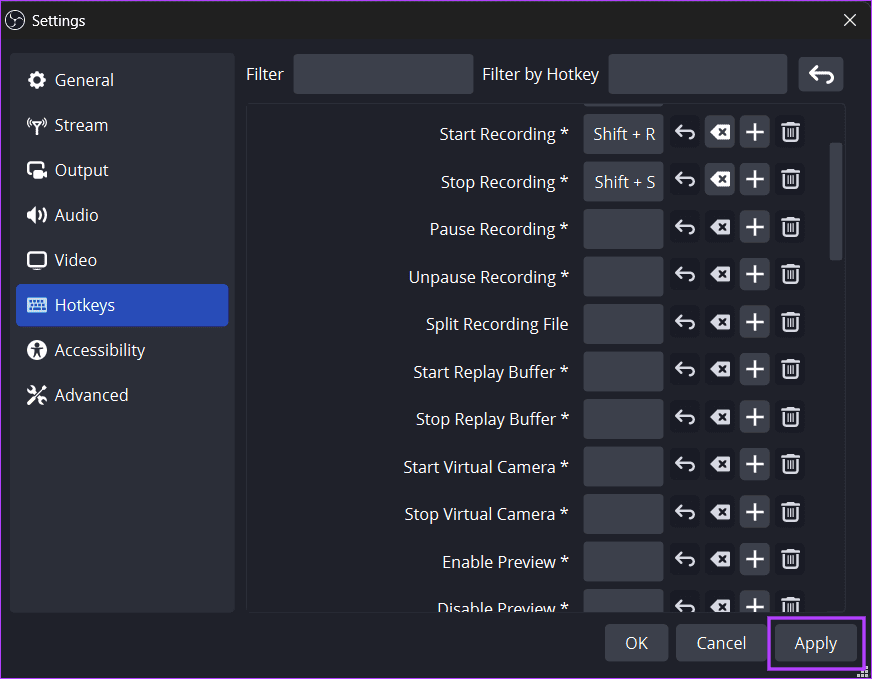
Step 1: Click on the Hotkeys tab in the OBS Studio settings.
Step 2: Then click on the Start Recording option and press the desired key combination, e.g., Shift + R.
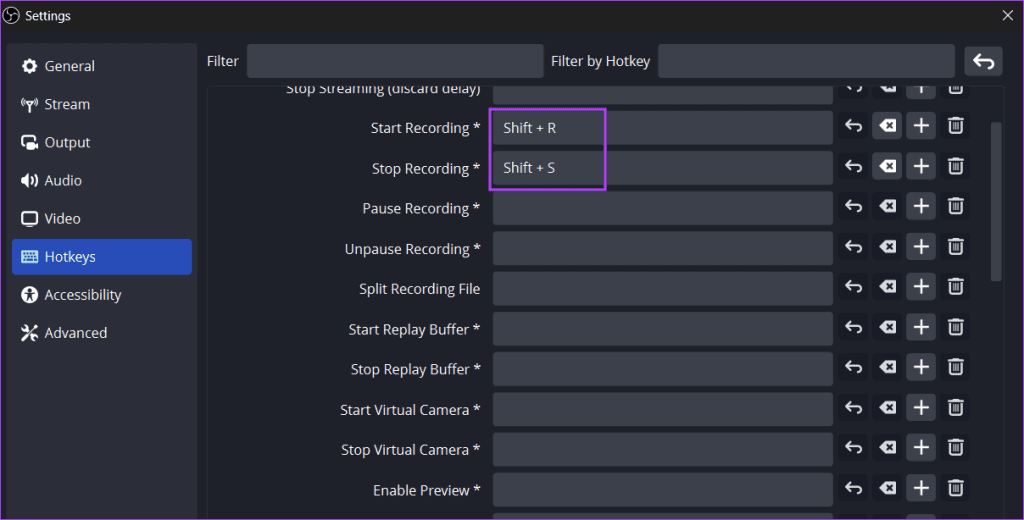
Step 3: Similarly, map the hotkeys for other basic actions and click the Apply button.
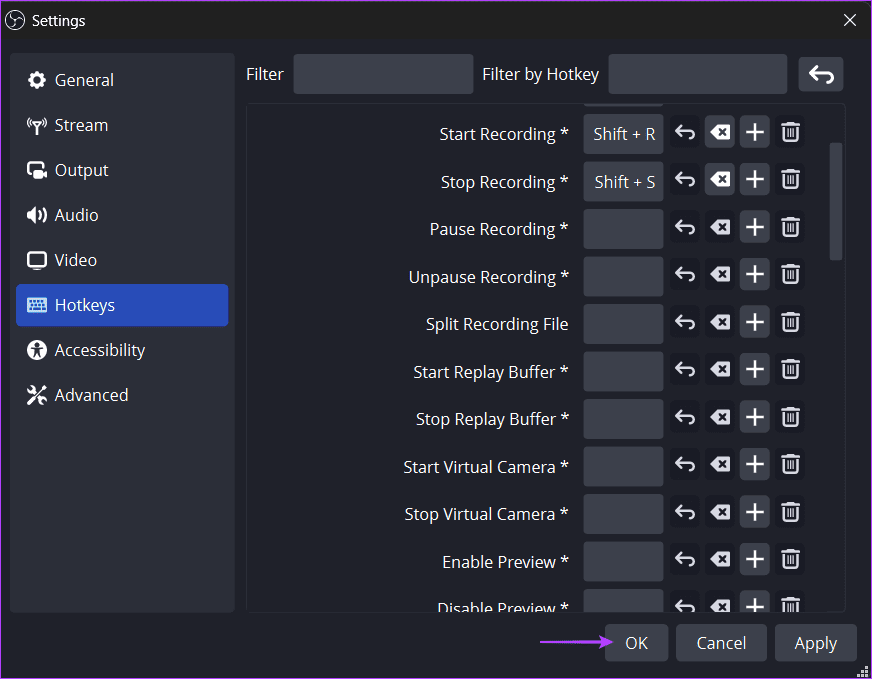
Step 4: Click on the OK button.
5. Recording Game Play
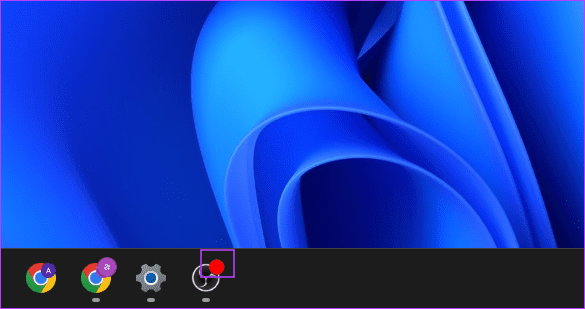
With that, you will have configured OBS Studio to record gameplay without any issues. Minimize OBS Studio and press the hotkey to start the recording. A red dot will appear on the OBS icon in the taskbar, indicating that recording has begun.
After you capture the gameplay, press the stop recording hotkey to save the recording on the storage disk. You can use any media player to view and edit the recording with a video editing app.
Easily Record Gameplays
We hope you can now easily record high-quality gameplay videos with OBS Studio. Make sure to check the resolution and quality settings and map hotkeys for convenience. Share any other free recording software like OBS Studio that you use in the comments.
Was this helpful?
Last updated on 04 March, 2024
The article above may contain affiliate links which help support Guiding Tech. The content remains unbiased and authentic and will never affect our editorial integrity.

