Command Prompt is a powerful tool on Windows, and you can accomplish several tasks using a single window. Therefore, it is easy to get lost between the commands you’ve entered and the responses and output from the tool. In this article, we want to show you how to view the Command Prompt history on your Windows PC easily.

We’ll also show you how to export your Command Prompt history into a text file. This makes it easier for you to refer to and share your commands with someone else.
However, note that you will lose all your Command Prompt history once you close the window or shut down your Windows PC. Therefore, you can access the history only when you have any active CMD session.
Also Read: How to create a folder or file from Windows Command Prompt
Method 1: Use a Keyboard Shortcut to Access Command Prompt History
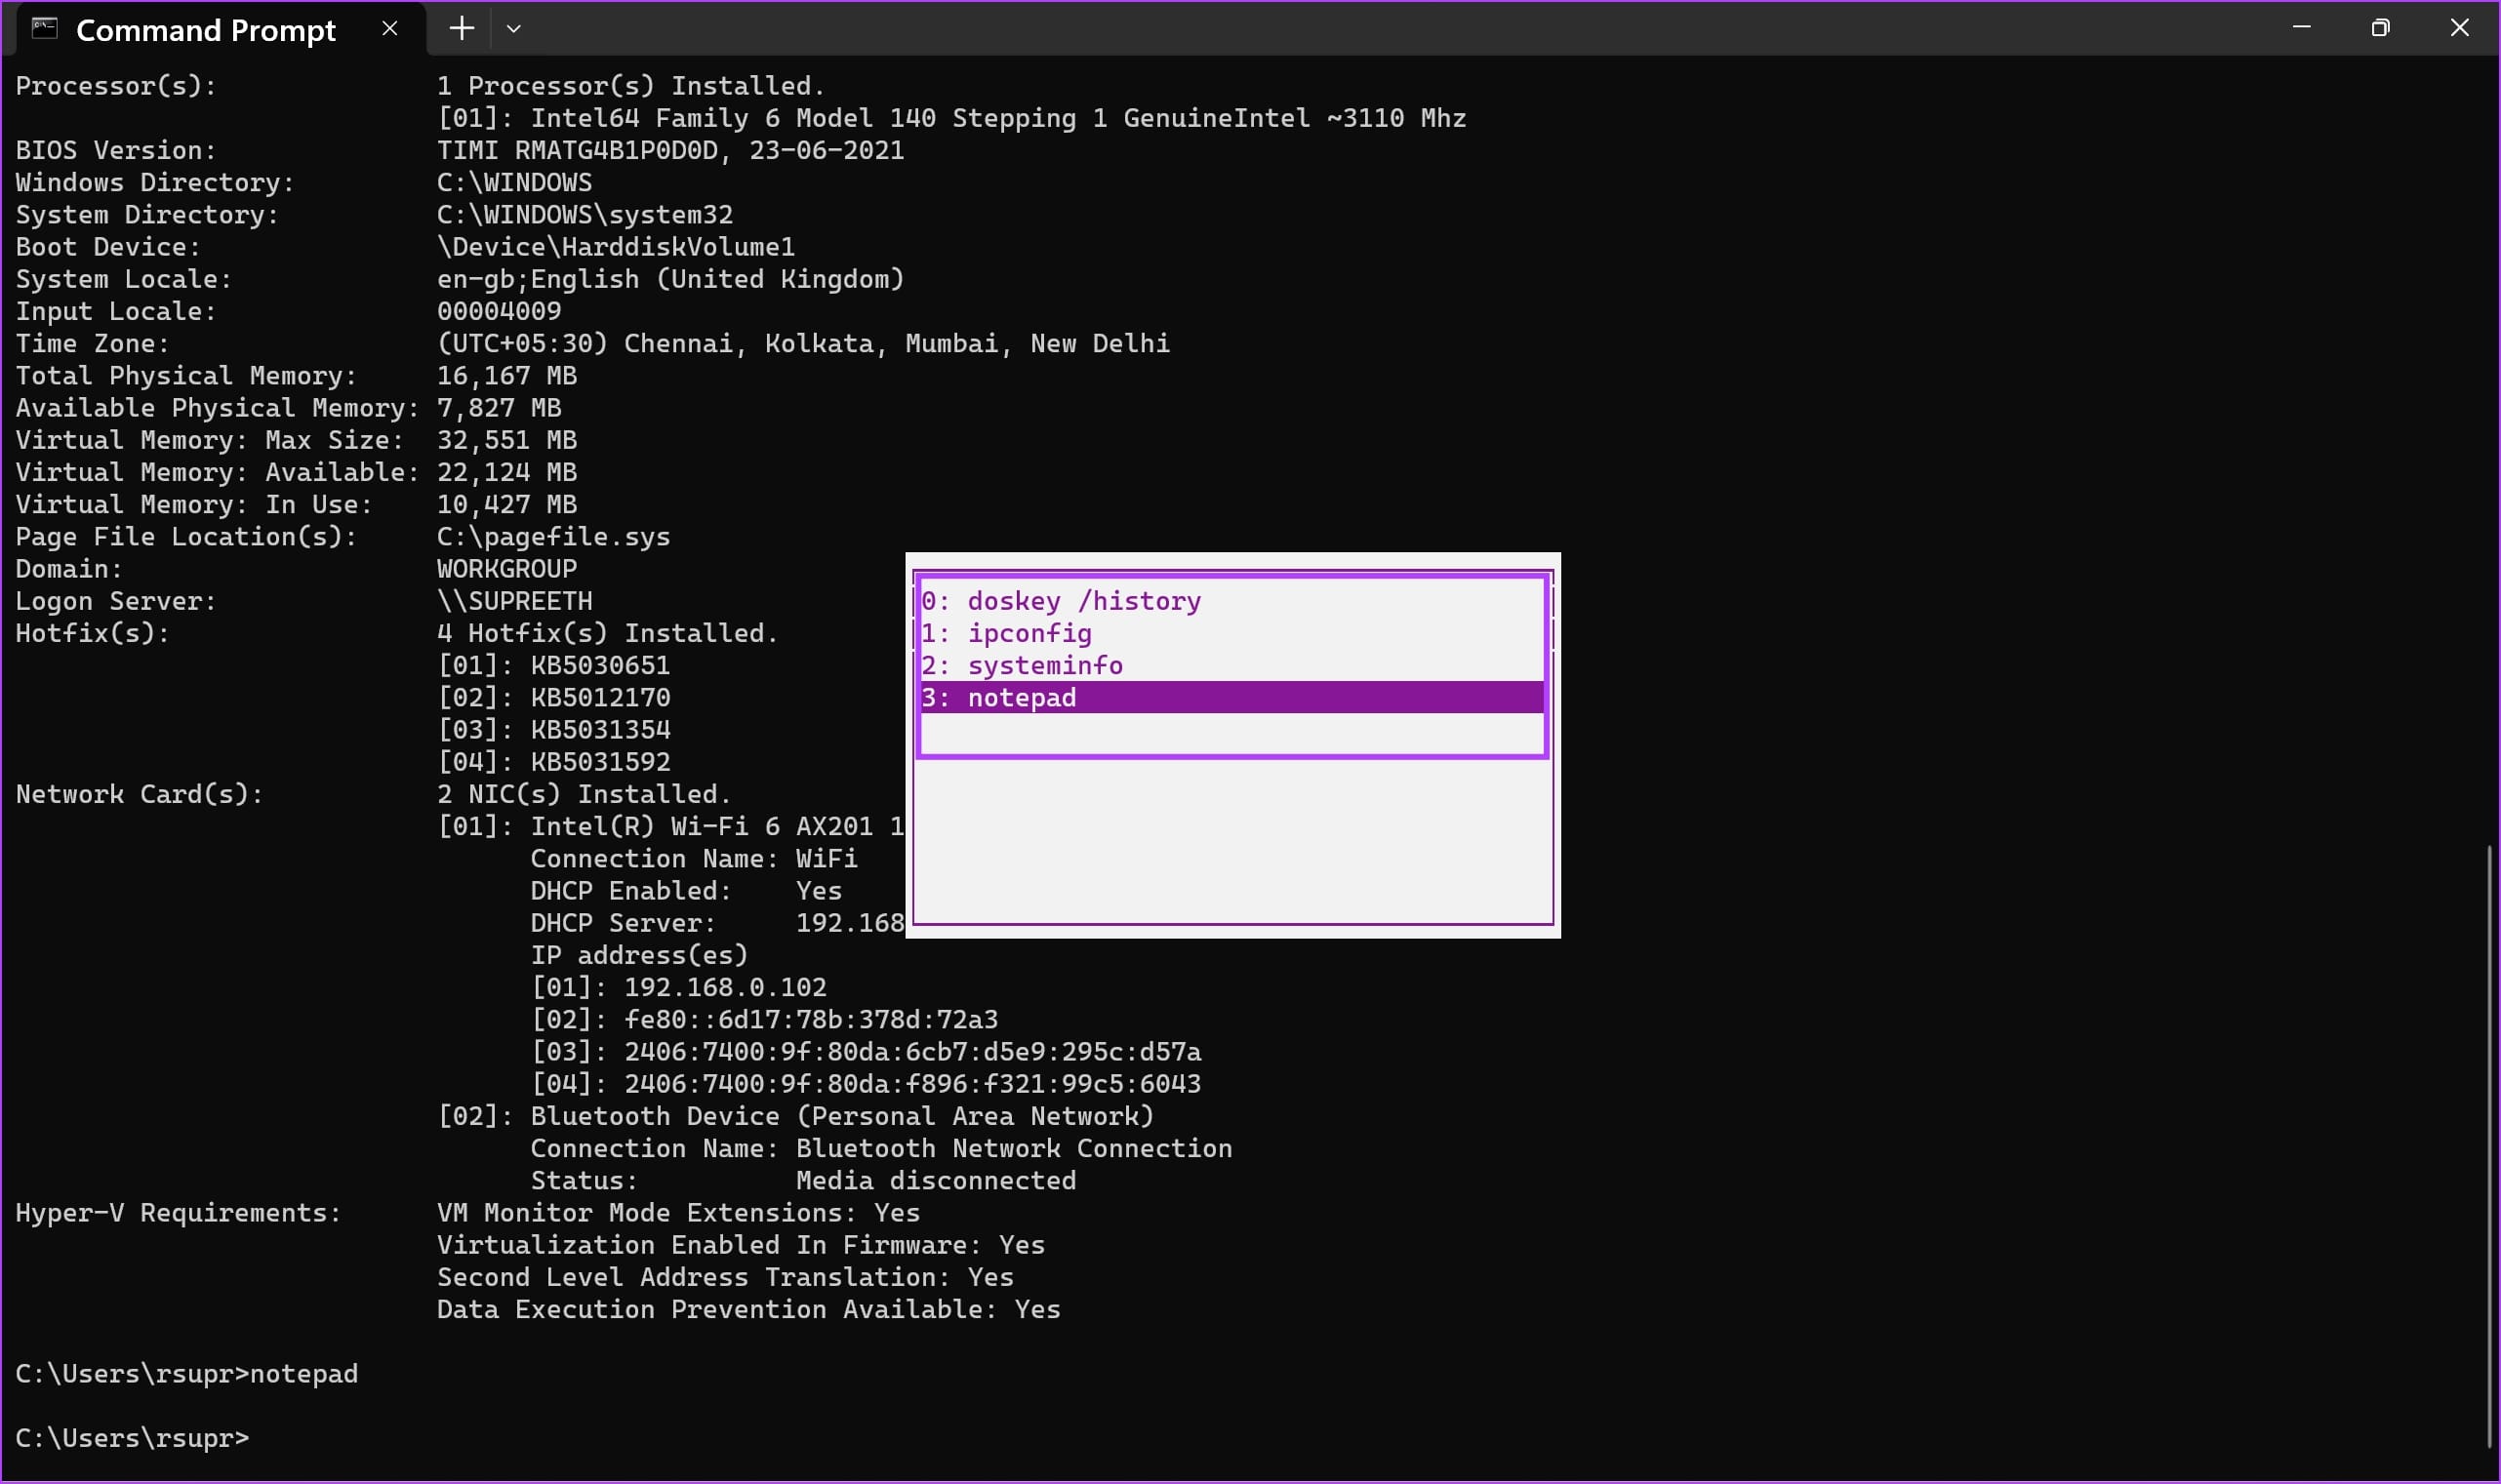
There is a keyboard shortcut to view the history on CMD quickly. You can hold the F7 key or hold the ‘Fn’ key with F7 to access the history of your commands. It will appear in the form of a dialog box.
You can use the up and down arrow keys to navigate through your commands. Hit the enter key to execute the highlighted command.

Method 2: Use a Command to Access the CMD History
Alternatively, you can use a command to view the history of your CMD session. After executing a series of commands in your session, use the command below and hit the enter key to access your history.
doskey /history

If there are many commands in your history, it is much more convenient to export them to a text file – more on that as we move on to the next section of the article.
How to Export the Command Prompt History to a Text File
Command Prompt also allows you to export the history of commands executed in a session onto a text file. You can also specify the desired destination to save the text file. Here’s how you can do that.
Step 1: Once you access the history, type cd to change the directory, and enter the folder path you want to save the text file. Enter the following command below and hit enter.
cd "filepath"
Ensure that you enter the path in double quotes. To find the path of a folder, right-click on the folder, and select ‘Copy as Path’.

Step 2: There you go. You can now open the folder where you saved the history and access the ‘history.text’ file.

How to Increase Command Prompt History Size
You can increase the size of the command history page by adjusting the properties of the Command Prompt window.
By default, Command Prompt stores a limited number of previously entered commands in its history. The default size is set to 50 commands. Here’s how to increase the command history size:
Step 1: Open a CMD window and enter the following command.
doskey /listsize=150
We’ve changed the size from 50 to 150. You can enter any desired value to increase the history.

Bonus: How to Check PowerShell History
If you are using PowerShell on your Windows PC to execute commands, it is pretty straightforward. All you need to do is to enter the command HISTORY, and PowerShell will show you the command history.

That is everything you need to know to view the Command Prompt history on Windows.
FAQs on Command Prompt History
Ensure you view the history in an active session where you previously executed commands. You can’t see the history of previously closed command sessions.
Try using the key combination of Fn + F7 to access the history in the command window.
You can increase the command history size to store up to 999 commands.
There isn’t any native feature that lets you see the command prompt history with timestamps on Windows.
View Command History Quickly
We hope this article helps you access and view the history of Command Prompt. What is your favorite command that enables you to save a lot of time while you’re on your PC? Let us know in the comments section below!
Was this helpful?
Last updated on 17 November, 2023
The article above may contain affiliate links which help support Guiding Tech. The content remains unbiased and authentic and will never affect our editorial integrity.


