Fix 1: Enable Your Audio Device on Windows
The first thing to do is ensure that you haven’t accidentally disabled the audio device on Windows. It can happen if you connect a bunch of headphones, Bluetooth headphones, and speakers to your computer. Here’s how to check and fix that.
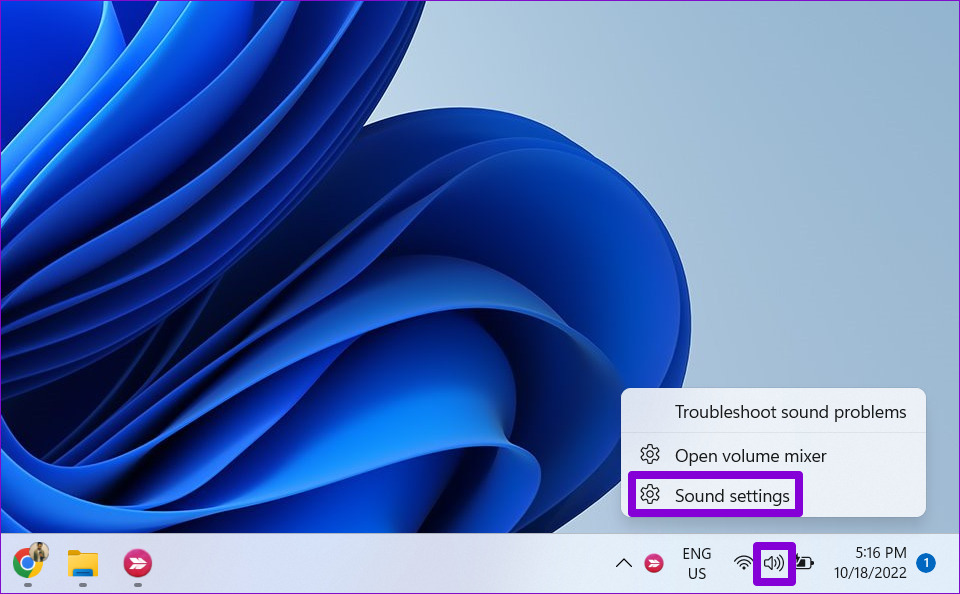
Step 1: Right-click the speaker icon on the taskbar at the bottom-right corner and select Sound settings from the menu.
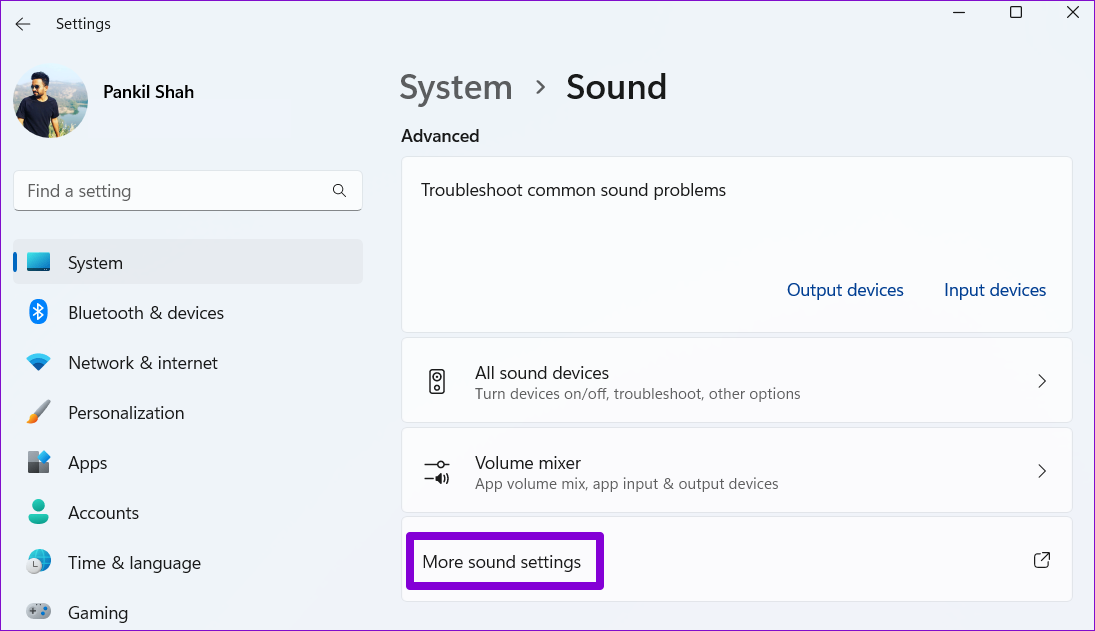
Step 2: Scroll down to the Advanced section and click on More sound settings.
Step 3: Under the Playback tab, locate your audio device that shows disabled. Right-click on it and select Enable.

If your device does not appear on the list, right-click anywhere within the Playback tab and select the Show Disabled Devices option. When your device appears, enable it.

Fix 2: Run the Playing Audio Troubleshooter
Windows’ built-in troubleshooters are effective for fixing system-related issues and errors. In this case, you can run the Playing Audio troubleshooter to allow Windows to find and fix issues triggering the “No audio device is installed” error.
Step 1: Press the Windows key + I to launch the Settings app and head to System > Troubleshoot.
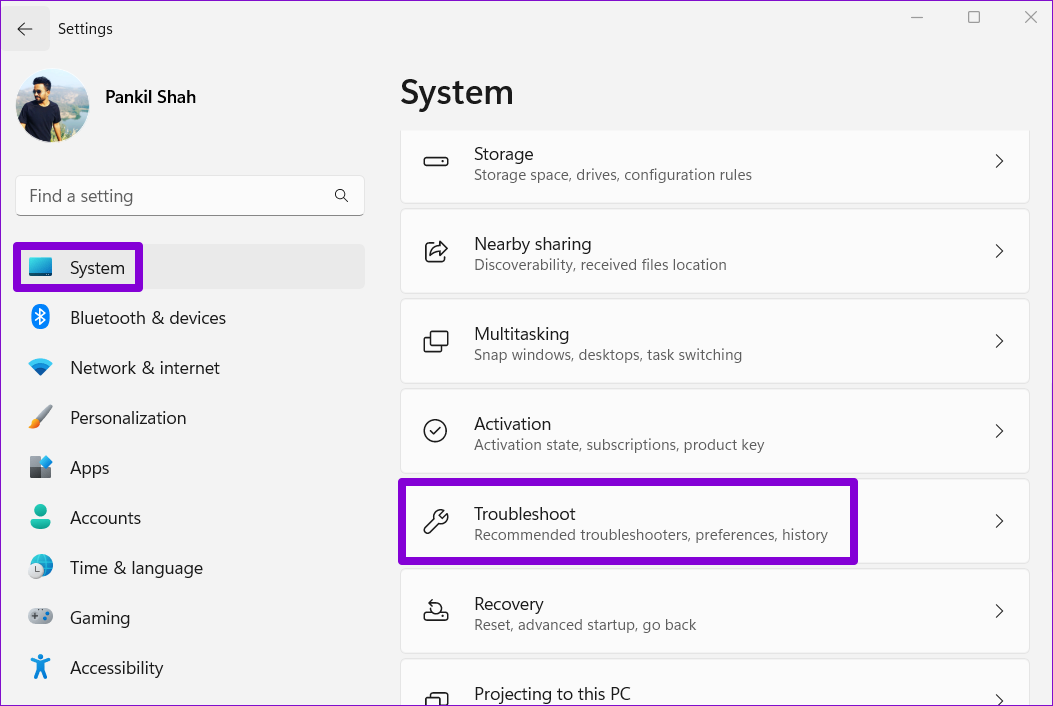
Step 2: Select Other troubleshooters.

Step 3: Click the Run button next to Playing Audio.

Wait for the troubleshooter to fix any issues with your system, and the error should no longer bother you.
Fix 3: Check Audio Services
For audio to work on your computer, Windows relies on two system services: Windows Audio and Windows Audio Endpoint Builder. If one of these services is not running, you may experience audio problems on Windows 11. Here’s how to fix them.
Step 1: Press the Windows key + R to open the Run dialog box. Type services in the box and press Enter.
Step 2: In the Services window, scroll down to locate Windows Audio on the list. Double-click on it to open its properties.

Step 3: Change the startup type to Automatic and click Apply, followed by OK.

Repeat the above process to configure the startup type for the “Windows Audio Endpoint Builder” service too. Then, restart your PC and see if Windows detects your audio device.
Fix 4: Update or Reinstall the Audio Driver
A faulty audio driver could prevent Windows from communicating with your device and trigger the “No audio device is installed” error. Most of the time, you can resolve such issues by updating the audio driver. Here’s how to go about it.
Step 1: Press the Windows key + S to open the search menu. Type device manager in the search box and select the first result.
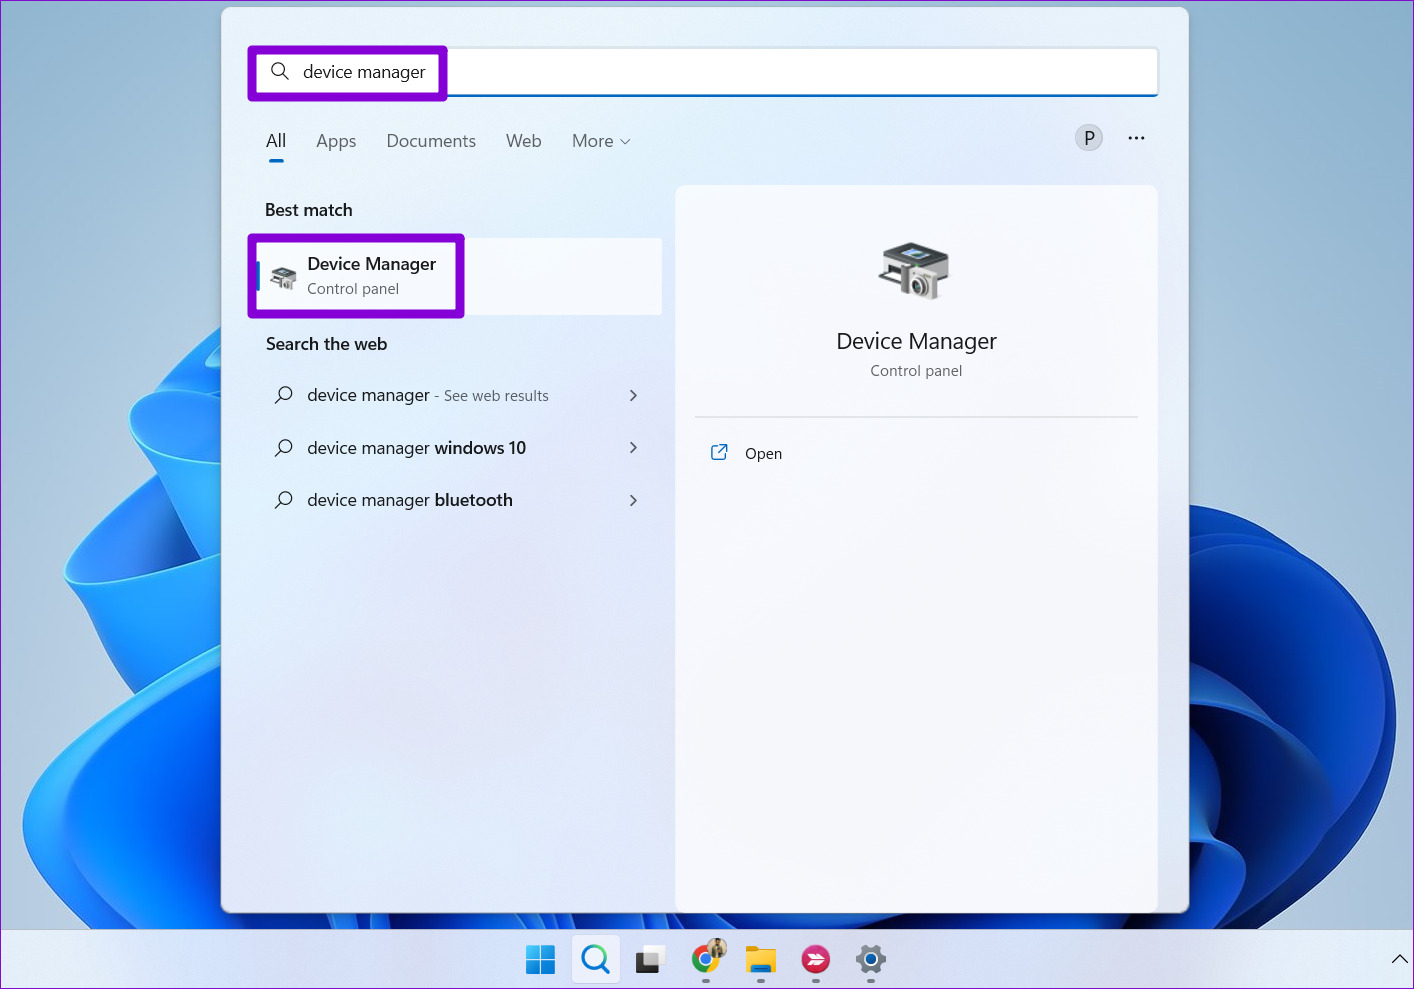
Step 2: Expand Sound, video and game controllers. Then, right-click on the audio device and select Update driver.

Follow the on-screen instructions to finish updating the driver. If updating the driver does not help, uninstall the problematic driver and restart your computer. After Windows boots, it will automatically install the missing audio driver to fix the error.
Fix 5: Perform a System Restore
Such an error can also appear if your PC has undergone any bad system changes. If none of the above solutions work, use System Restore to undo recent changes and revert your PC to a point before the error first appears.
Step 1: Open the search menu, type create a restore point, and press Enter.

Step 2: In the System Properties window, click the System Restore button.

Step 3: Click Next.
Step 4: Select the restore point before the error first appeared.
Step 5: Click on Finish.

Your PC will reboot and revert to the specified restore point. After that, the error should not appear on Windows.
Was this helpful?
Last updated on 08 May, 2024
The article above may contain affiliate links which help support Guiding Tech. The content remains unbiased and authentic and will never affect our editorial integrity.


