With the Task Scheduler in Windows 10, users can automate routine tasks on a PC. The Task Scheduler works by monitoring the criteria or triggers chosen as signifiers for an event. With this, it helps to execute each task once the criteria are satisfied.

However, situations may arise where users may need to disable a scheduled task. Possibly the task slows down the PC or it is no longer needed. In such a situation, there are four ways to disable the scheduled task.
Using Task Scheduler to Disable Scheduled Tasks
The same way tasks are enabled on the task scheduler is the same way users can also disable them. Here’s how to disable scheduled tasks using the Task Scheduler:
Step 1: Click on the Windows button at the bottom-left of your PC screen.

Step 2: Scroll to Windows Administrative Tools and click on the drop-down arrow to unveil the different tools.
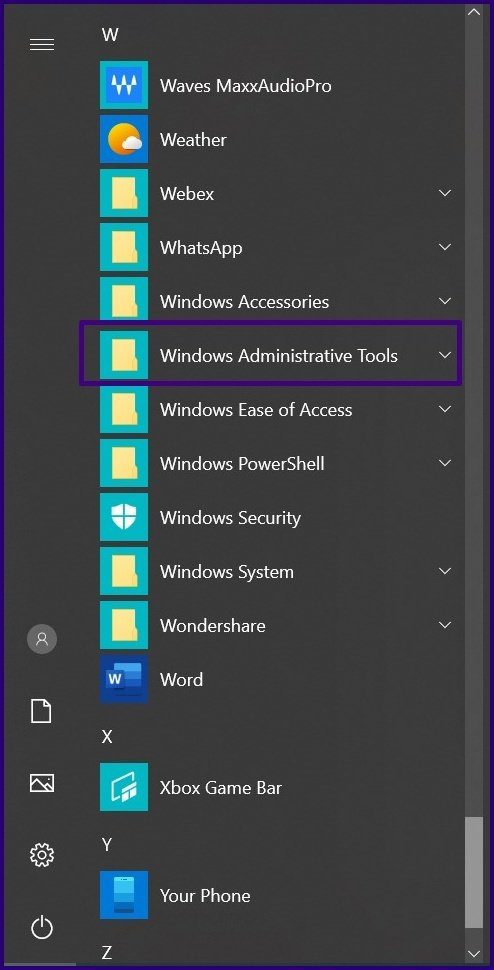
Step 3: Navigate to Task Scheduler and click on it. An alternative way to launch the Task Scheduler is by clicking on the search box beside the Windows button, enter the phrase, Task Scheduler and click on the icon or press Enter.

Step 4: When the Task Scheduler launches, click on Task Scheduler library.
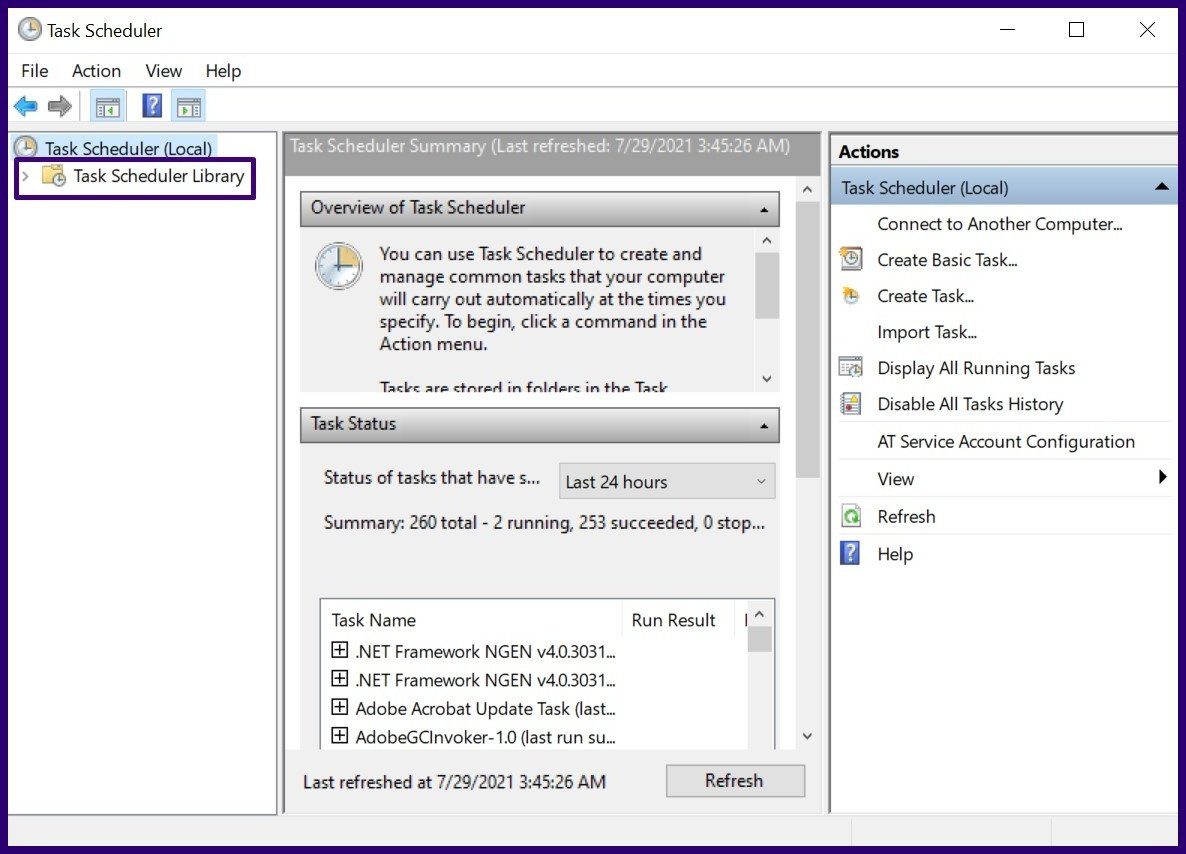
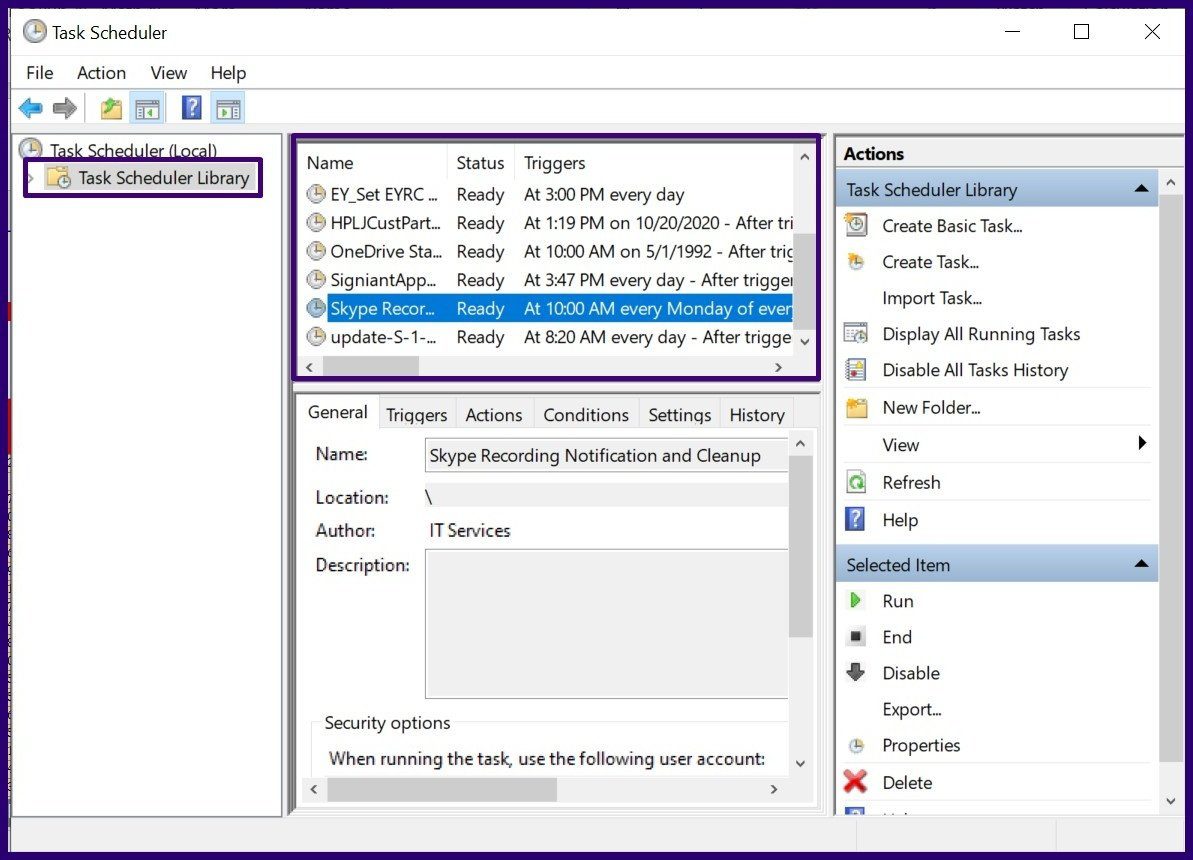
Step 5: Check through the Task Scheduler library to locate the task or tasks that you need to disable. In some cases, you may have to browse through different folders to locate the tasks.
Step 6: After selecting the task, on the right pane named Actions, click on the tab named Selected Item to open a drop-down.
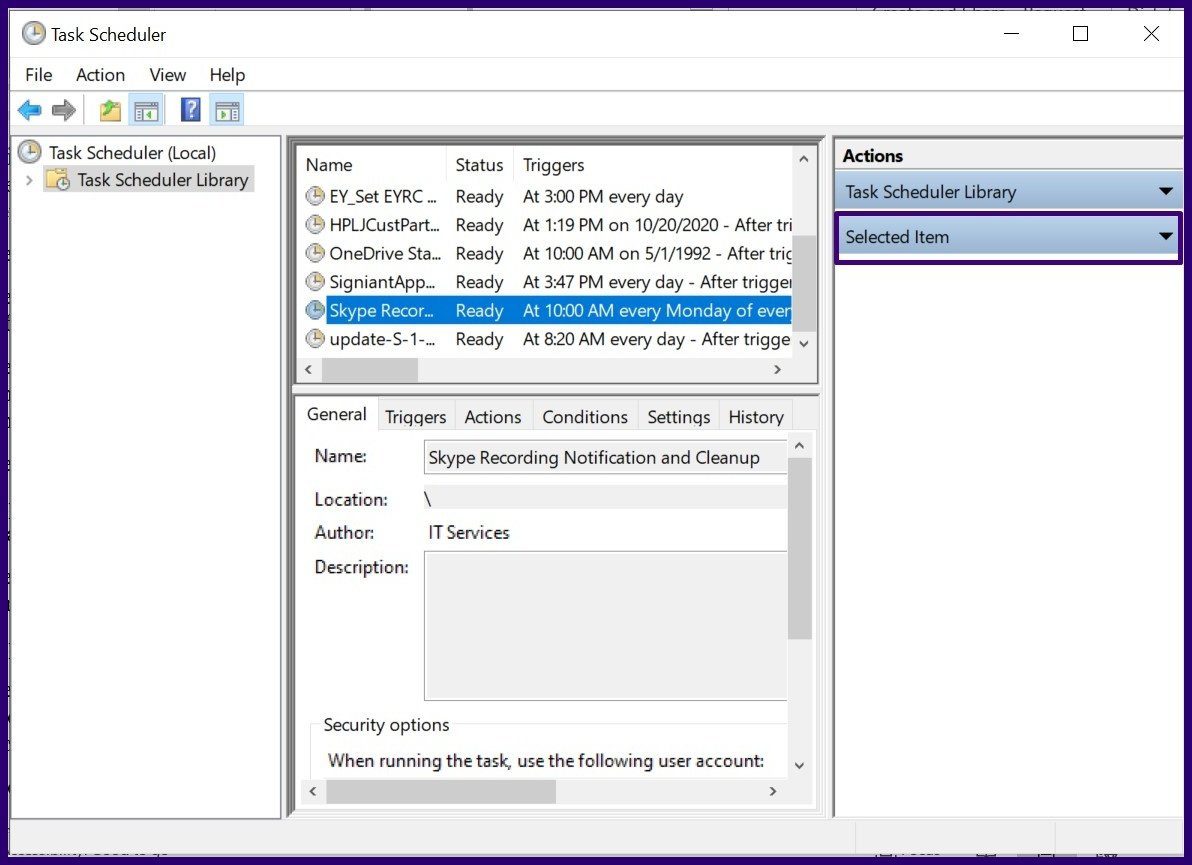
Step 7: Select Disable from the list of options available.
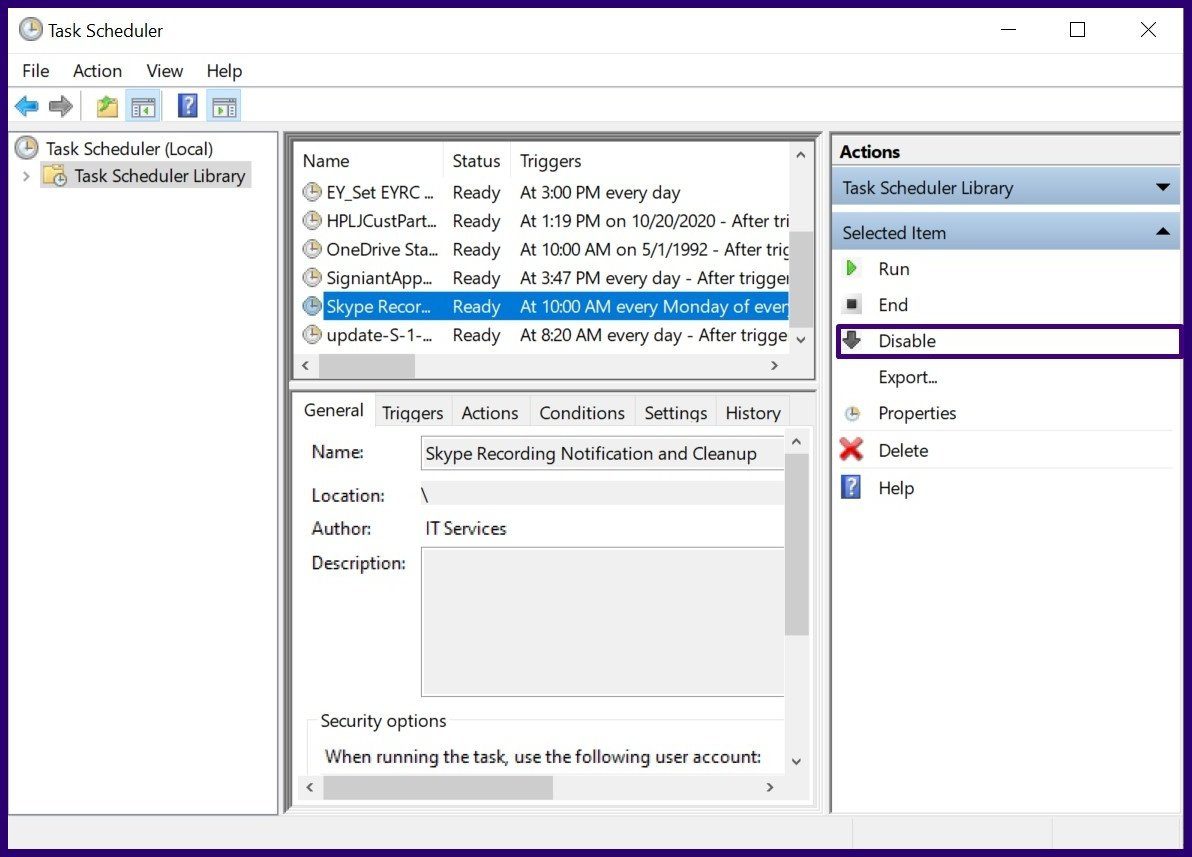
Once you complete the above steps, you should successfully disable the scheduled task.
Using Windows Command Prompt to Disable Scheduled Tasks
The Command Prompt is also another option to consider when trying to disable tasks on Windows 10 and former versions. Here’s how it works:
Step 1: On the Windows search bar, input search query for Command Prompt and select Enter to launch it.

Step 2: Typically, scheduled tasks are stored in the root folder of the Task Scheduler library. Once Command Prompt launches, type this command into Command Prompt if your tasks are within the root folder library.
schtasks /Change /TN "" /Disable
However, if the scheduled tasks are in a different folder other than the Task Scheduler root folder, then use the name of the actual folder as shown below:
schtasks /Change /TN "\" /Disable
The task Name should be the name of the task to be disabled while folder name should be the stored location of the task.
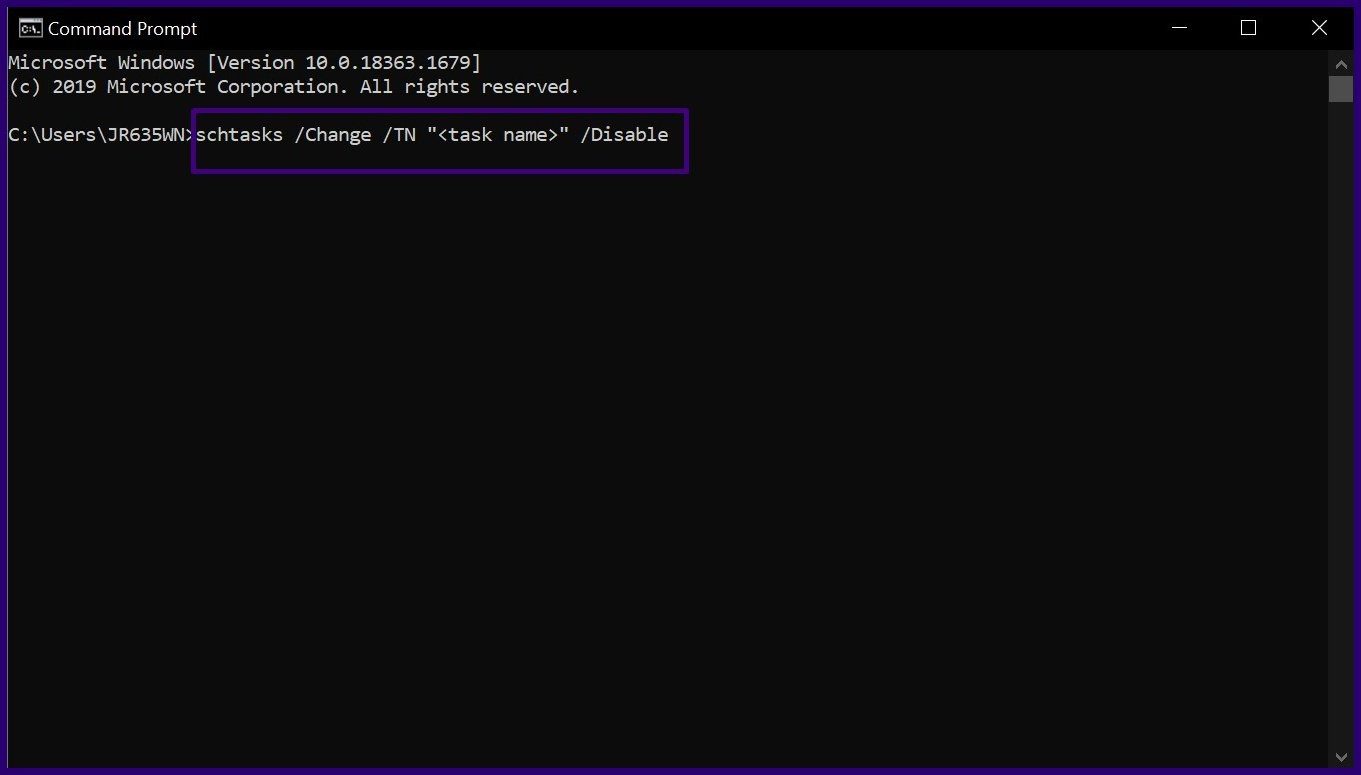
Step 3: Select Enter on your keyboard to run the command.
Using Windows Elevated Command Prompt to Disable Scheduled Tasks
If you get an access denied error when running Command Prompts, then it means you need administrator rights. This will require you to launch Elevated Command Prompt. You can access Elevated Command Prompt by:
Step 1: On the Windows search bar, type cmd in the Windows Search.
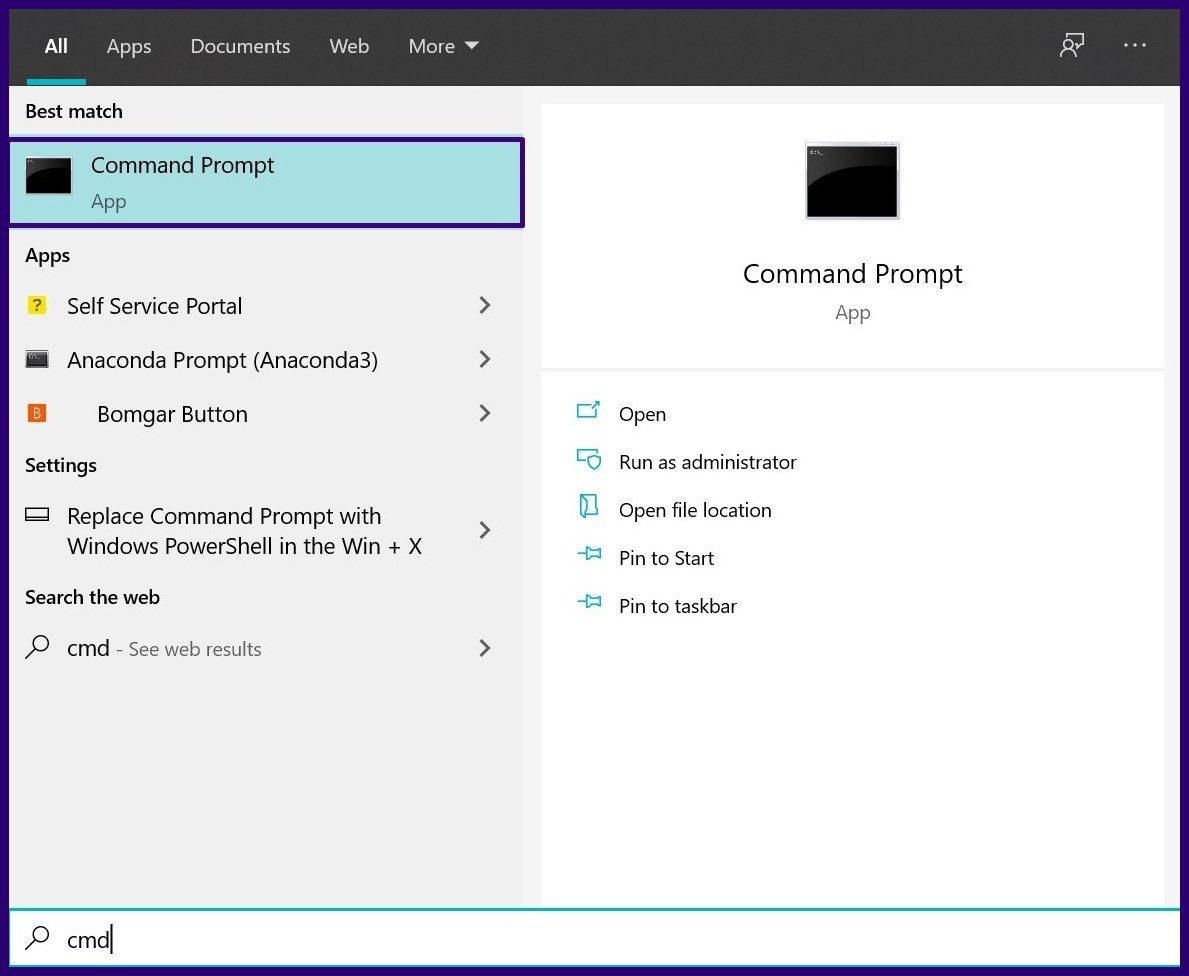
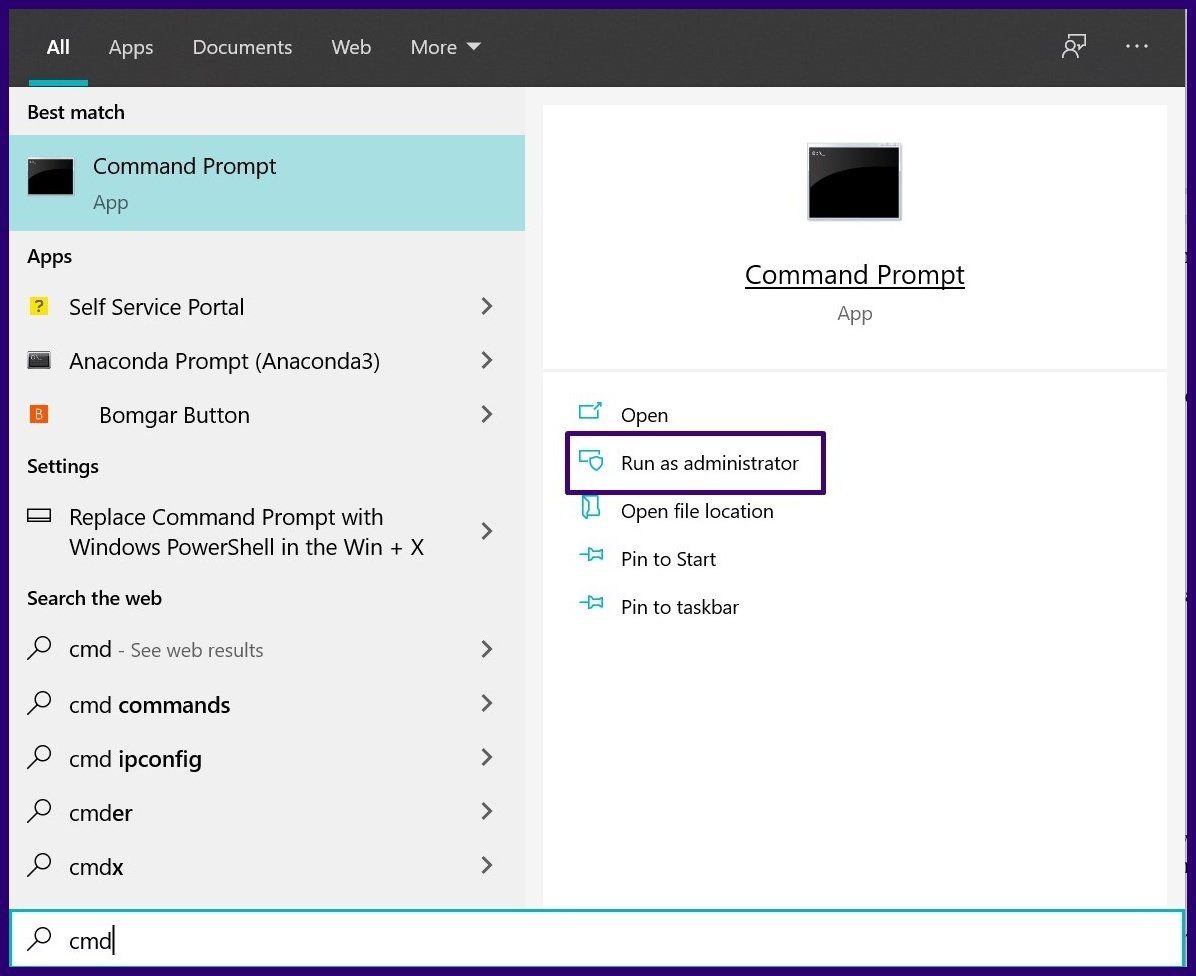
Step 2: On the right of the search result, select Run as Administrator.
Step 3: Select Yes to run the Command Prompt as an Administrator.
Step 4: In the Command Prompt Window, depending on the location of the task type input:
schtasks /Change /TN "" /Disable
or
schtasks /Change /TN "\" /Disable

Step 5: Select Enter on your keyboard to run the command.
Using Windows PowerShell to Disable Scheduled Tasks
Unlike the Command Prompt, which is available on all Windows versions, Windows PowerShell is only available on Windows 10. Here’s how it works:
Step 1: In the Windows search box, type the search query Windows PowerShell and select Enter on the keyboard to launch it. If you receive an error message that reads access denied, try running the app as an administrator.

Step 2: Type any of the commands provided below into PowerShell. Your choice will depend on the location of the scheduled task.
Root folder of the Task Scheduler library:
Disable-ScheduledTask -TaskName ""
Another folder asides from the root folder:
Disable-ScheduledTask -TaskPath "\" -TaskName ""

Step 3: Select Enter on your keyboard to run the command.
Using Microsoft Power Automate
With the steps mentioned above, you can enable or disable scheduled tasks on Windows 10. Apart from the Task Scheduler, Microsoft Power Automate is another tool that you can use to automate tasks on Windows 10.
Was this helpful?
Last updated on 07 February, 2022
1 Comment
Leave a Reply
The article above may contain affiliate links which help support Guiding Tech. The content remains unbiased and authentic and will never affect our editorial integrity.


in the registry, set the value of
HKEY_LOCAL_MACHINE\SYSTEM\CurrentControlSet\Services\schedule\start
to 4