Having multiple workbooks or worksheets open side-by-side can eliminate the need to switch between different tabs or windows, making it more convenient to work on multiple tasks at once. Note that the process is a lot easier if you have multiple display screens or monitors tethered to your PC. However, you don’t need to get a dual-screen setup if you want to do a side-by-side comparison.
Using the View tab on the Microsoft Excel Ribbon, you can view multiple worksheets on one screen at a go. Here’s how to do so:
How to View Two Worksheets in the Same Excel Workbook Side-by-Side
Here’s how to view two worksheets in the same workbook side-by-side without switching between sheet tabs:
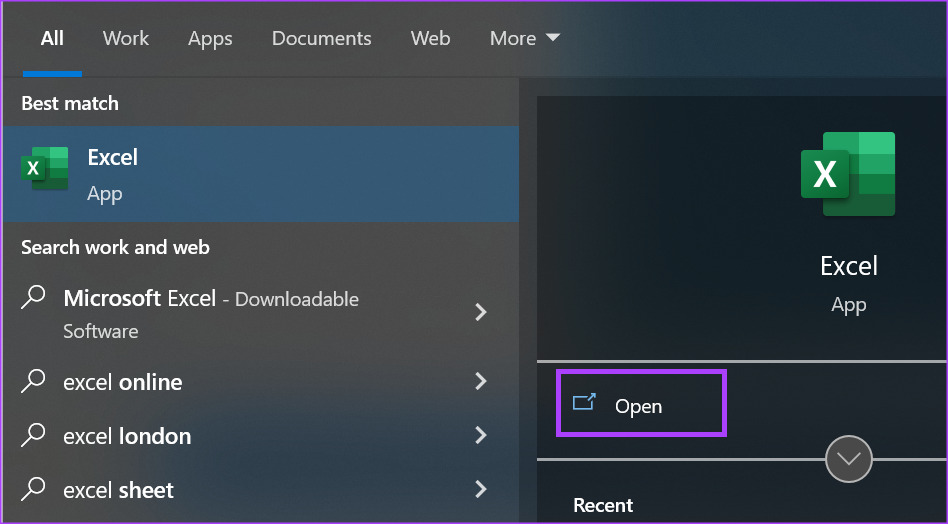
Step 1: From your PC’s Start menu or Taskbar, click the Microsoft Excel app or workbook to open it.
Step 2: On the Excel Ribbon, click the View tab.

Step 3: In the Window group of the View tab, click New Window. This will create a duplicate of your open workbook.

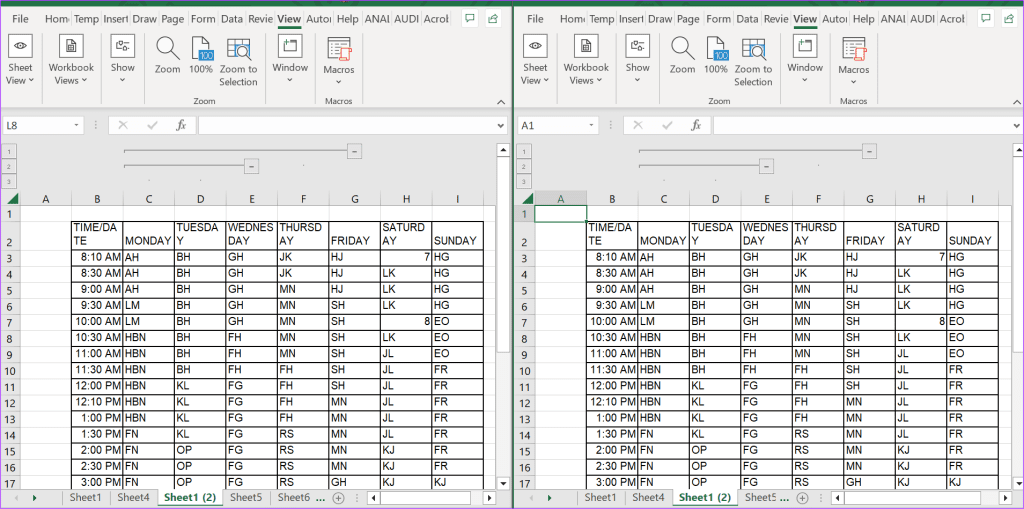
Step 4: Click the View tab again and within the Window group, click View Side by Side. This will place both workbooks side by side.

Step 5: In each workbook window, click the sheet that you want to compare.
How to View Two Worksheets in Different Excel Workbooks Side-by-Side
Here are the steps you should take to place worksheets from different workbooks side-by-side:
Step 1: Open the workbooks with the worksheets that you want to place side-by-side.
Step 2: On the Excel Ribbon, click the View tab.

Step 3: Click the View tab and click View Side by Side within the Window group.

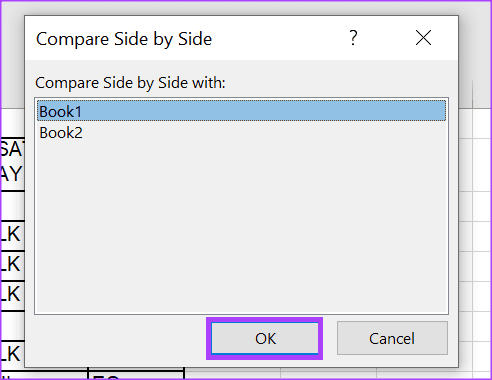
Step 4: If you have more than two workbooks open, Excel will launch the Compare Side by Side dialog box. Select the workbook you want to compare and click OK. This will place both workbooks side by side.
Step 5: Once done, simply click the sheet that you want to compare in each workbook window.

How to Enable Synchronous Scrolling to Scroll Through Two Excel Worksheets
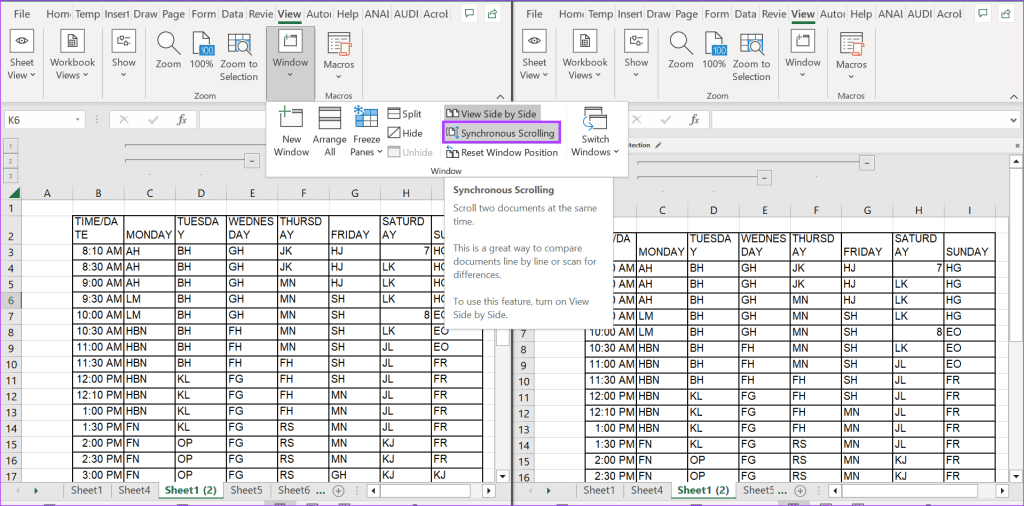
When you have two worksheets open, you may want to scroll through both at the same time without having to navigate their respective bars. The Synchronous Scrolling feature on Microsoft Excel makes this possible. However, it only works when two workbooks are open and the View Side by Side option is enabled. Here’s how to enable synchronous scrolling in your Excel.
Step 1: On the Excel Ribbon, click the View tab.

Step 2: Click the View tab and click View Side by Side within the Window group. This will place both workbooks side by side.

Step 3: Click the View tab of one of the opened workbooks, and within the Window group, click Synchronous Scrolling.
How to Arrange the View of The Excel Workbooks
When you enable the View Side by Side option, Excel, by default, will place both worksheets in a Tiled view. However, you can change the view of your worksheets using the steps below:
Step 1: On the Excel Ribbon, click the View tab.

Step 2: Click the View tab, and within the Window group, click Arrange All. This will launch the Arrange Window dialog box.

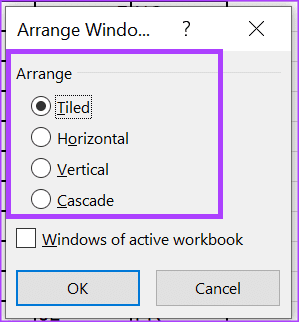
Step 3: From the following options, select how you want your Excel workbooks stacked:
- Tiled: the windows are arranged as equally sized squares in the order you open them.
- Horizontal: the windows are stacked one below another.
- Vertical: the windows are placed next to each other.
- Cascade: the windows overlap one another.
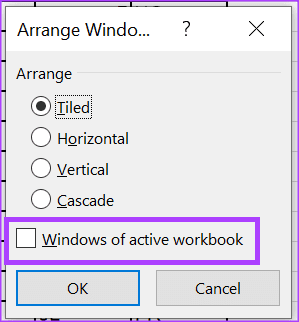
Step 4: If you have multiple worksheets in a workbook that you want to work with, tick the box beside ‘Windows of active workbook.’
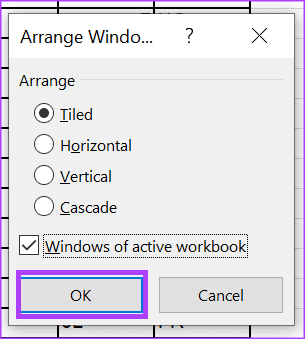
Step 5: Click OK to save your changes.
Using Microsoft Spreadsheet Compare to Analyze Excel Versions
Placing Excel worksheets side by side for comparison requires a lot of manual tracking. It is also best used when the data changes being compared are minute. When comparing a large data set, you can use Microsoft Spreadsheet Compare to save some time and ensure accuracy.
Was this helpful?
Last updated on 01 February, 2024
The article above may contain affiliate links which help support Guiding Tech. The content remains unbiased and authentic and will never affect our editorial integrity.


