NVIDIA GeForce Experience is a utility that helps you keep the GPU drivers up to date. In addition, it offers additional features such as game optimization and overlays for tracking game performance, capturing the gameplay, and broadcasting it to a larger audience. But some users face the ‘NVIDIA GeForce Overlay Not Working’ issue in the app on Windows 10 or Windows 11.
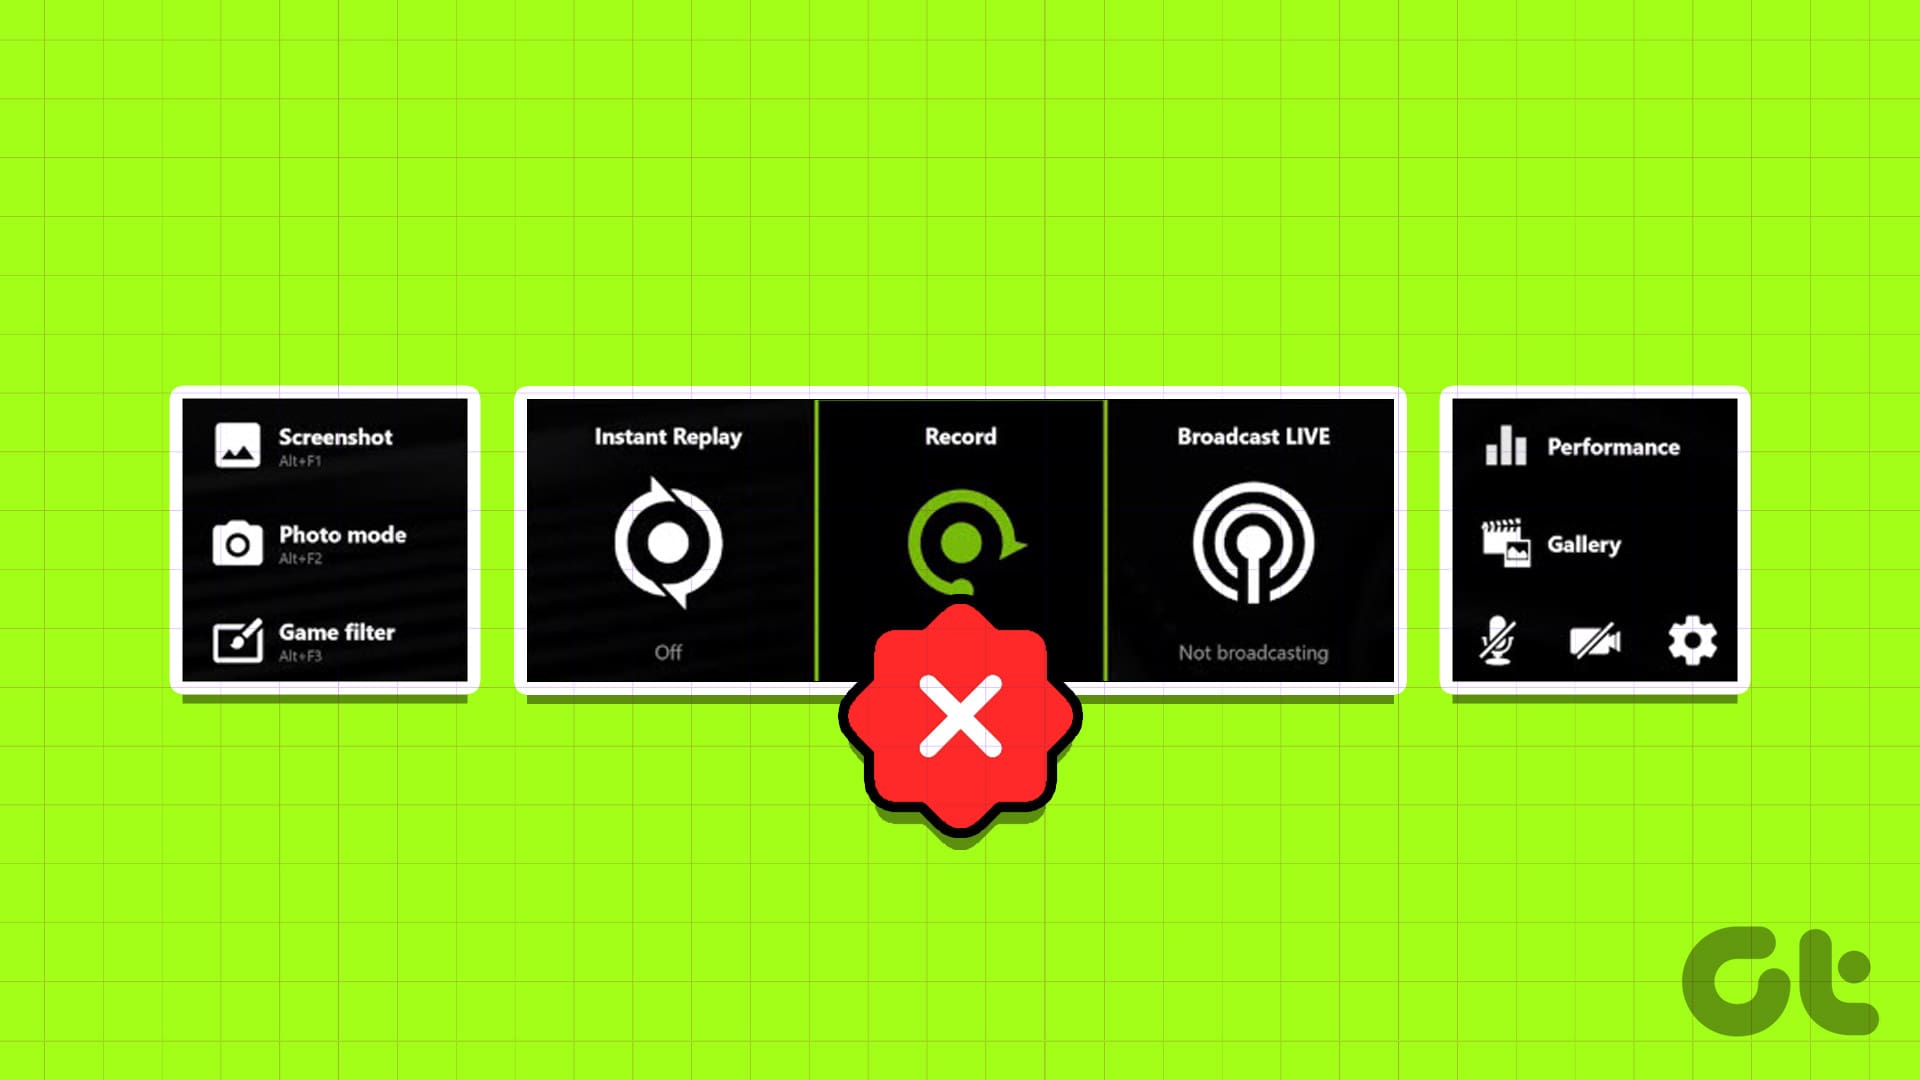
The potential reasons for this issue include misconfigured overlay settings, glitched NVIDIA services, missing media feature pack, and a corrupt or outdated NVIDIA client. Try these nine methods to fix the issue and make the NVIDIA GeForce overlay working again on your Windows 10 or Windows 11 computer.
1. Restart NVIDIA GeForce Experience
Before trying out any advanced fixes, you’ll need to completely close the NVIDIA GeForce Experience and then launch it again. Here’s how to do it:
Step 1: Press the Control + Shift + Escape keyboard shortcut to open the Task Manager.
Step 2: Scroll down and find the NVIDIA GeForce Experience app in the list. Right-click on it and select the End task option.

Step 3: Close the Task Manager.
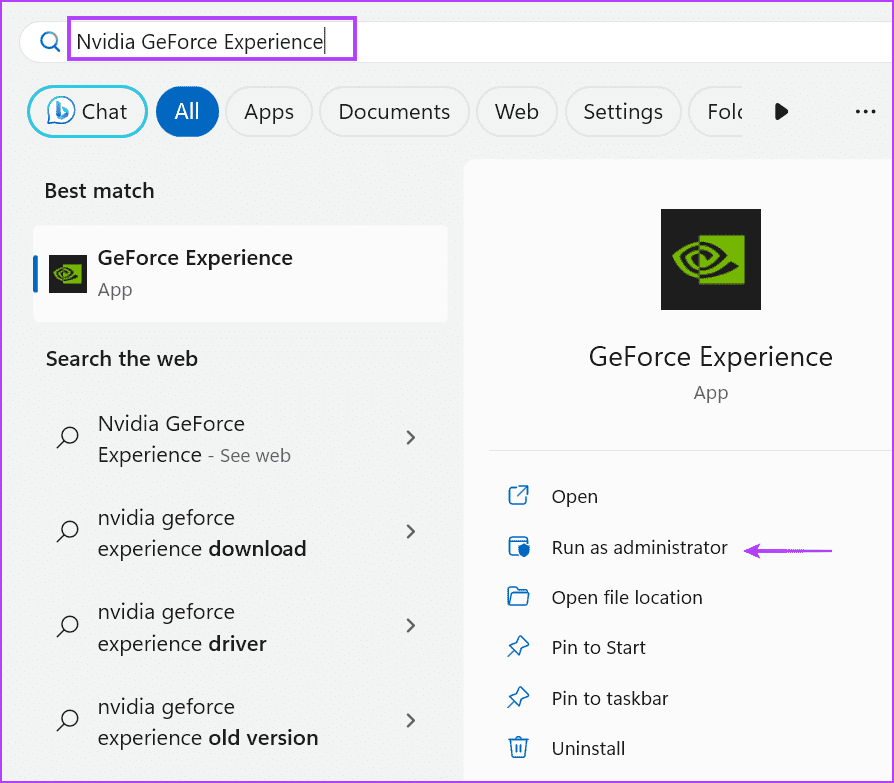
Step 4: Press the Windows key to open the Start menu. Type NVIDIA GeForce Experience in the search box and click on the Run as administrator option.
2. Check Overlay Settings
If the In-game GeForce overlay is disabled, you won’t see it when you press the Alt key + Z keyboard shortcut. The same goes for other overlays like the Performance overlay. So, you need to enable the GeForce overlay and check its settings as well. Here’s how:
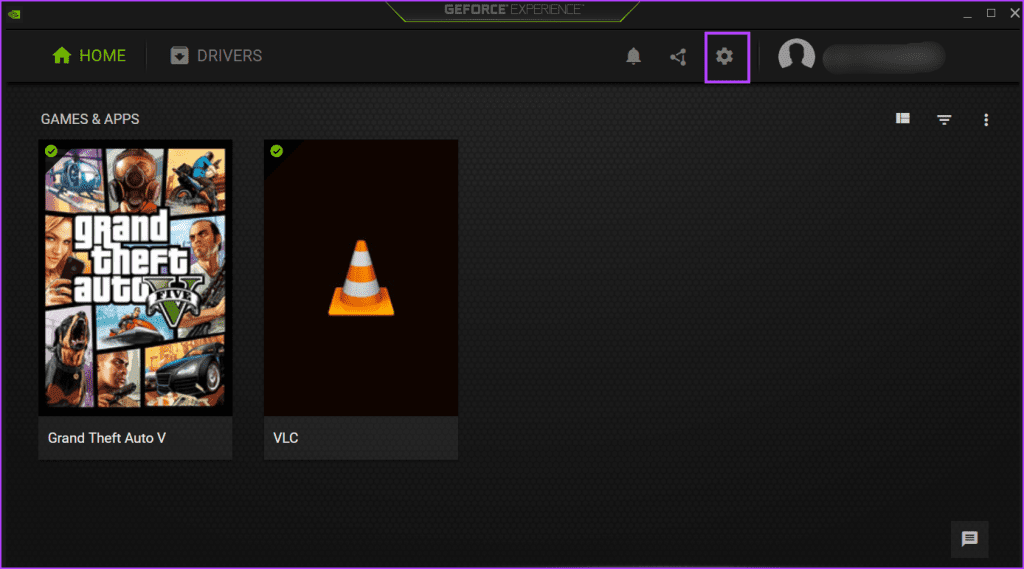
Step 1: Press the Windows key to open the Start menu. Type NVIDIA GeForce Experience in the search box and press Enter.
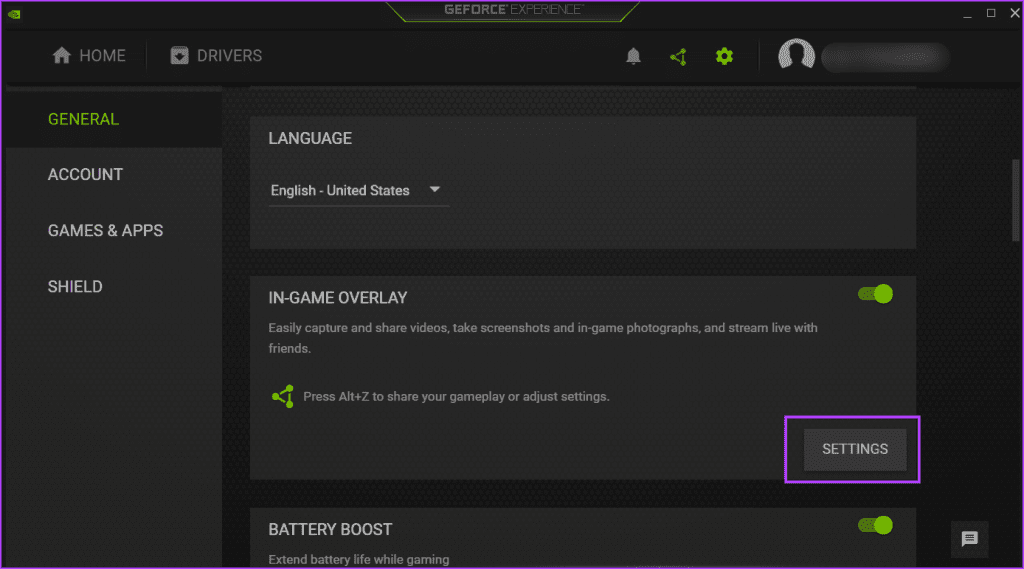
Step 2: Click on the Settings icon at the top-right corner.
Step 3: Scroll down and turn on the toggle next to In-Game Overlay to enable the overlay.

Step 4: Click on the Settings button.
Step 5: Click on the HUD Layout option.
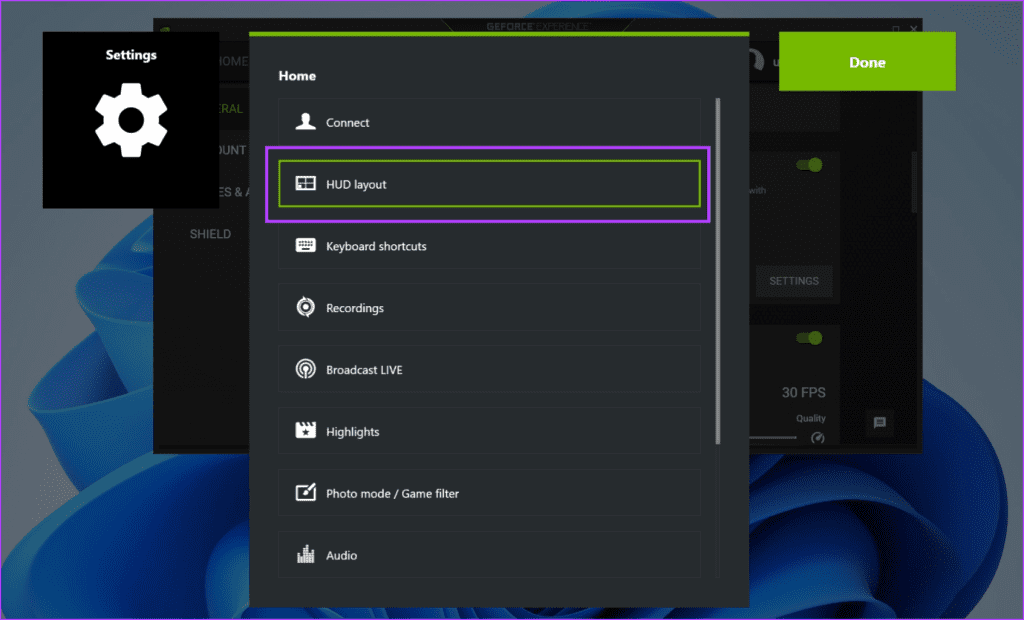
Step 6: Click on the Performance overlay. Select any overlay type and then click on the area on which you want it to appear.
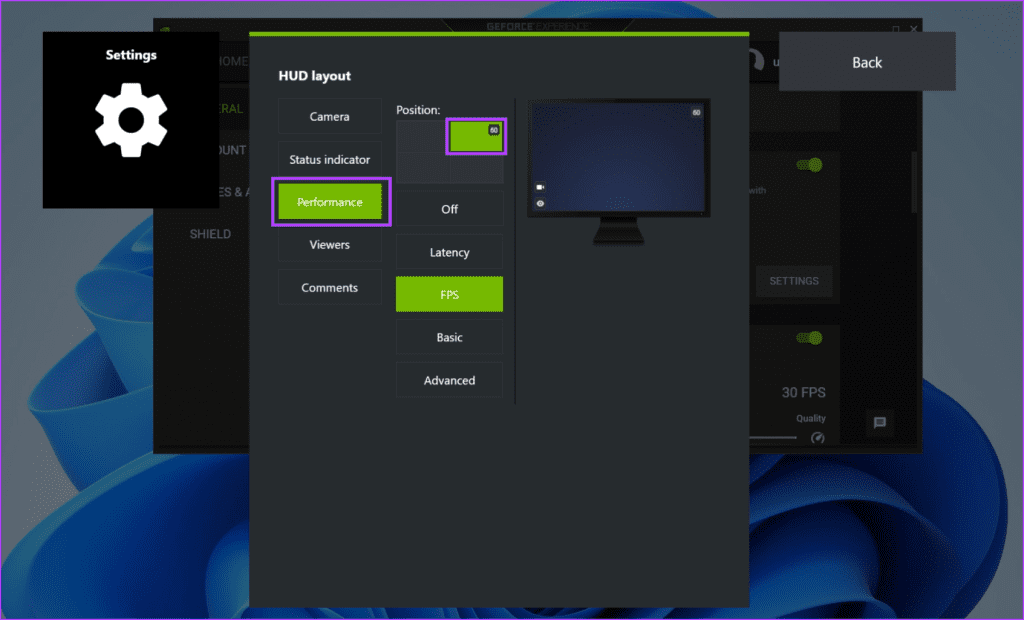
Step 7: Repeat the same for other overlays listed in the HUD layout section.
Step 8: Click on the Back button.

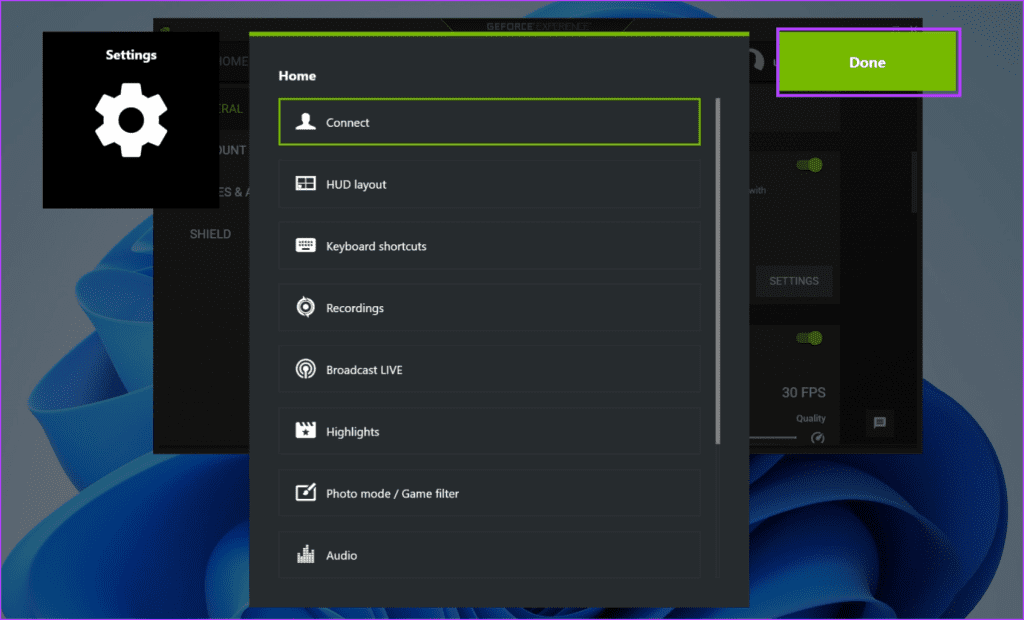
Step 9: Click on the Done button to save the changes.
3. Check NVIDIA Services
NVIDIA Control Panel and NVIDIA GeForce Experience rely on multiple services to function properly. If any of these services stop working, you will face issues with the app. Here’s how to check and ensure those NVIDIA services are working:
Step 1: Press the Windows key to open the Start menu. Type Services in the search box and press Enter.

Step 2: Scroll down and find the ‘NVIDIA Display Container LS’ service. Right-click on it and select the Restart option.
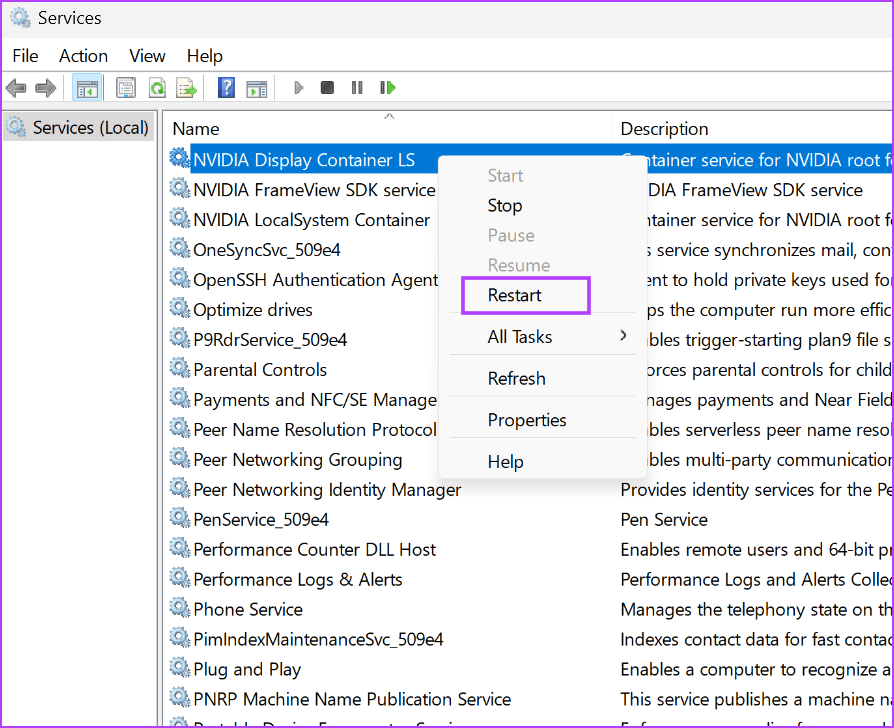
Step 3: Similarly, restart the ‘NVIDIA FrameView SDK’ and ‘NVIDIA LocalSystem Container’ services.
Step 4: Close the Services utility.
4. Enable Experimental Features
Some users were able to fix the In-game GeForce overlay not working in NVIDIA GeForce Experience by enabling the experimental features in the settings. Repeat the following steps:
Step 1: Press the Windows key to open the Start menu. Type NVIDIA GeForce Experience in the search box and press Enter.
Step 2: Click on the Settings icon.
Step 3: Click on the ‘Enable experimental features. A GeForce Experience update may be required’ checkbox.
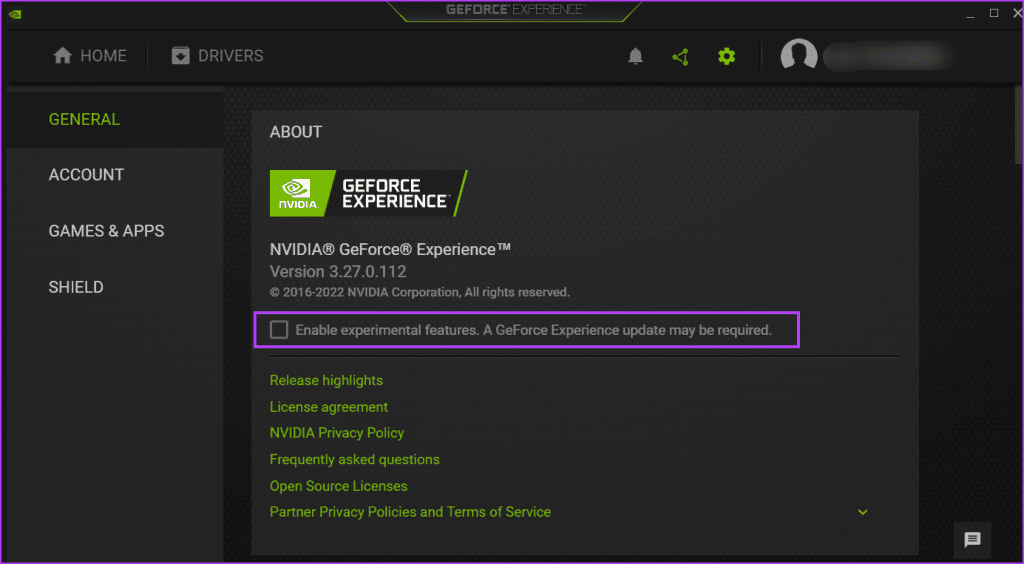
You may have to update the app if it is outdated.
5. Repair Visual C++ Redistributable Installation
Games and apps need different Visual C++ Runtime libraries to work without any issues on Windows 10 and Windows 11. But if the existing installation of the Visual C++ Runtime libraries is corrupt, you must repair it. Here’s how to do it:
Step 1: Press the Windows key to open the Start menu. Type appwiz.cpl in the search box and press Enter to open the Programs and Features page in Control Panel.

Step 2: Right-click on the Visual C++ Runtime package and click on the Change option.
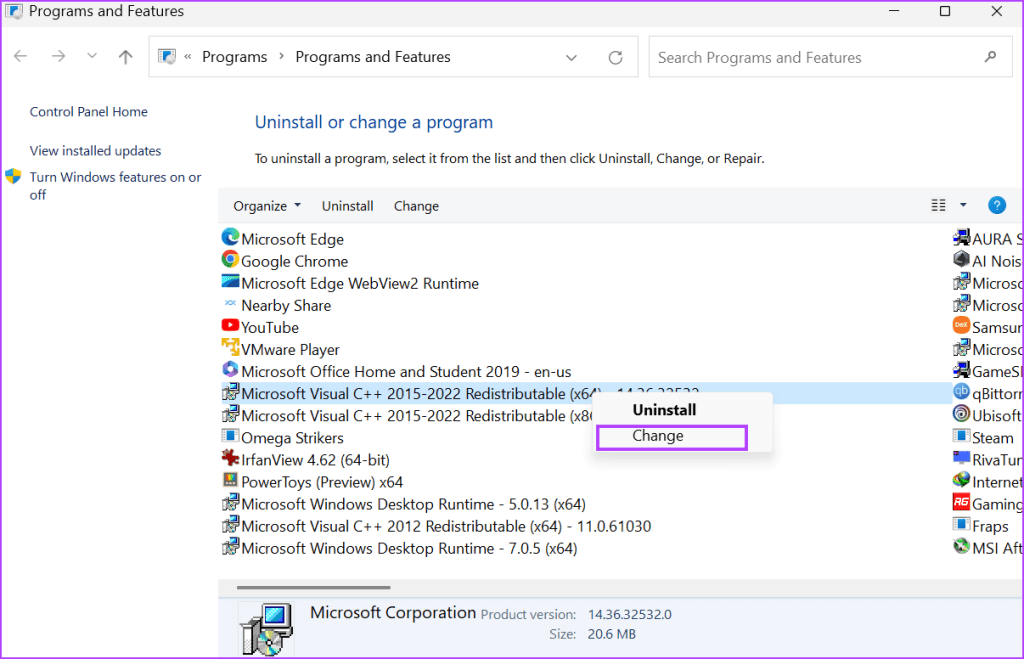
Step 3: Click on the Repair button.

Step 4: The User Account Control window will open. Click on the Yes button.
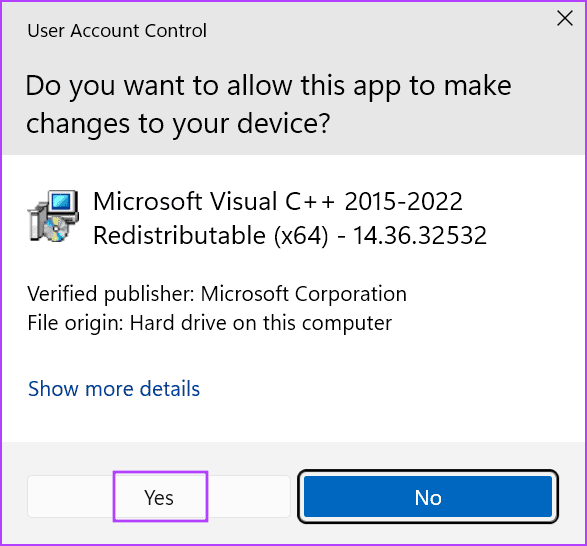
Step 5: Wait for the repair process to complete. After that, click on the Close button.

Step 6: Click on the Restart button.

6. Disable NVFBC Capture in Steam
If you use Steam Remote Play, the NVFBC capture feature can interfere with the NVIDIA GeForce overlay. Unfortunately, NVFBC support has been deprecated on Windows 10 (version 1803) and higher versions.
So, you’ll need to disable the NVFBC capture feature in Steam to ensure it doesn’t disrupt the in-game GeForce overlay in games. Here’s how you can do that:
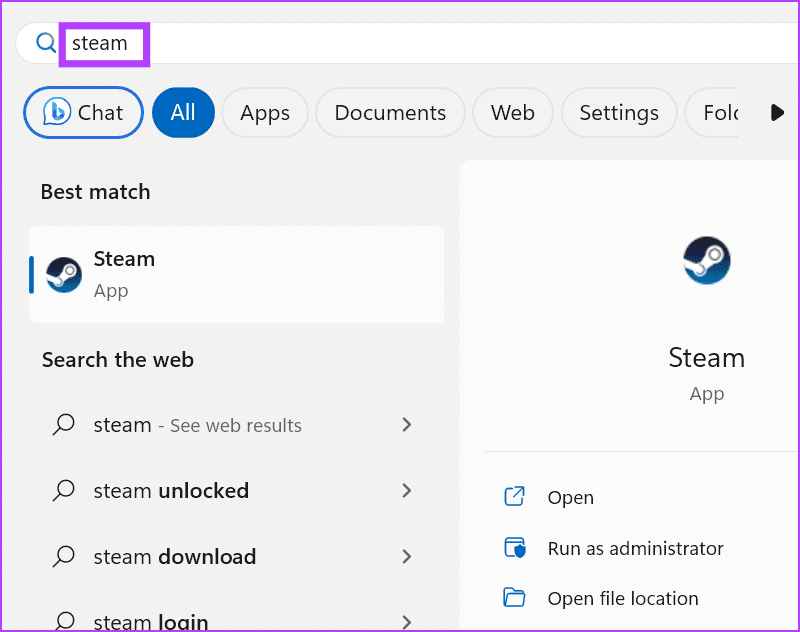
Step 1: Press the Windows key to open the Start menu. Type Steam in the search box and press Enter to open the Steam Client.
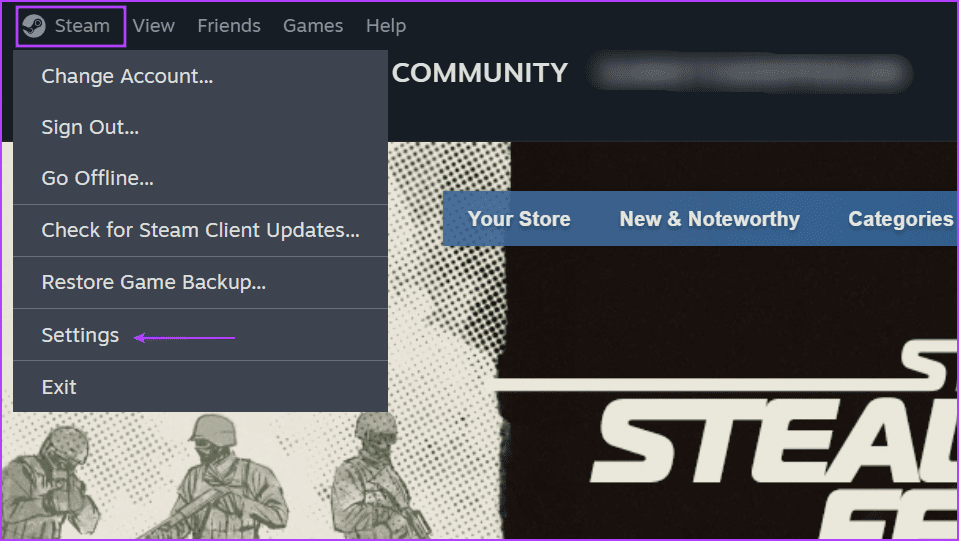
Step 2: Click on the Steam button. Then, click on the Settings option.
Step 3: Now, click on the Remote Play option.

Step 4: Find the ‘Use NVBFC capture on NVIDIA GPU’ option. Click on the toggle to disable it.

Step 5: Close the Steam app.
7. Install the Appropriate Media Feature Pack
Windows 10 and Windows 11’s N edition and KN edition do not have the Windows Media Feature Pack pre-installed. So, if you use either of these Windows editions, you’ll need to install the appropriate Media Feature Pack to fix the NVIDIA overlay not showing the FPS issue. Here’s how:
Step 1: Press the Windows key to open the Start menu. Type features in the search box and press Enter to open the Optional Features page.

Step 2: Click on the View features button.

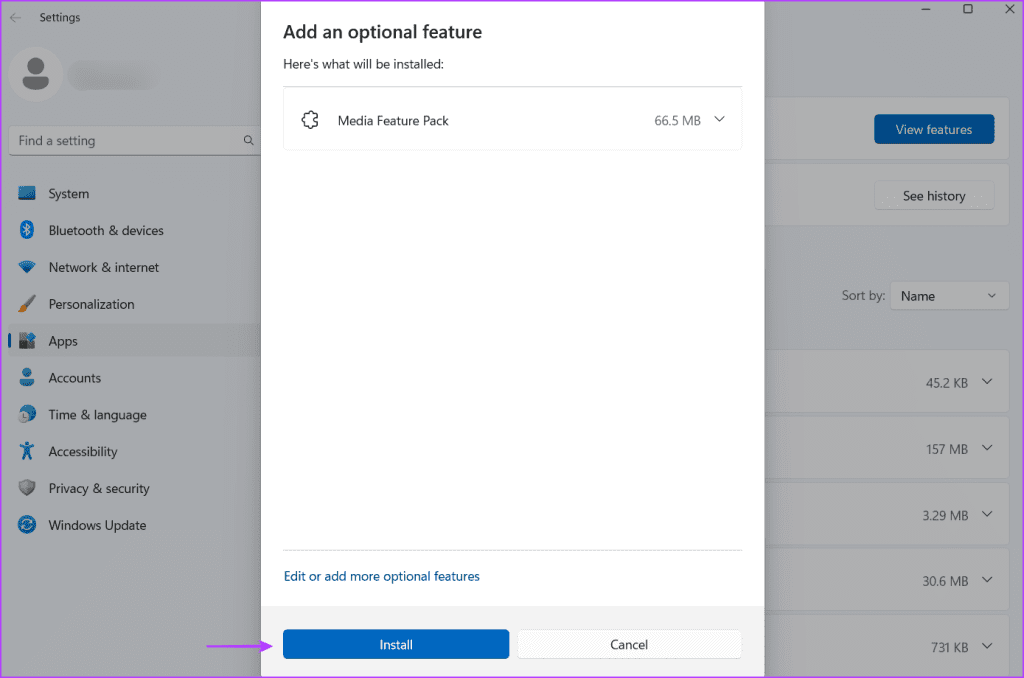
Step 3: Find the Media Feature Pack in the list and click on the checkbox to select it. Then click on the Next button.

Step 4: Click on the Install button.
Step 5: Wait for the feature to install. Restart your PC.
8. Update Windows
An outdated version of Windows 10 or Windows 11 version can also pose problems with apps and features. If you were avoiding Windows updates for a long time, check and download the latest updates. Here’s how:
Step 1: Press the Windows key to open the Start menu. Type Check for updates in the search box and press Enter.

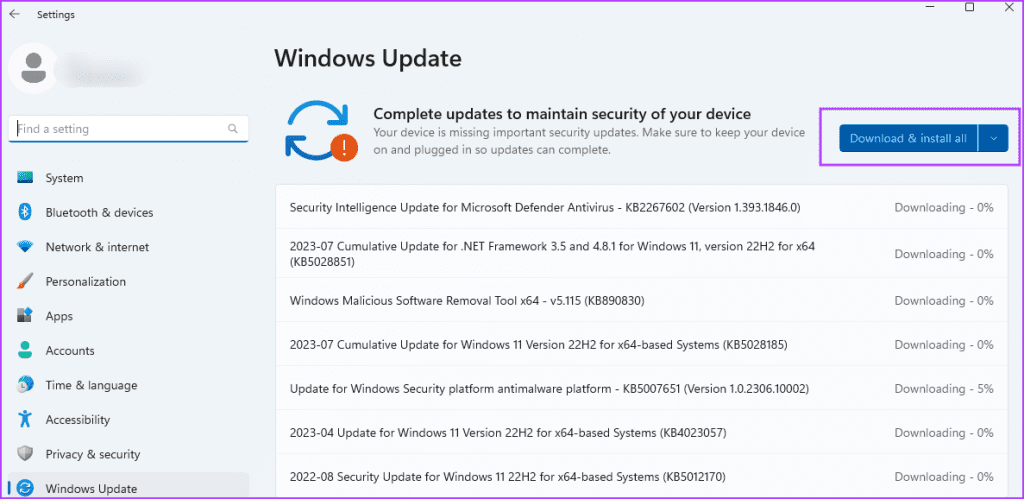
Step 2: Wait for the utility to search for updates. Click on the Download and install button.
Step 3: Restart your PC to apply the update.
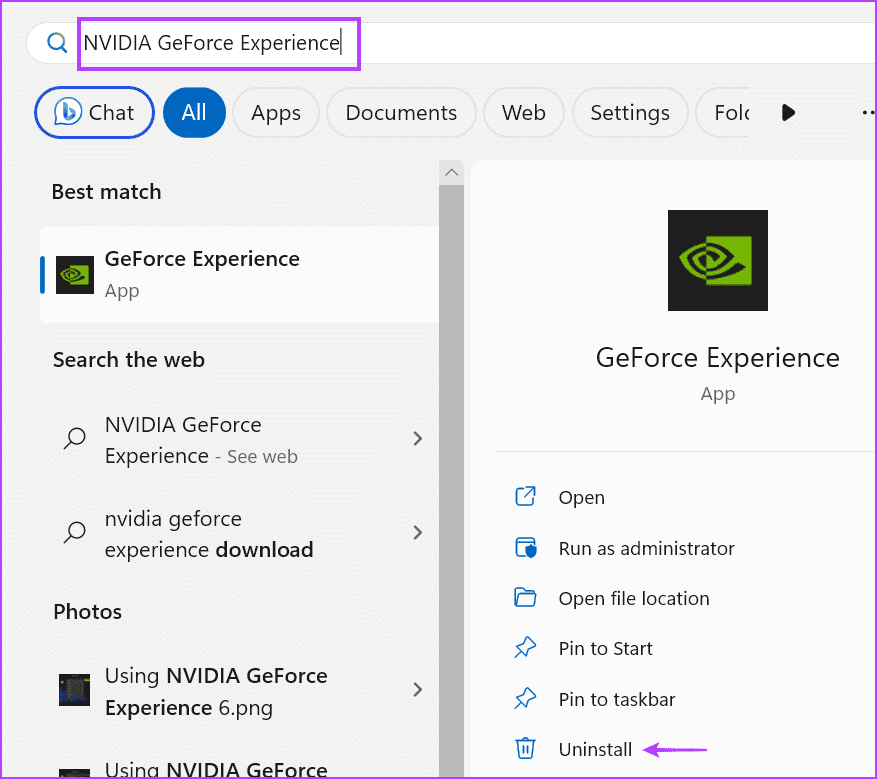
9. Reinstall NVIDIA GeForce Experience
If none of the above methods fixed the ‘Nvidia overlay not working in full screen’ issue, you must reinstall the NVIDIA GeForce Experience app. Here’s how:
Step 1: Press the Windows key to open the Start menu. Type NVIDIA GeForce Experience in the search box and click on the Uninstall option.
Step 2: Right-click on the NVIDIA GeForce Experience program and select the Uninstall/Change option.
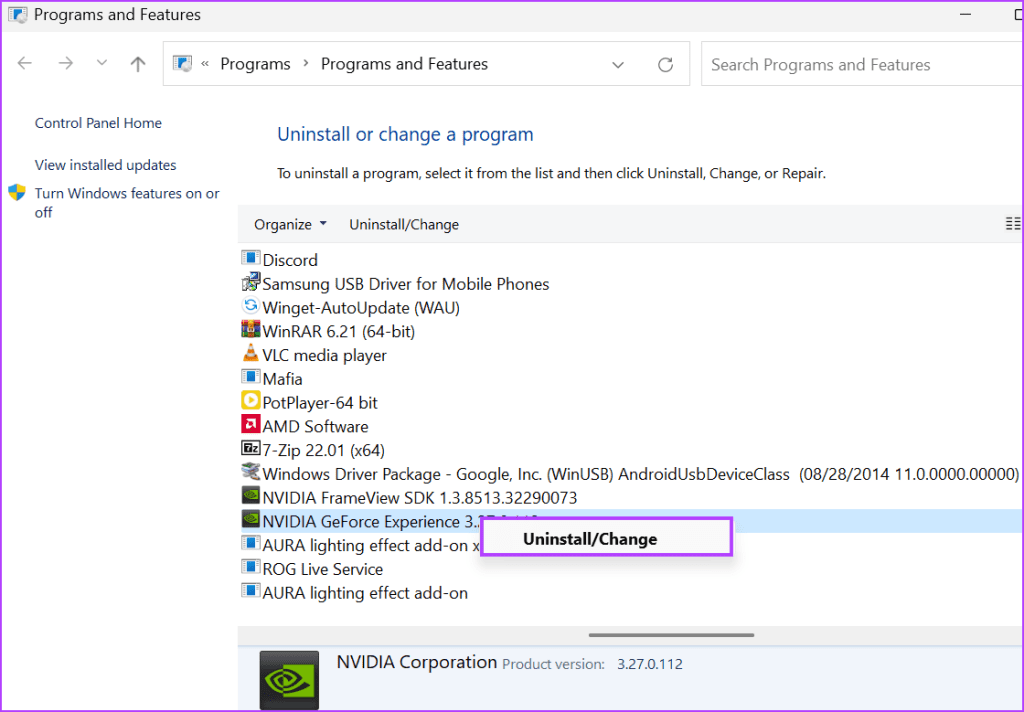
Step 3: The User Account Control window will appear. Click on the Yes button.

Step 4: Follow the on-screen instructions to remove the program.
Step 5: Download the latest version of the NVIDIA GeForce Experience app.
Step 6: Install the app on your PC and enable the overlay feature.
Tackle the NVIDIA GeForce Overlay Issue
Nvidia GeForce overlay not working on Windows 10 or Windows 11 PC impedes the user’s attempt to display performance stats on the screen and from using other features. Check the overlay settings, restart all the NVIDIA services, and enable experimental features in the app. After that, install the Media Feature Pack, disable NvFBC capture in Steam, and reinstall the app.
Was this helpful?
Last updated on 31 July, 2023
Read Next
 How to Download and Install NVIDIA Drivers Without GeForce Experience
When it comes to PC Gaming, NVIDIA's GPUs remain the go-to choice for most gamers out there.
How to Download and Install NVIDIA Drivers Without GeForce Experience
When it comes to PC Gaming, NVIDIA's GPUs remain the go-to choice for most gamers out there.
 3 Fixes if GeForce Experience Not Recording Game Audio in Windows 11
Common Fixes Close and restart GeForce Experience - Click the Arrow button in the system tray notifications area and right-click the NVIDIA icon to select Exit.
3 Fixes if GeForce Experience Not Recording Game Audio in Windows 11
Common Fixes Close and restart GeForce Experience - Click the Arrow button in the system tray notifications area and right-click the NVIDIA icon to select Exit.
 Top 9 Ways to Fix GeForce NOW Error Code 0x800b1004 in Windows 11
GeForce NOW is NVIDIA’s famed cloud game streaming service.
Top 9 Ways to Fix GeForce NOW Error Code 0x800b1004 in Windows 11
GeForce NOW is NVIDIA’s famed cloud game streaming service.
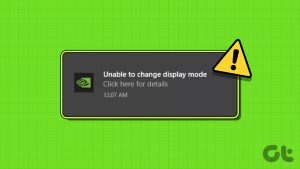 Top 7 Ways to Fix NVIDIA’s ‘Unable to Change Display Mode’ Error on Windows 11
NVIDIA dominates the graphics market so fiercely that people scalp its newly released cards.
Top 7 Ways to Fix NVIDIA’s ‘Unable to Change Display Mode’ Error on Windows 11
NVIDIA dominates the graphics market so fiercely that people scalp its newly released cards.
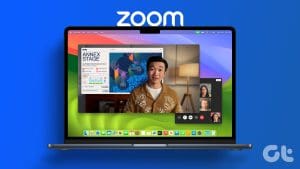 How to Use Presenter Overlay on Mac
Screen Sharing can help you guide your clients or colleagues through a presentation.
How to Use Presenter Overlay on Mac
Screen Sharing can help you guide your clients or colleagues through a presentation.
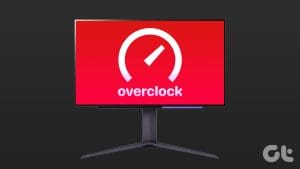 How to Overclock a Monitor: NVIDIA, AMD, and Intel GPUs
When gaming, having a high-performance monitor can make a significant difference in your overall experience.
How to Overclock a Monitor: NVIDIA, AMD, and Intel GPUs
When gaming, having a high-performance monitor can make a significant difference in your overall experience.
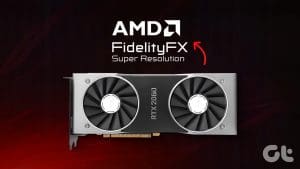 How to Use AMD FSR3 on NVIDIA RTX GPUs
If you already own an NVIDIA GPU, one of the best features available is DLSS technology.
How to Use AMD FSR3 on NVIDIA RTX GPUs
If you already own an NVIDIA GPU, one of the best features available is DLSS technology.
 How to Download and Use NVIDIA Chat with RTX on Windows
AI is almost everywhere; with platforms like ChatGPT, it is now even available on your smartphone.
How to Download and Use NVIDIA Chat with RTX on Windows
AI is almost everywhere; with platforms like ChatGPT, it is now even available on your smartphone.
The article above may contain affiliate links which help support Guiding Tech. The content remains unbiased and authentic and will never affect our editorial integrity.