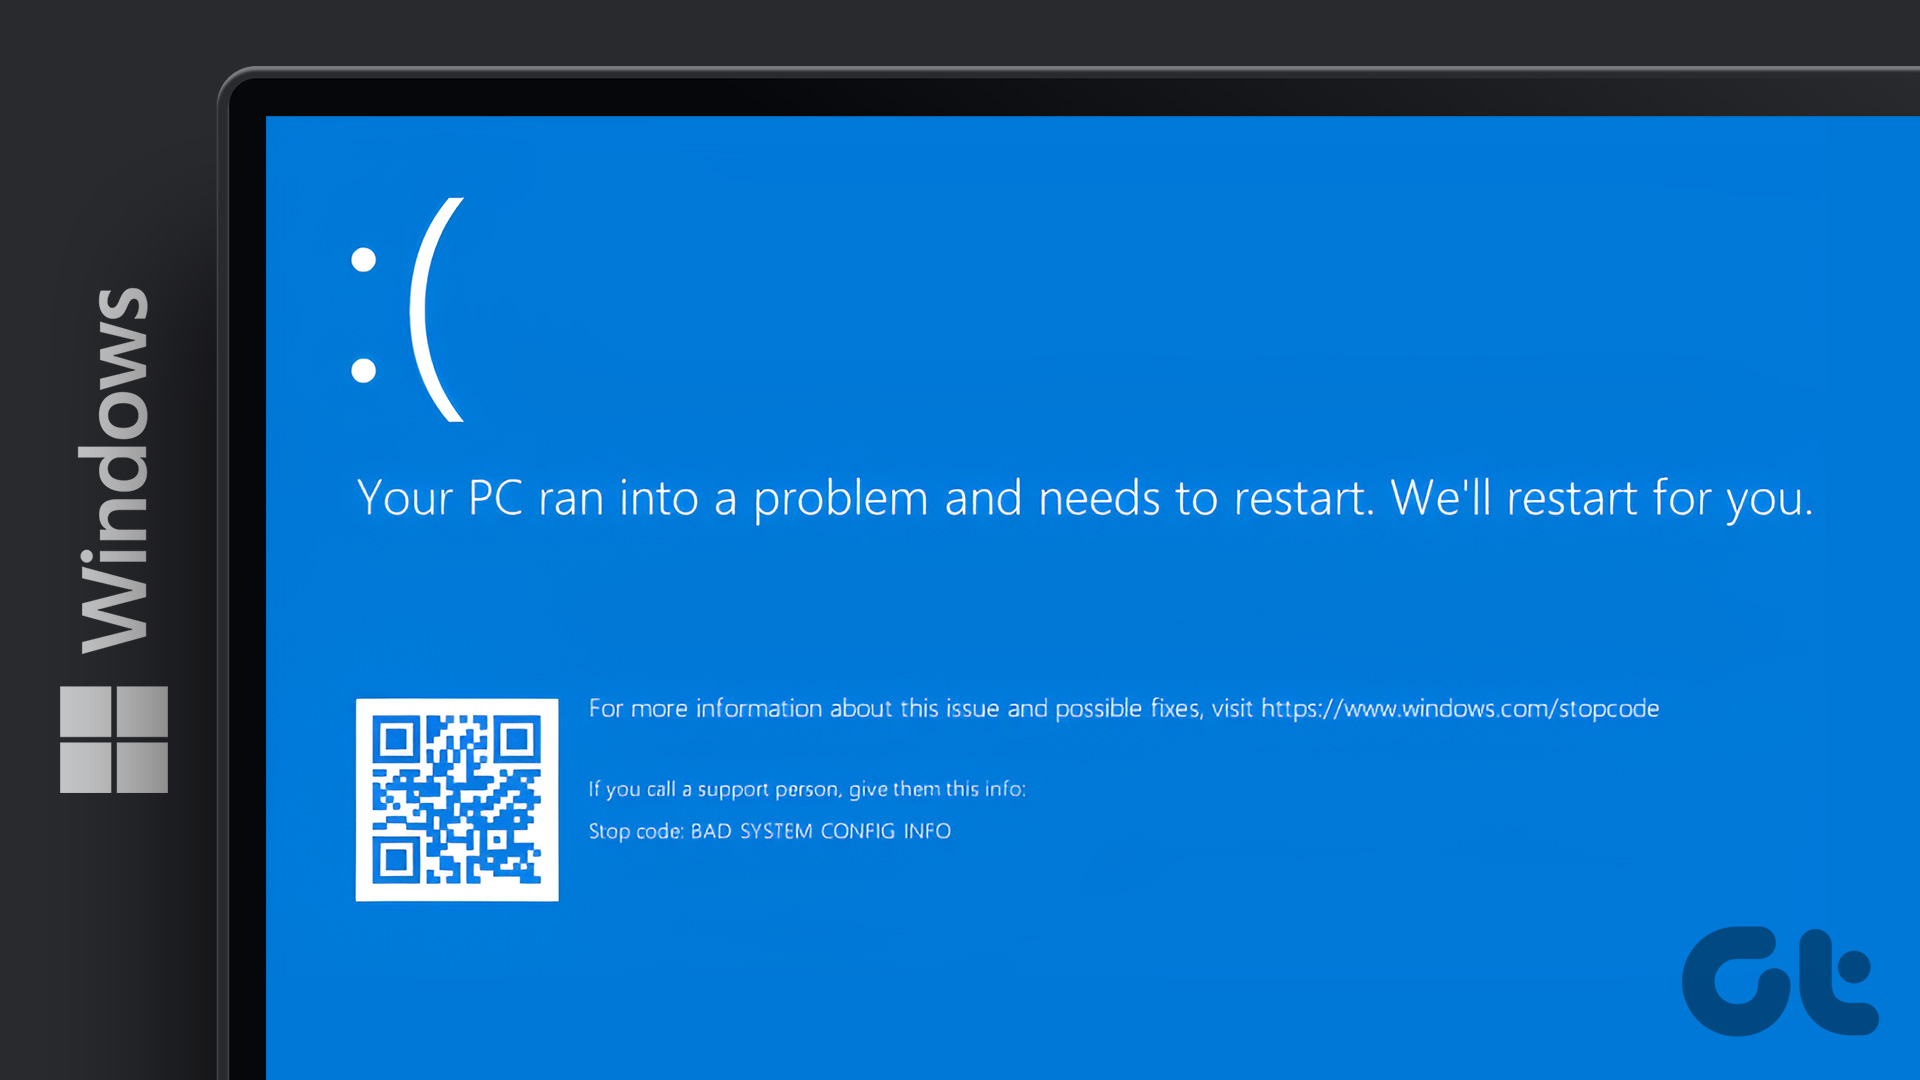
Windows encounters its fair share of BSOD errors. After a BSOD error occurs, the PC restarts and works fine for some users, while others have more frequent crashes and restarts. One such troublesome error is the ‘UNEXPECTED_KERNEL_MODE_TRAP’ error.
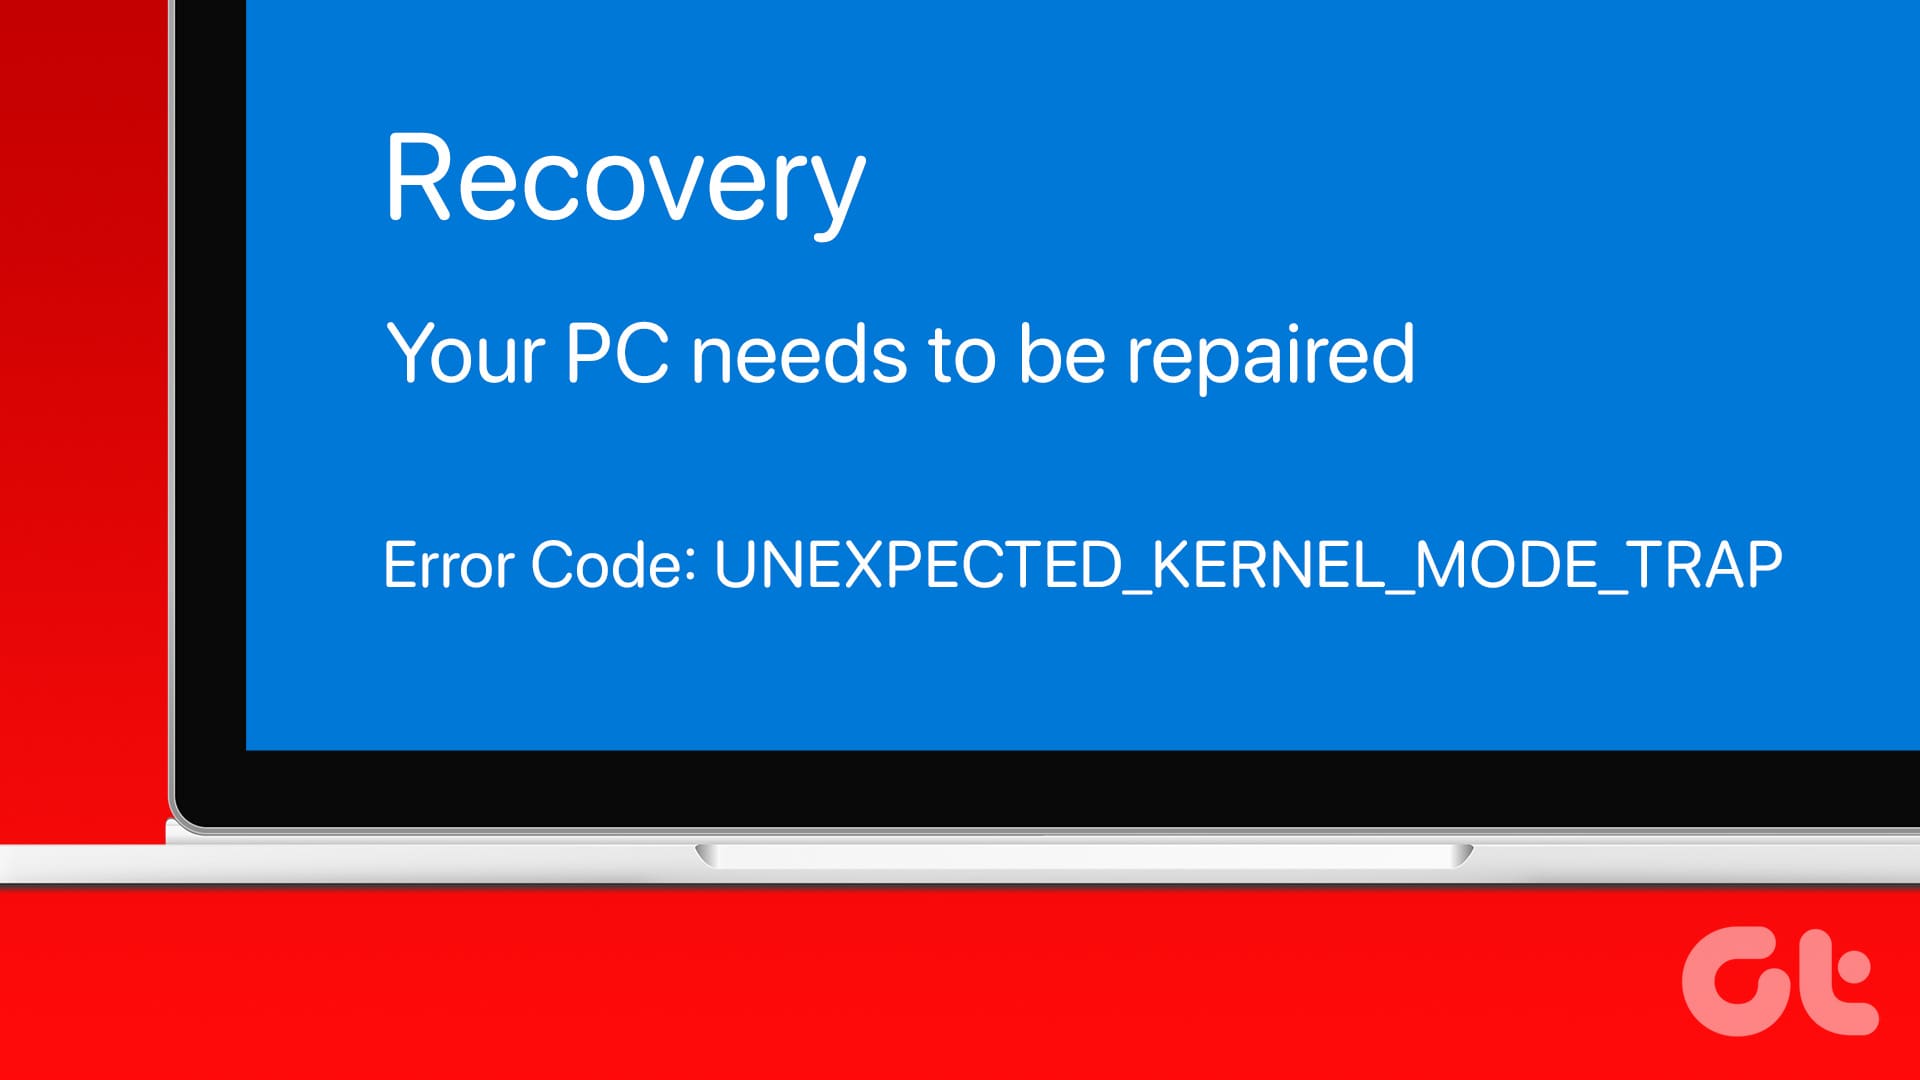
The usual culprits of this error are usually drivers or a conflicting program, resulting in the Blue Screen of Death. But faulty hardware or corrupt system files can also be a reason behind this issue. We will discuss eight methods to fix it and restore your Windows PC to normal. So, let’s get straight to it.
1. Remove the Connected USB Devices
First, you must check if the connected devices are causing a BSOD on your Windows PC. Unplug all the USB devices and restart your PC. Plug in the keyboard and mouse (if you use a desktop) and log in.
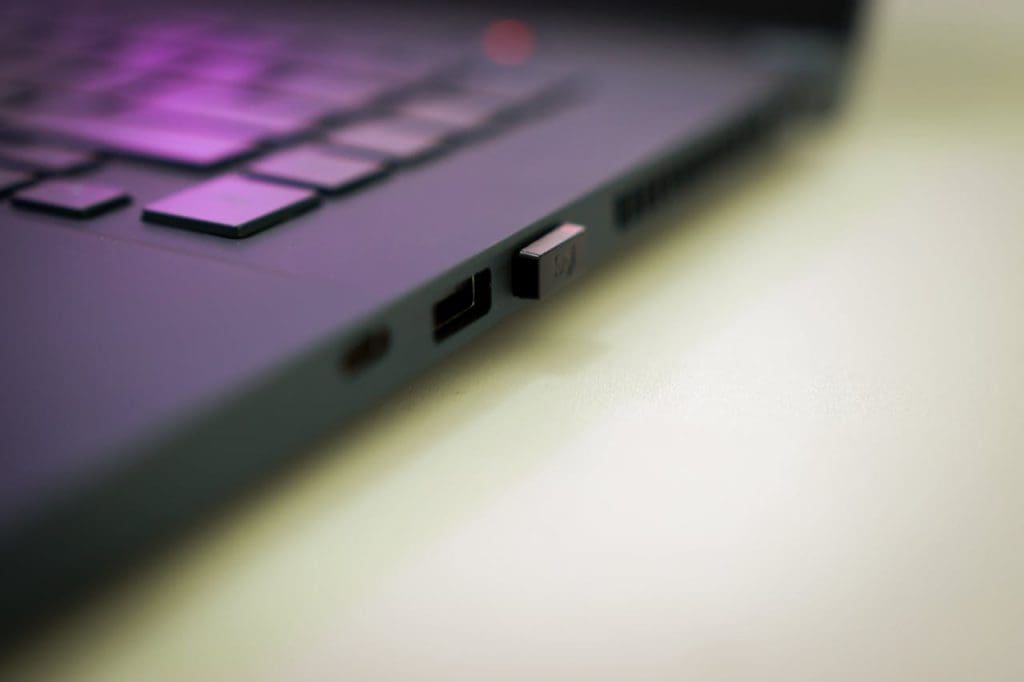
Now, add each USB device individually and check if the blue screen error occurs. If you don’t encounter the error after connecting all USB devices and using the PC for some time, the drivers of these devices aren’t causing the error.
2. Check and Update Drivers
Outdated drivers can become incompatible with newer Windows updates. So, you must update all the device drivers. The simplest way to do this is using the Device Manager. Right-click on a device and select the Update driver option.

However, the utility may not always find and install the latest drivers for your device. You can use an OEM-specific driver update utility (Asus has MyAsus tool) to download and install the latest drivers.
If you have a custom PC, you must download and install each component’s latest drivers from the manufacturer’s website (AMD, NVIDIA, Intel, etc.). It is arduous, but it can help you fix the Windows BSOD error.
3. Remove the Anti-Cheat Software
If you use the EA app and face an error while playing FIFA 23 or other games, the anti-cheat engine could be the reason behind this issue. The anti-cheat engine discourages players from using hacks and cheats while competing in multiplayer events.
But if the anti-cheat engine conflicts with Windows OS components, the ‘unexpected kernel mode trap’ can occur. Since the anti-cheat engine is embedded in the client, you cannot remove it and play games. Wait for EA to release a patch and keep checking for updates.
4. Check RAM For Faults
You can use the Windows Memory Diagnostic utility to check for RAM faults. There are other RAM check tools like Memtest64, but the inbuilt tool will suffice in this case. Here’s how to use it:
Step 1: Press the Windows key to open the Start menu. Type windows memory diagnostic in the search box and press Enter.
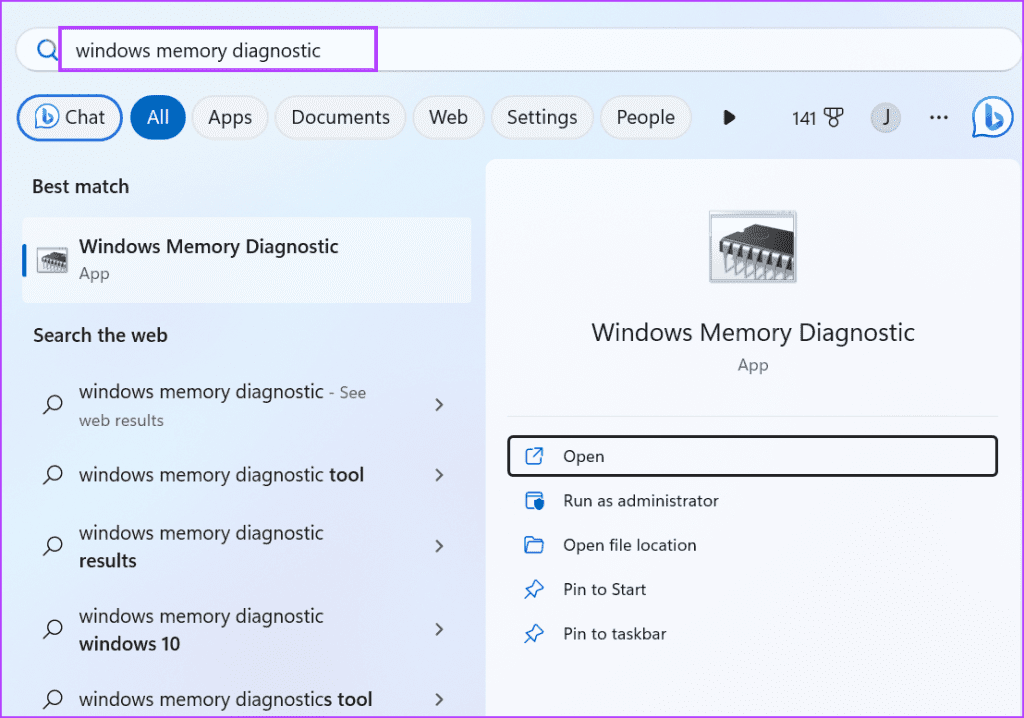
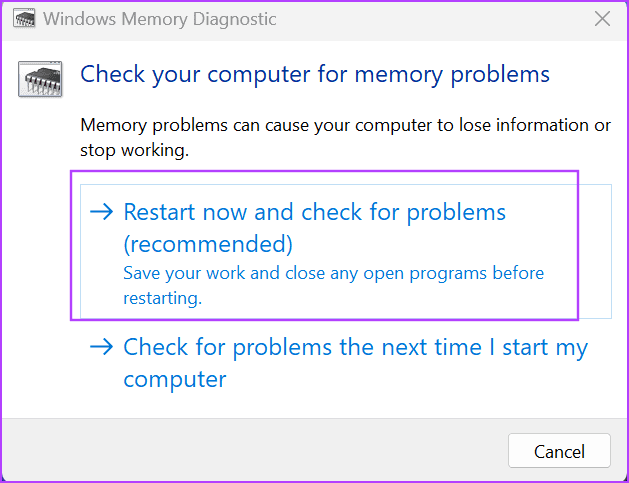
Step 2: Click on the ‘Restart now and check for problems’ option.
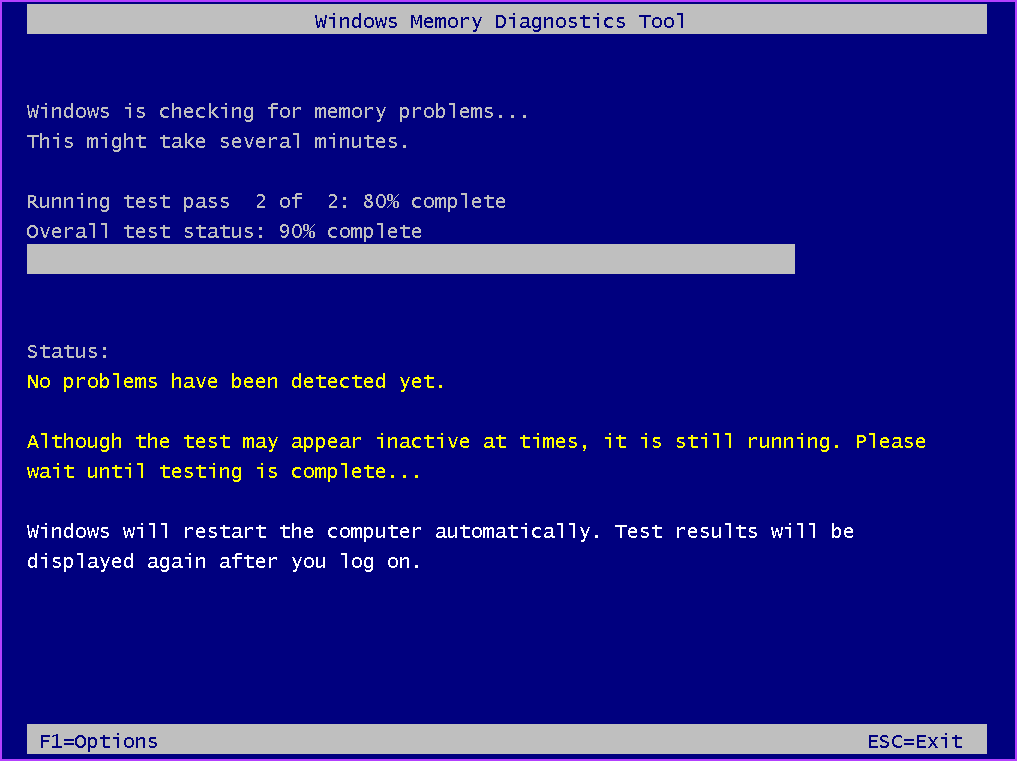
Step 3: Your Windows PC will restart and boot to the Windows Memory Diagnostic page. Wait for the scan to finish.
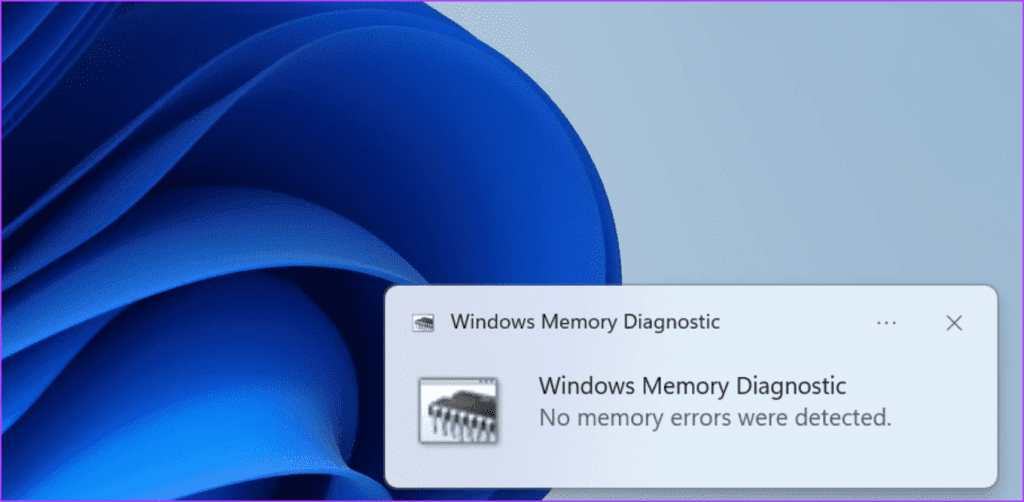
Step 4: Login to your PC. The RAM is fine if you get the ‘No memory errors were detected’ notification on the desktop.
5. Run a Check Disk Scan
After checking the RAM, you must conduct a Check disk scan to find and fix corrupt disk sectors and files. Here’s how to do it:
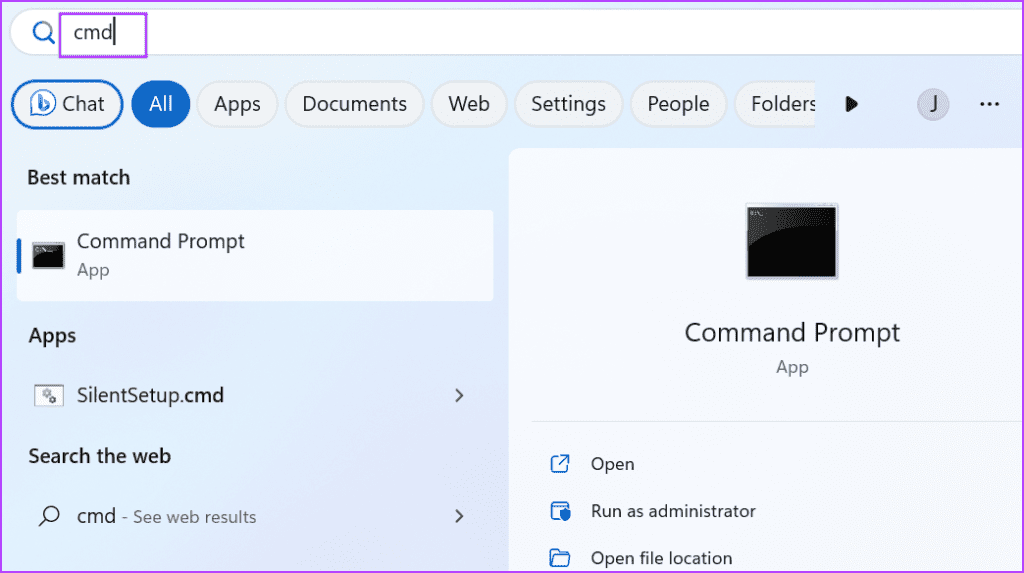
Step 1: Press the Windows key to open the Start menu. Type cmd in the search box and simultaneously press the Ctrl + Shift + Enter keys.
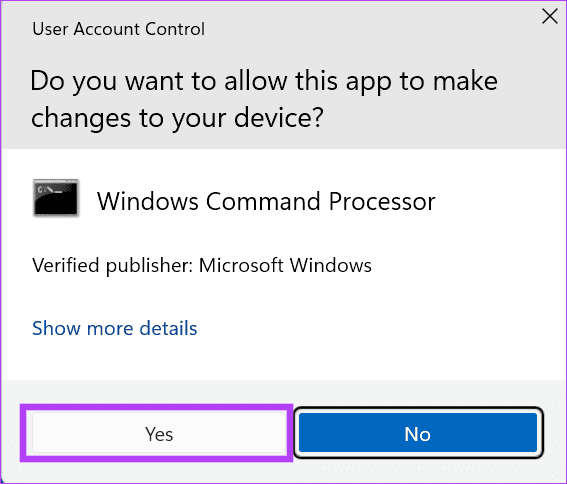
Step 2: The User Account Control window will launch. Click on the Yes button.
Step 3: Input the following command and press Enter:
chkdsk /r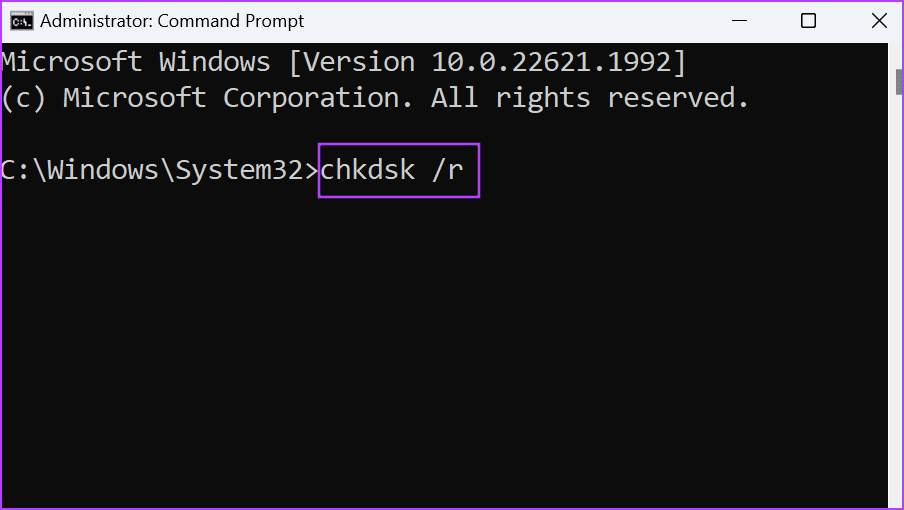
Step 4: Type y in the Command Prompt windows and press Enter.
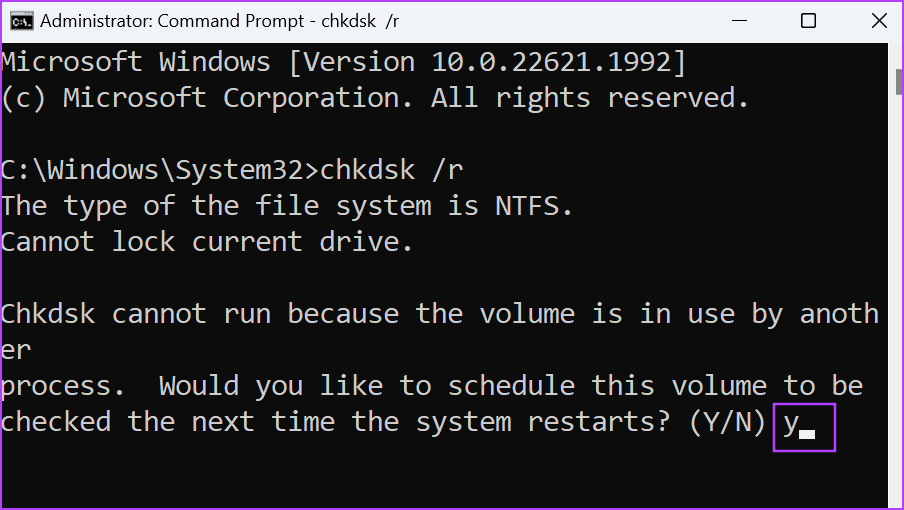
Step 5: Close the Command Prompt window and restart your PC.
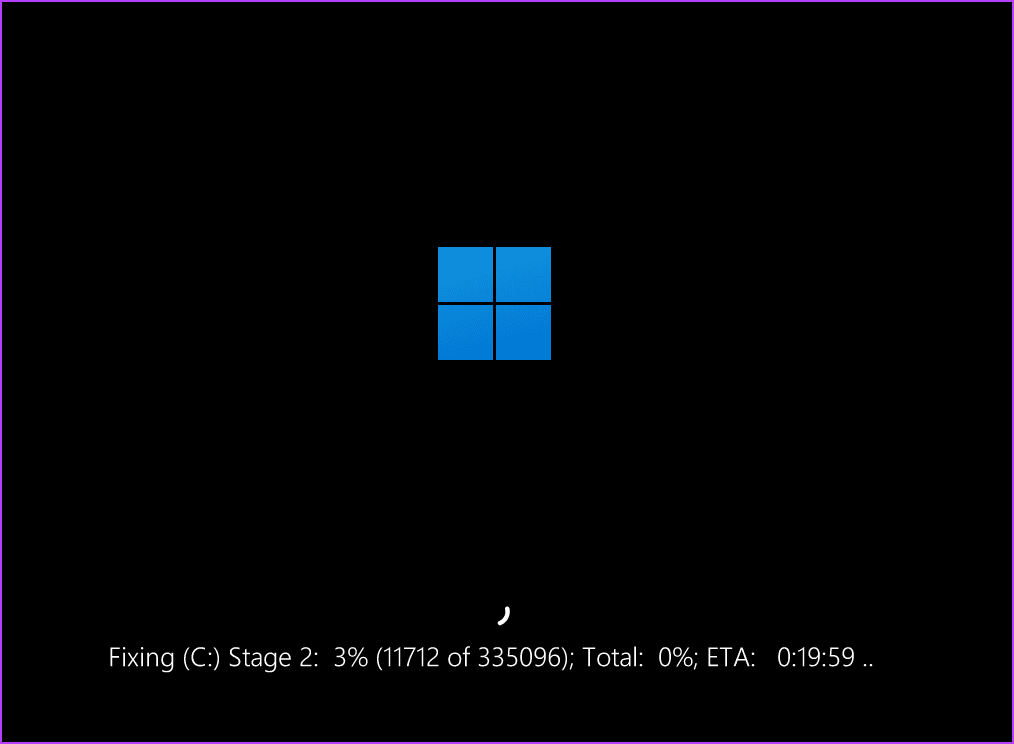
The check disk scan will start and may last one hour or more, depending on your storage disk type (HDD or SSD).
6. Use Clean Boot To Check Software Conflicts
Clean Boot can help you weed out the services belonging to third-party apps that are causing the BSOD error. Here’s how to use it:
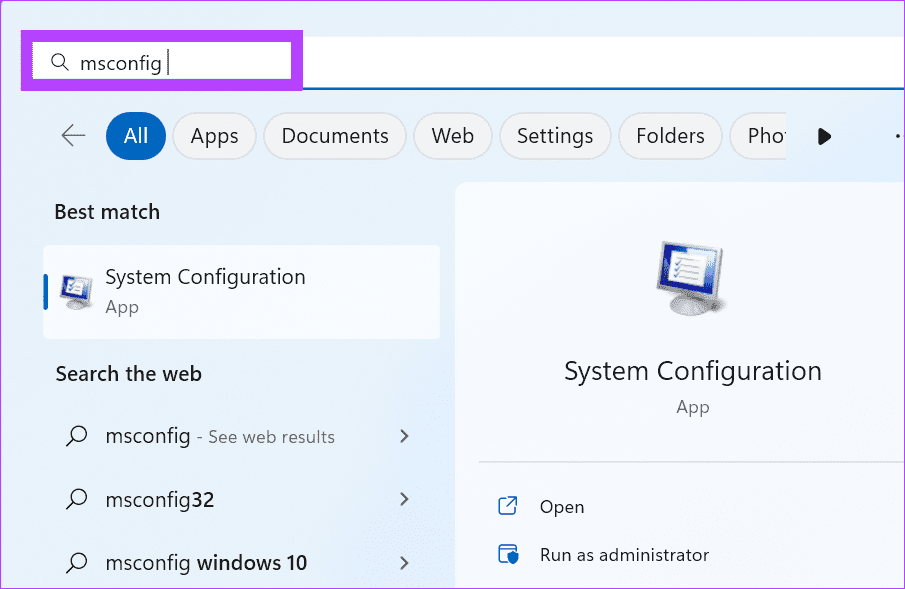
Step 1: Press the Windows key to open the Start menu. Type msconfig in the search bar and press Enter.
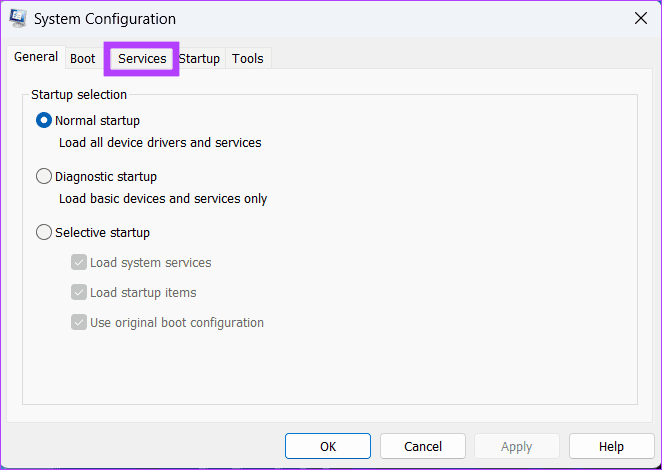
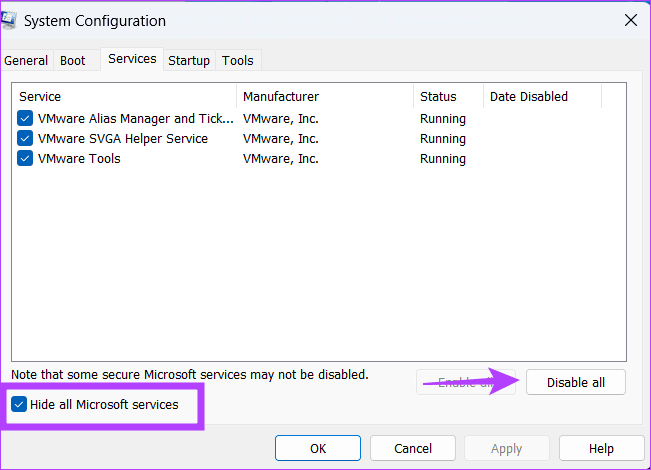
Step 2: The System Configuration utility will launch. Switch to the Services tab.
Step 3: Select the ‘Hide all Microsoft services’ checkbox. Then, click on the Disable all button.
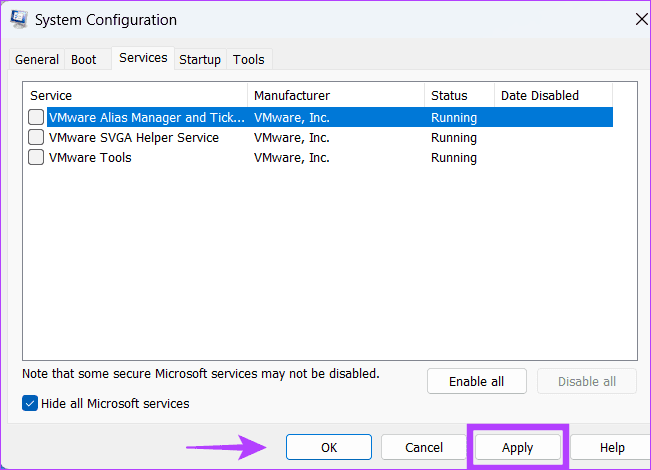
Step 4: Click on the Apply button. Then click on the OK button.
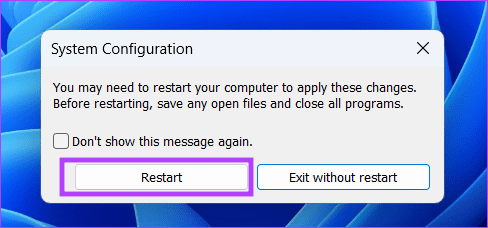
Step 5: From the subsequent menu, click on the Restart button.
Check if the BSOD error occurs after you enter the clean boot state. A third-party service is behind the issue if the error doesn’t occur. Enable some services and re-renter the clean boot state.
Repeat this process until you find the problematic service. Disable the service or uninstall the program from your PC.
7. Clean Install Windows
You can also try and do a clean install for Windows if you are still experiencing random BSODs with the ‘UNEXPECTED_KERNEL_MODE_TRAP’ error. It will remove the corrupt system files, drivers, and registry entries and reinstall the operating system on your PC.
Before you proceed, back all the personal data from the C drive to an external USB or hard disk drive. After that, create a USB installation media using Rufus or the Windows Media Creation tool.
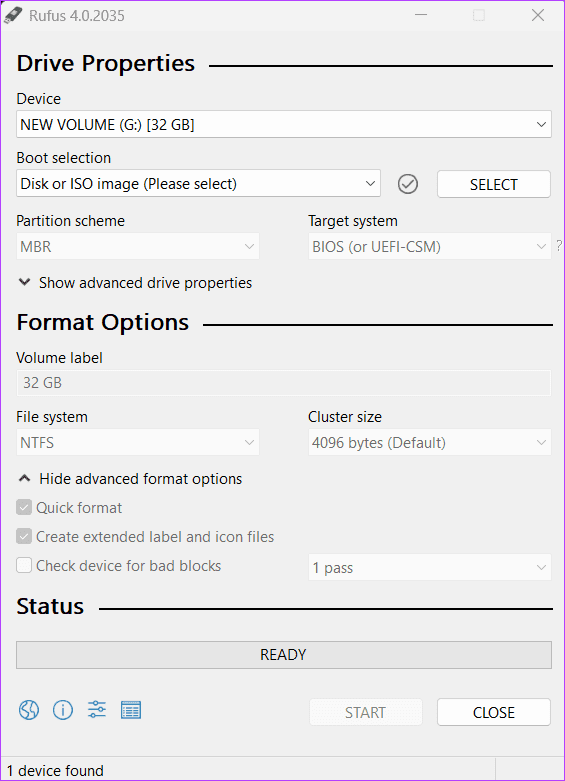
Restart your PC and boot using the USB drive. Follow the on-screen instructions to format the C drive and reinstall Windows on your PC.
8. Rule Out Hardware Faults
After trying out all the software-level fixes, if you still face the BSOD error, it’s time to get your PC checked by a certified technician. It will help you determine the error’s root cause (usually a failing component). Replace the faulty component to fix the issue.
Resolve BSOD Errors
These were the eight methods to fix the ‘UNEXPECTED_KERNEL_MODE_TRAP’ BSOD error in Windows. Usually, updating the drivers and disabling the problematic program resolve this issue. Share the method that worked for you in the comments.
Was this helpful?
Last updated on 22 February, 2024
The article above may contain affiliate links which help support Guiding Tech. The content remains unbiased and authentic and will never affect our editorial integrity.

