Method 1: Enable Opera GX’s Built-in RAM Limiter
Enabling the built-in RAM limiter in Opera GX should be your first solution since this feature will manage how much memory the browser can use. Follow the steps below.
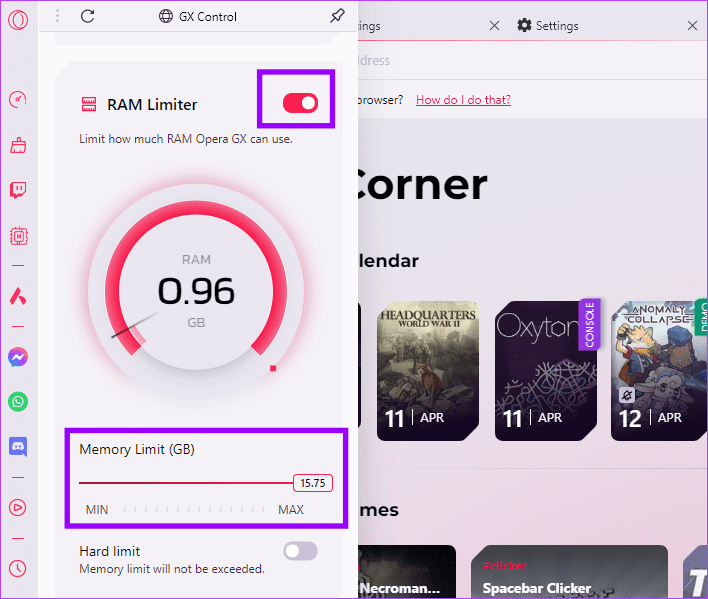
Step 1: Launch the app and click on the GX Control icon on the left panel.
Step 2: Enable the toggle for RAM Limiter, set the limit using the slider, then toggle on Hard limit.
Method 2: Use GX Control to Reduce RAM and CPU Usage
The Opera GX control panel helps check how many resources your browser uses and limits it according to your requirements. This can come in handy to limit the RAM usage of Opera GX. Here’s how to use it.
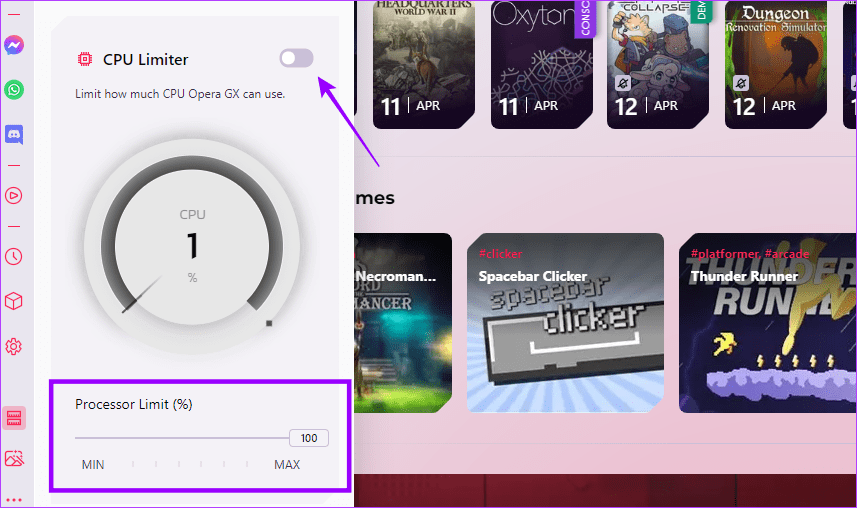
Step 1: Open Opera GX > go to the sidebar menu > click on GX Control.
Step 2: Scroll down and enable the CPU Limiter, then use the slider to set the max Processor limit.
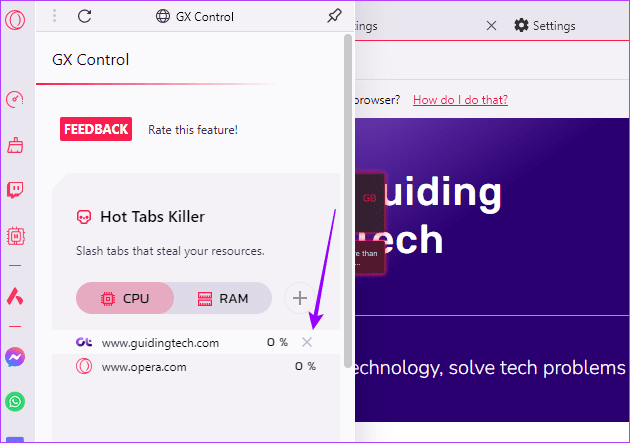
Step 3: Scroll to Hot Tabs Killer > click the close icon for unused tabs.
Note that these RAM reduction processes are essential because high RAM may cause Windows 11 to crash.
Method 3: Disable Background Processes
Opera GX also has a built-in Task Manager to help identify and end processes using too much memory. Here’s how to access and use it.
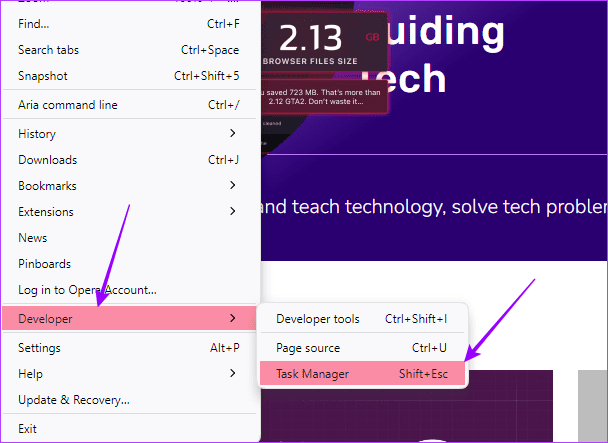
Step 1: Open Opera GX and click on the menu icon at the top left corner.

Step 2: Click on Developer > Task Manager.
Step 3: Now, select the processes using too much memory and click on End process.

Method 4: Turn off Hardware Acceleration
When turned on, hardware acceleration allows Opera GX to use your system’s resources to run its processes. This can slow down other apps and features on your device. To prevent this, turn off hardware acceleration for Opera GX. Here’s how to do it.
Step 1: Open Opera GX and click the Alt + P keys to open Settings.
Step 2: Go to the Browser tab and turn off the toggle for Use hardware acceleration when available in the System menu.

Step 3: Now, click on Relaunch.
Method 5: Disable Extensions
While extensions help add features to your browsers, they can also become resource hoggers. Depending on your extension permission, they can run in the background and use your system resources to complete processes, which may make Opera’s gaming browser use additional resources.
Step 1: Open Opera GX > click on the Extension icon from the sidebar menu.
Step 2: Now, turn off the slider for the desired extensions.
Method 6: Disable Background Sync
Even if you close pages, they might still send and receive information if the background sync setting is enabled. This can also be why Opera GX is running out of memory. Here’s how to fix that by turning off the background sync setting.
Step 1: Open Opera GX and press Alt + P to open Settings.
Step 2: Here, click on Privacy and security > Site Settings.
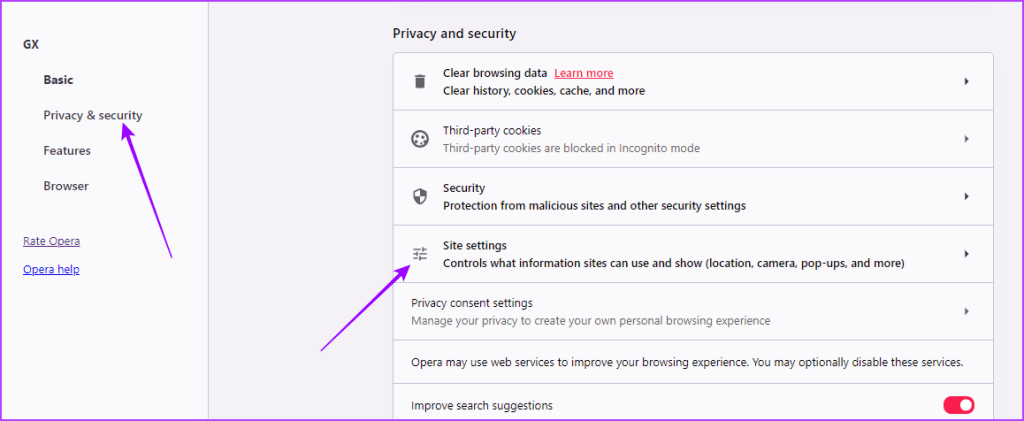
Step 3: Scroll up and click on Background sync.
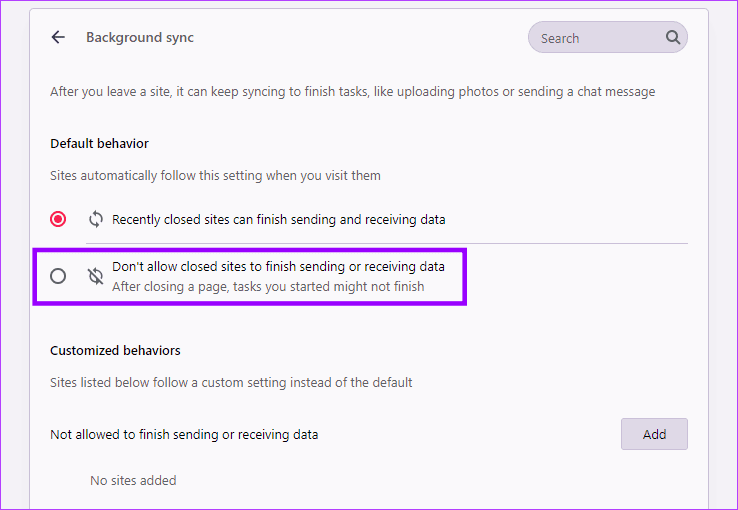
Step 6: Then, select the Don’t allow closed sites to finish sending or receiving data option.
Method 7: Disable JavaScript
You can also turn off JavaScript to remove pop-up ads and trackers, which will load the pages faster and reduce the browser’s memory usage. Here’s how to do it.
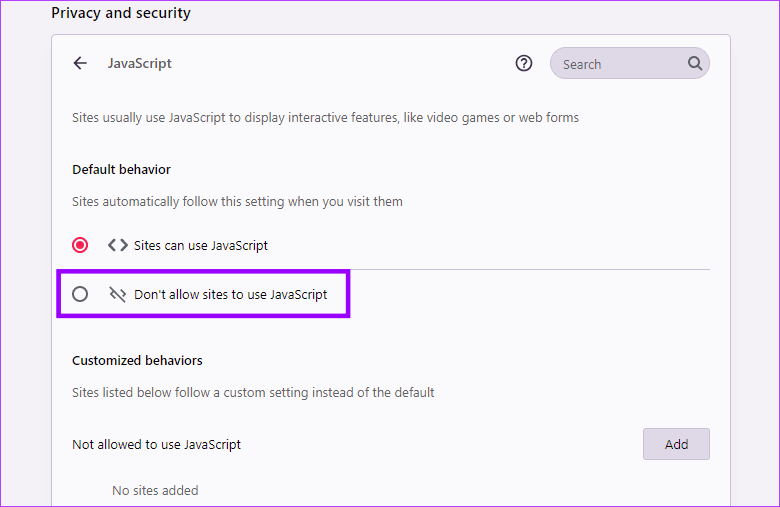
Step 1: Open Opera GX and press Alt + P to open Settings.
Step 2: Here, click on Privacy and security > Site Settings.
Step 3: Click on JavaScript > select Don’t allow sites to use Javascript.
Method 8: Turn off Built-in VPN
All Opera browsers have VPN services that let you browse the internet without worrying about your history, location, or any other data being recorded. However, this can also cause the pages to load slowly, making Opera GX consume high memory.
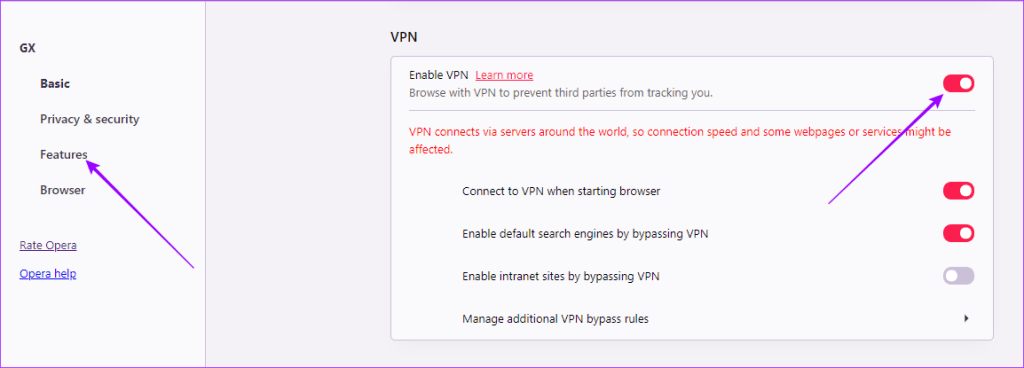
Step 1: Open Opera GX and press Alt + P.
Step 2: Now, go to the Features tab > turn off the toggle for Enable VPN.
Method 9: Clear Browser Cache
Browser cache is a record of sorts for all the pages you have previously visited. While this cache can help decrease your browser’s loading time, if it’s accumulated over time, it can also slow down the browser processes and use more memory. To prevent this, always clear your browser’s cache from time to time.
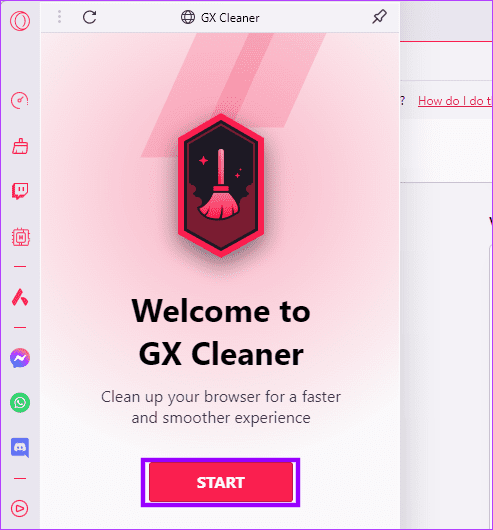
Step 1: Open Opera GX > click on GX Cleaner from the sidebar menu > click Start.
Step 2: Now, select Cache and Cookies from the options and click on START CLEANING.
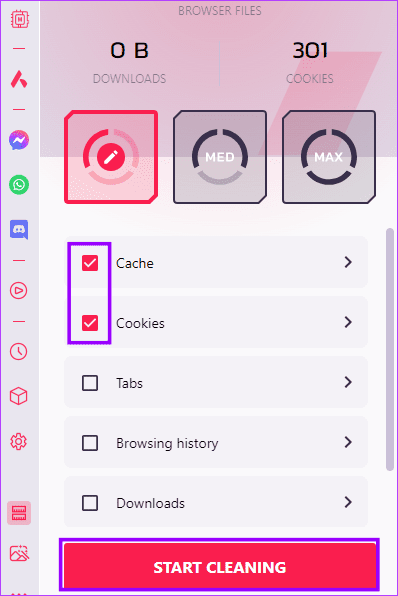
Step 4: Once it is over, click on Done.
Note that some of these solutions may apply to other browsers like Microsoft Edge.
Was this helpful?
Last updated on 22 April, 2024
Read Next
 Opera GX vs. Chrome: Is Opera GX better than Chrome
For the longest time, Google Chrome has been the go-to browser for a majority of us.
Opera GX vs. Chrome: Is Opera GX better than Chrome
For the longest time, Google Chrome has been the go-to browser for a majority of us.
 Opera vs Opera GX: Should You Switch to the Gaming Browser
Opera is one of the better Chromium-based browsers out there.
Opera vs Opera GX: Should You Switch to the Gaming Browser
Opera is one of the better Chromium-based browsers out there.
 10 Ways to Limit Cellular Data Usage on iPhone
Method 1: Uninstall Apps Consuming Excessive Cellular Data iOS offers a detailed breakdown of mobile data consumption to track apps demanding excessive data.
10 Ways to Limit Cellular Data Usage on iPhone
Method 1: Uninstall Apps Consuming Excessive Cellular Data iOS offers a detailed breakdown of mobile data consumption to track apps demanding excessive data.
 5 Ways to Limit Mobile Data Usage on Android
You can use Mobile Data on your Android phone especially while being outdoors to cater to your needs.
5 Ways to Limit Mobile Data Usage on Android
You can use Mobile Data on your Android phone especially while being outdoors to cater to your needs.
 How to Update Opera Browsers on Desktop and Mobile
Method 1: Update Opera Browser on iPhone Updating the Opera browsers on your iPhone is a straightforward process.
How to Update Opera Browsers on Desktop and Mobile
Method 1: Update Opera Browser on iPhone Updating the Opera browsers on your iPhone is a straightforward process.
 How to Allow or Block Pop-ups and Redirects on Opera
How to Allow or Block Pop-Ups and Redirects on Opera By default, Opera does not require you to block ads and pop-ups as it protects you from these annoying contents.
How to Allow or Block Pop-ups and Redirects on Opera
How to Allow or Block Pop-Ups and Redirects on Opera By default, Opera does not require you to block ads and pop-ups as it protects you from these annoying contents.
 Top 3 Ways to Limit Battery Charge on a MacBook
All Li-ion and polymer batteries have a limited lifespan.
Top 3 Ways to Limit Battery Charge on a MacBook
All Li-ion and polymer batteries have a limited lifespan.
 How to Get Rid of Facebook Marketplace Limit Reached Problem
Facebook Marketplace is a powerful platform to buy and sell products.
How to Get Rid of Facebook Marketplace Limit Reached Problem
Facebook Marketplace is a powerful platform to buy and sell products.
The article above may contain affiliate links which help support Guiding Tech. The content remains unbiased and authentic and will never affect our editorial integrity.