Google Maps is quite helpful to navigate your way in an unknown area or city. It’s also a great way to search for common establishments like restaurants and places of interest. However, if you know your way around that, you might not want to take the usual route that Google Maps suggests. Whether it’s for yourself or others, you can create and share custom directions on Google Maps.
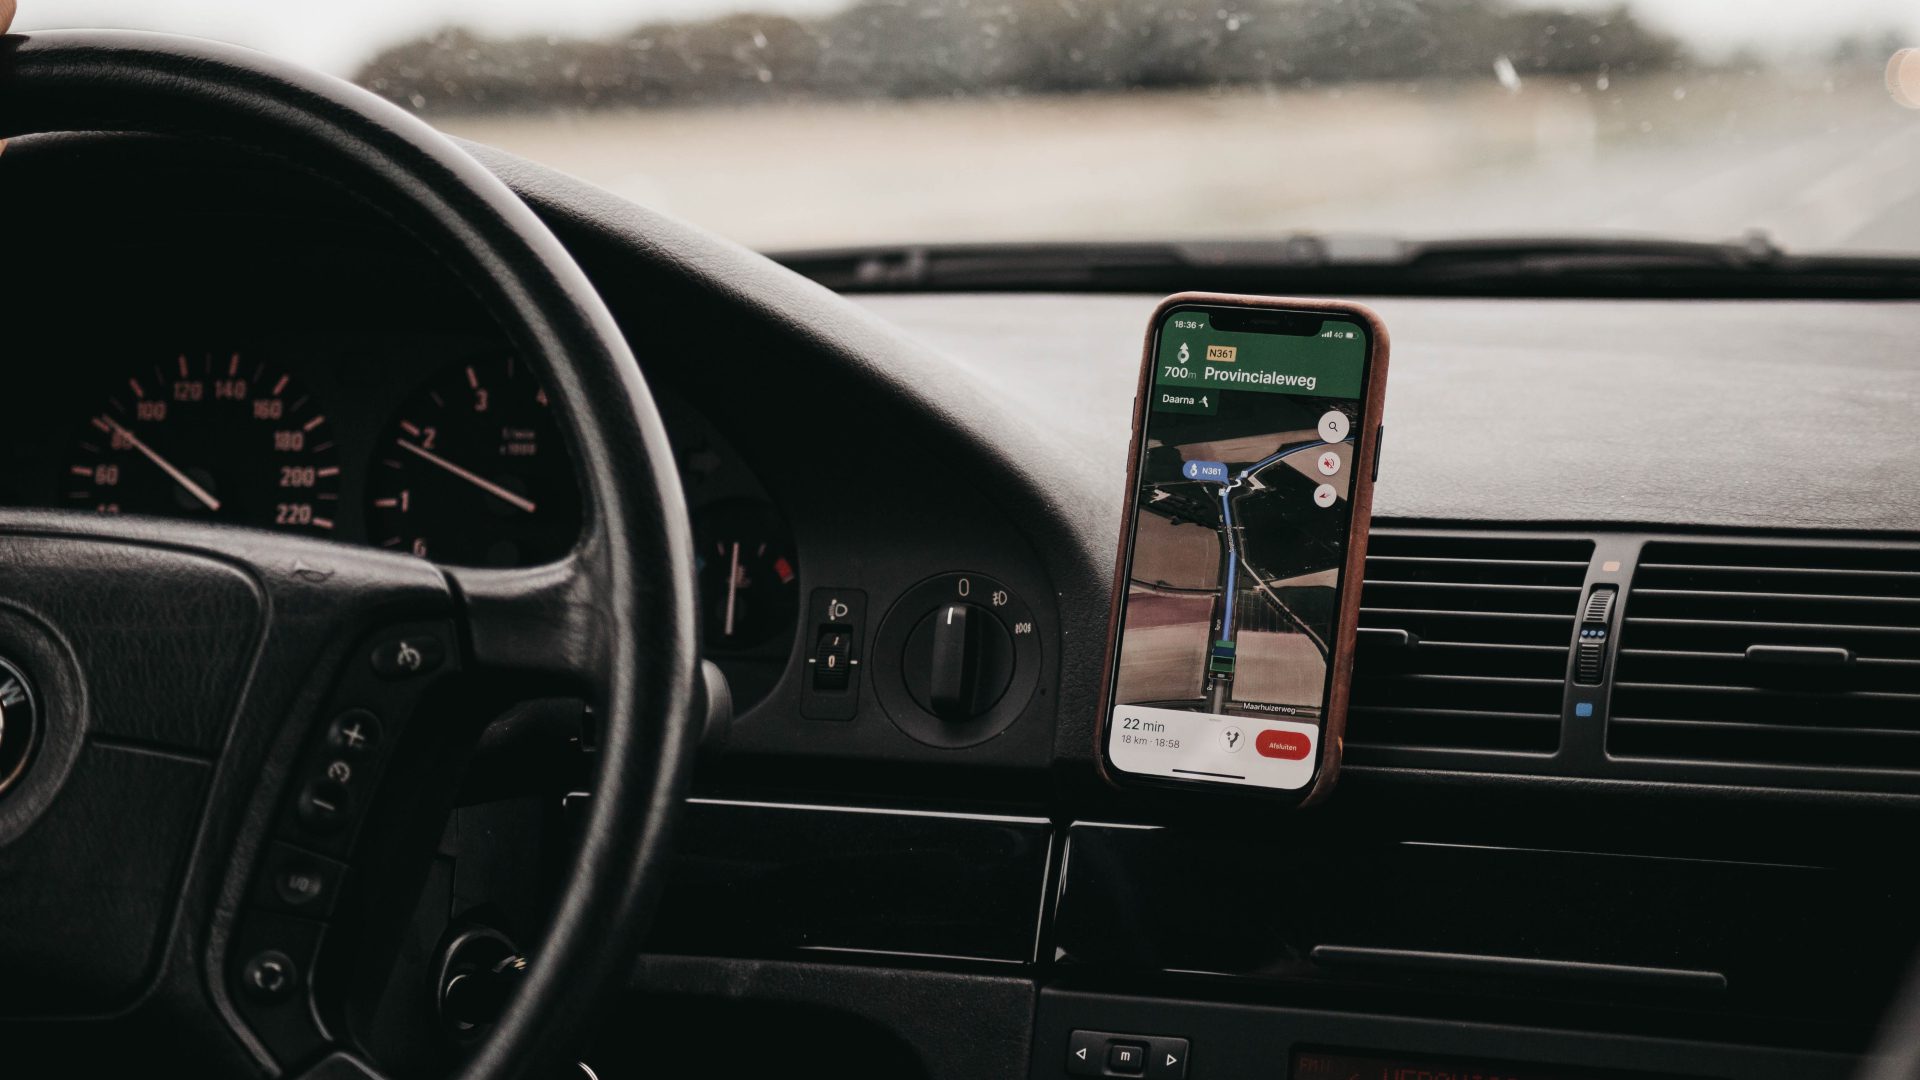
Sharing your location via Google Maps requires show the relevant location to friends and family to help them reach the destination. However, sharing your location doesn’t also mean recommending the best route. There might be more than one options and you’d want them to follow the quickest or the best one. Using this method, you will be able to share custom route and directions from Google Maps.
How to Share Custom Directions on Google Maps via PC
The desktop view makes it convenient to open Google Maps, create custom directions and routes before sharing it with others. Google lets you use a feature called My Maps present inside Google Maps, which means you’ll need to log in with your Google Account before proceeding. Here’s how you can do it.
Setting up Google My Maps
Step 1: Head over to the Google Maps page and login with your Google account details.
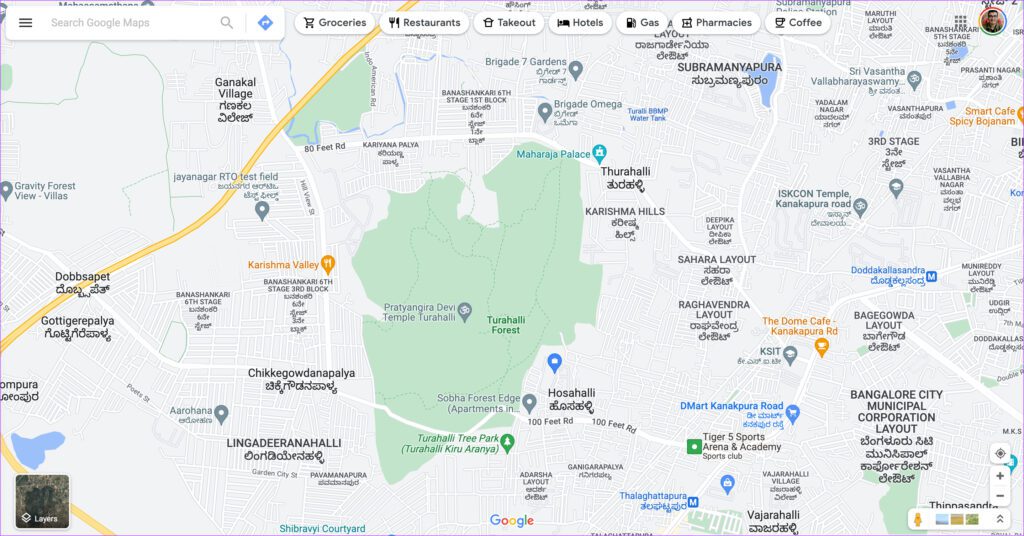
Step 2: Click on the hamburger menu in the top-left corner of the screen.

Step 3: Select the Your places option in the left pane.

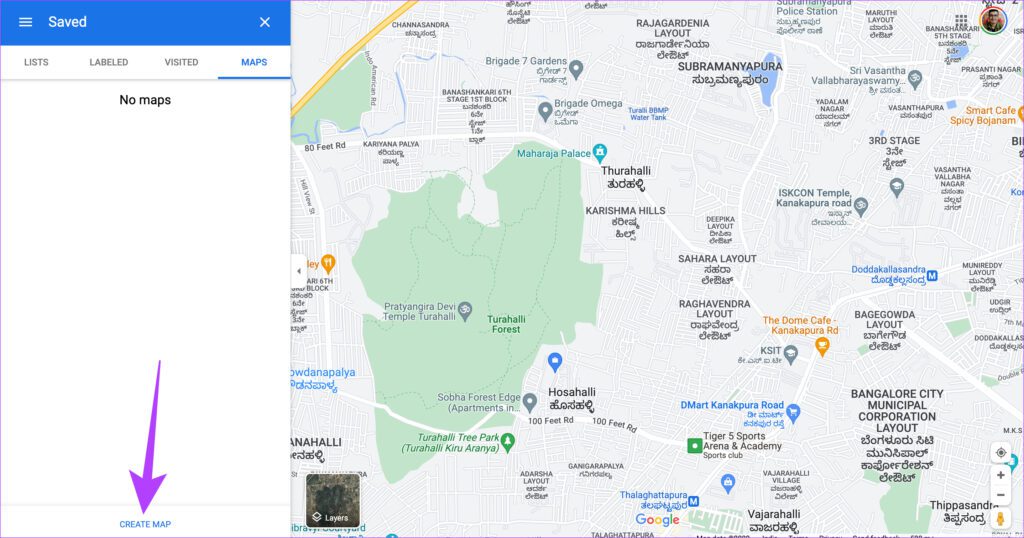
Step 4: Navigate to the Maps tab.

Step 5: You’ll probably see No maps displayed if you haven’t used this feature before. Click on Create Map at the bottom of the screen.
Step 6: The new page that loads up on your screen is the My Maps interface.
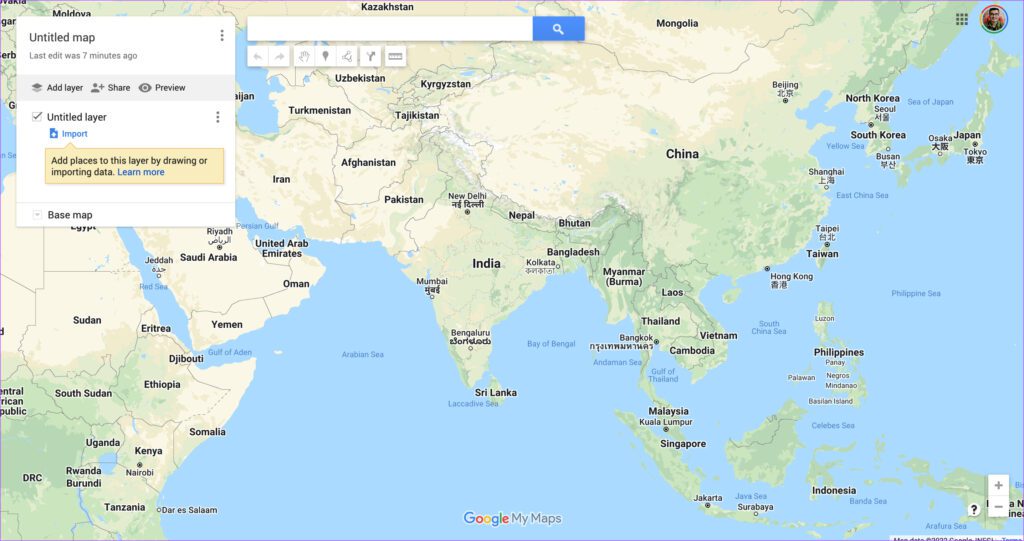
Step 7: Tap on Untitled map to set a name for your map.

You can also give it a short description of the route or directions. Click on Save once done.

Step 8: Change the look of your map by clicking on the small arrow next to the Base map.
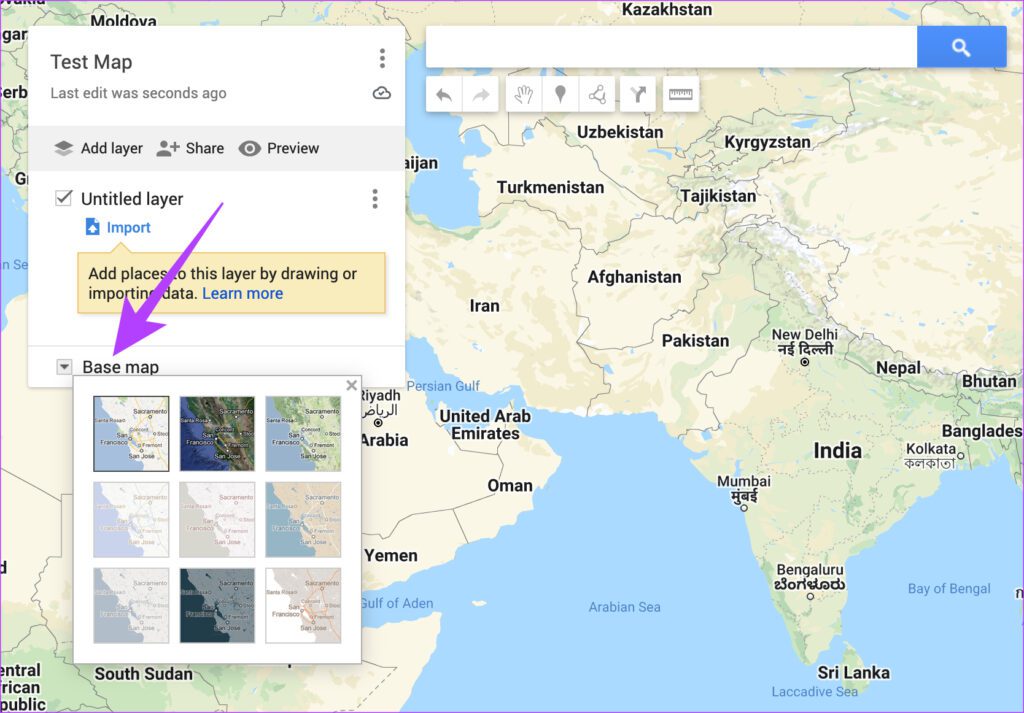
That’ll have your basic map setup in place, let’s add the destinations with the custom routes and directions.
Adding Custom Directions
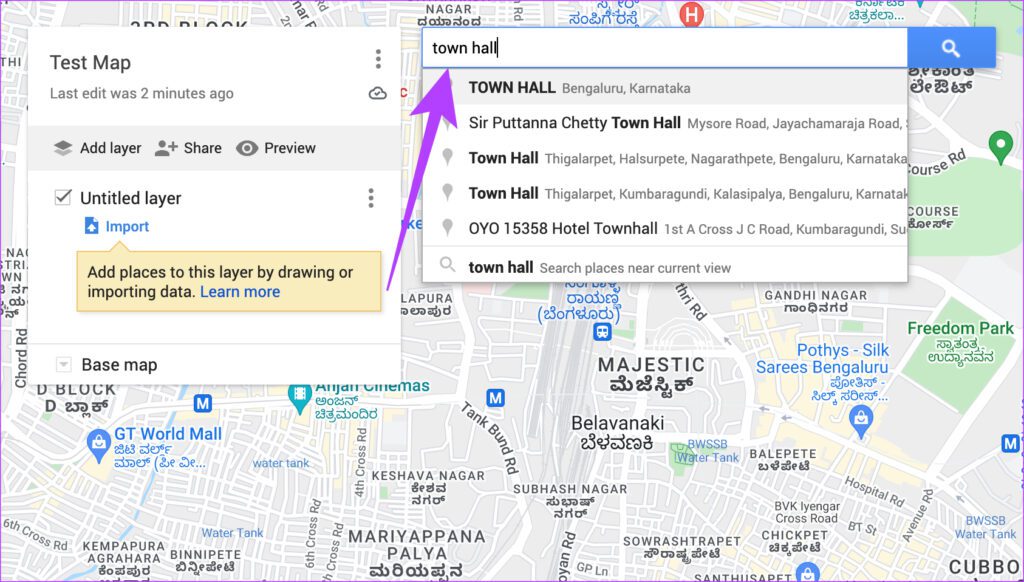
Step 1: Use the search bar to look for a particular location and select it from the drop-down list. Make sure this is the starting point for the route.
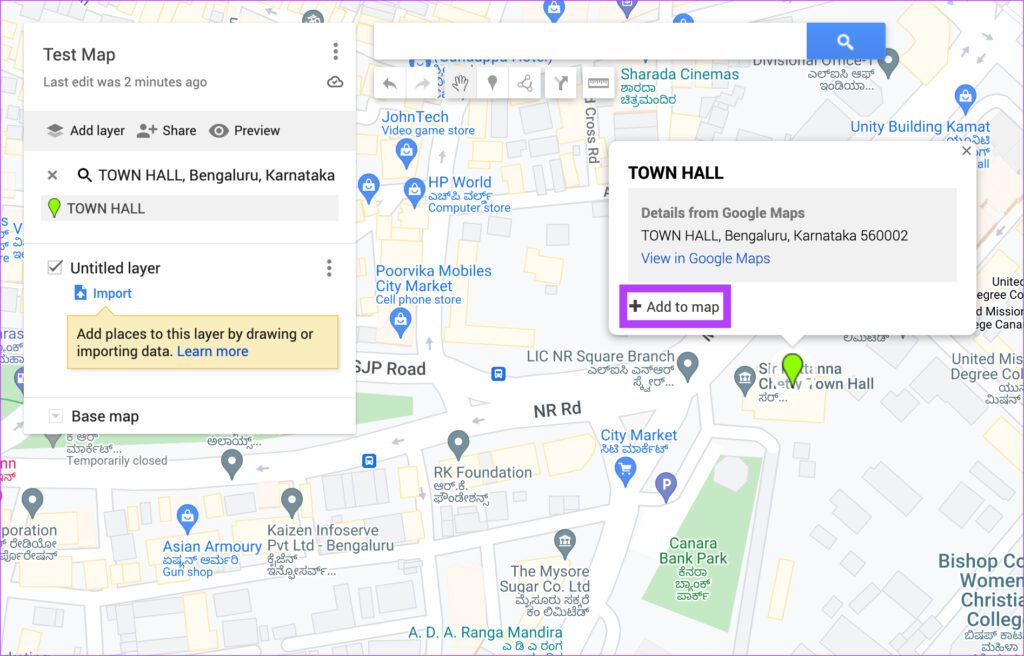
Step 2: You will now see the selected location pop up on the Map. Click on Add to map. Google Maps will show the location details for the route.
Step 3: Search for a new location in the search bar and click on the relevant result.
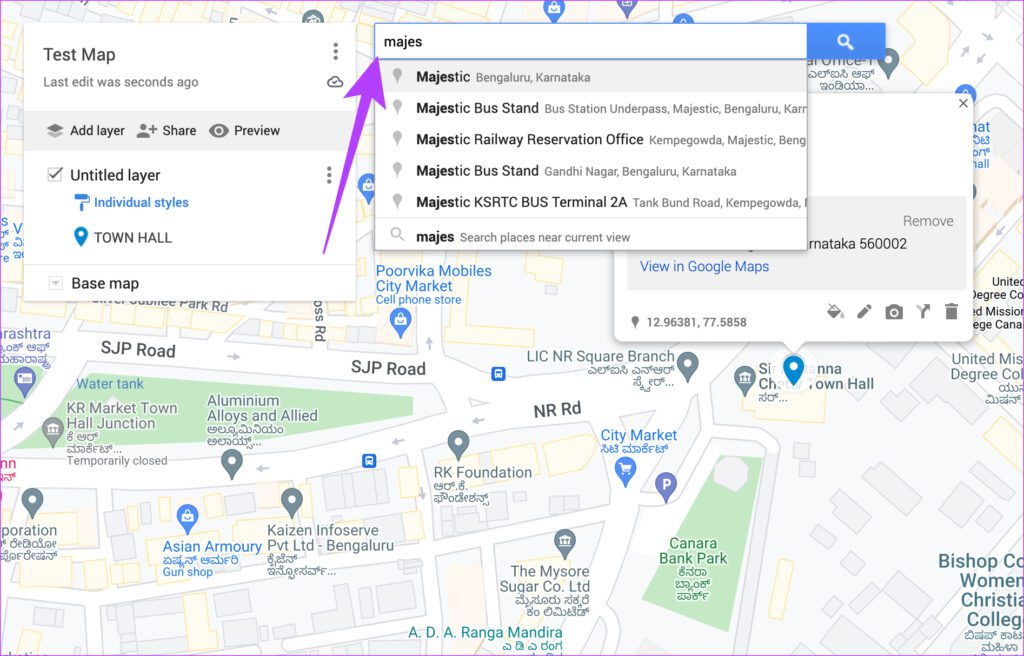
Step 4: Click on Add to map for this location again.
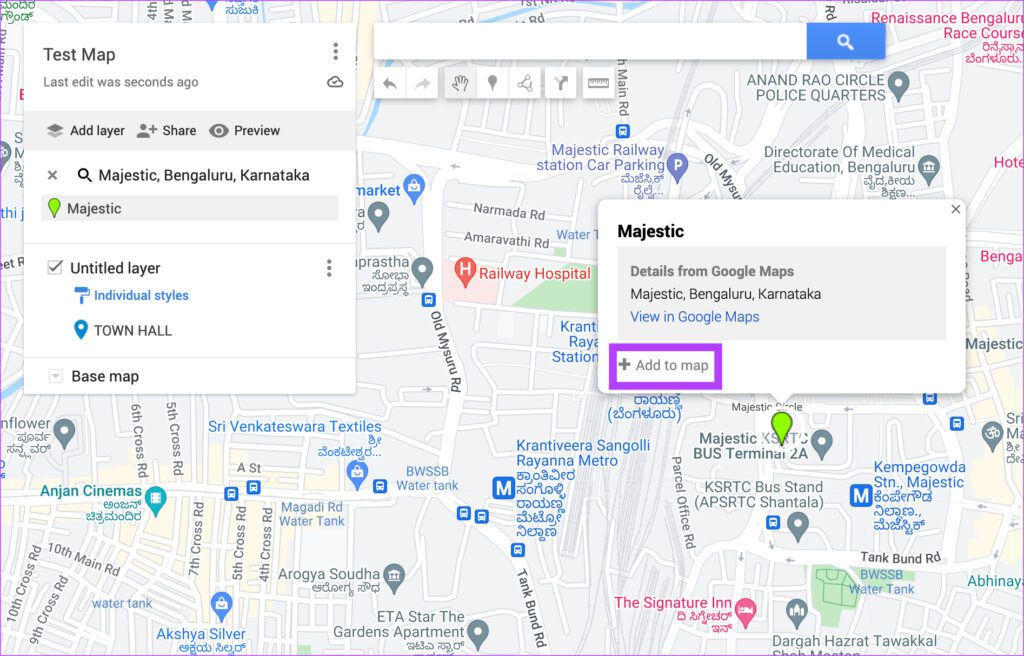
Step 5: After adding the location, tap on directions icon at the bottome-right corner of the dialog box to add directions to the location.
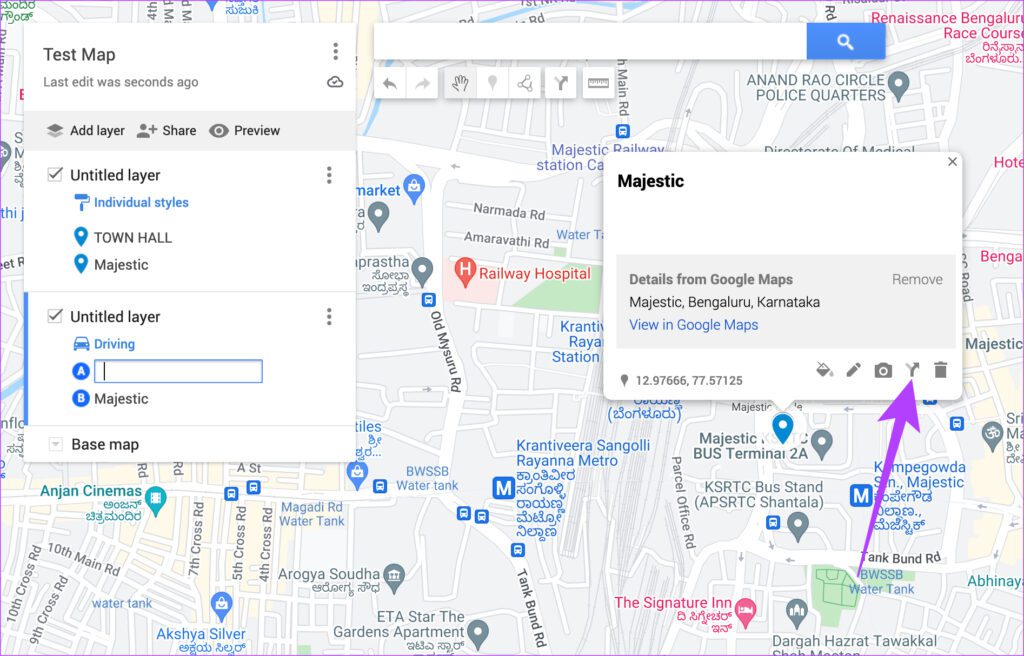
Step 6: The pane on the left will ask you to enter the point from where you want directions. Enter the starting point of the trip.
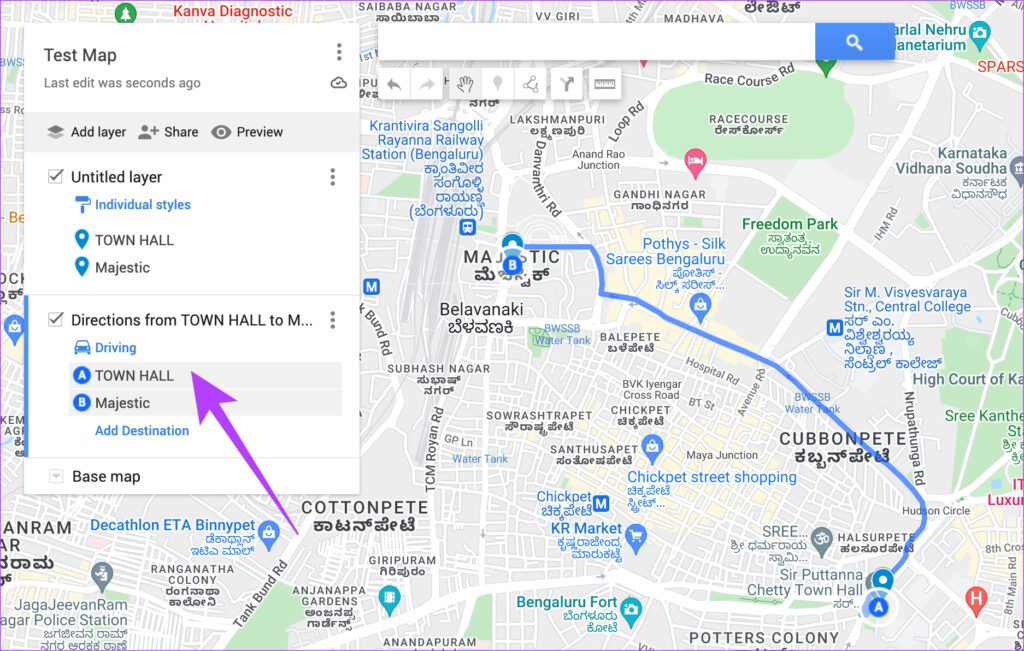
Step 7: You will be able to see that the directions from starting point to the chosen (Point A to B) destination.
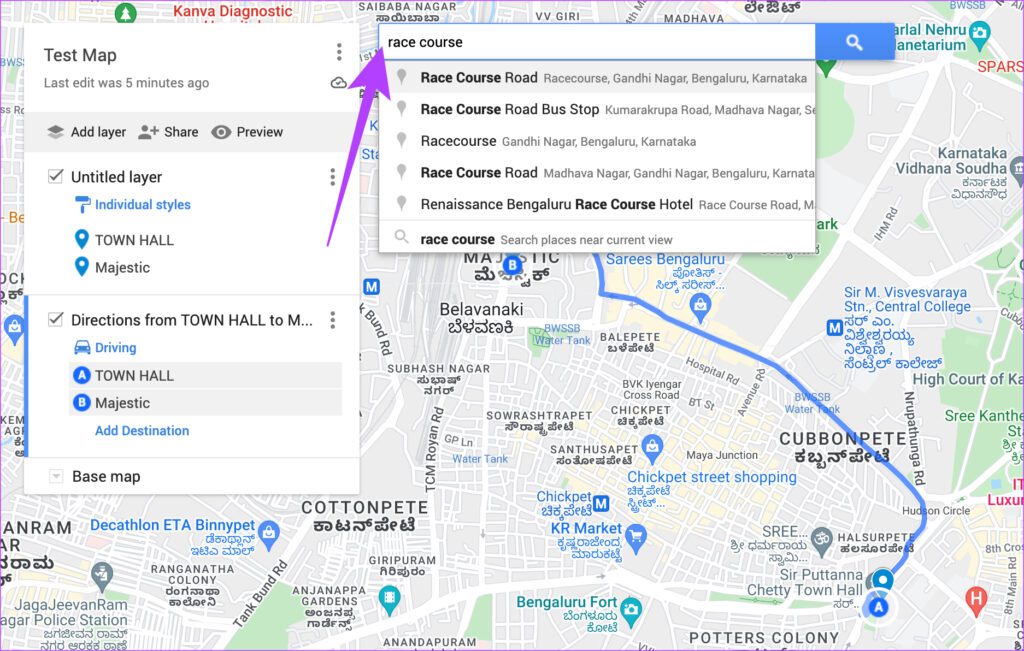
Step 8: Use the search bar at the top again to search for the next point and add it to the map just like earlier.
Step 9: Click on Add Destination to add the subsequent stops for the route.
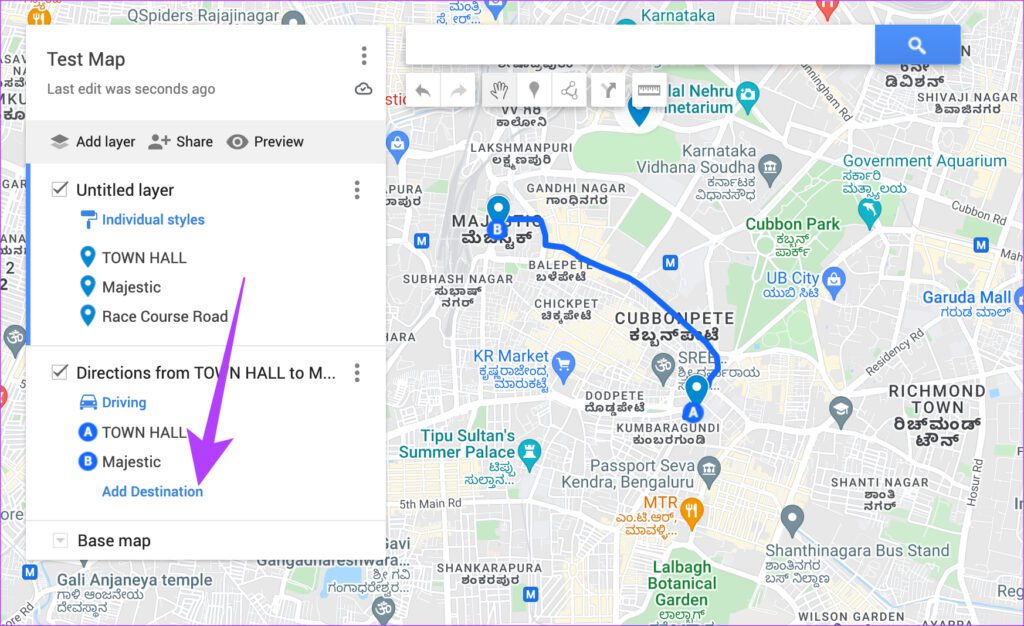
Step 10: Enter the location you added on the map as Point C.

Google Maps will show the route from Point B to C. Repeat the process till here and add all the destinations to the map.
Step 11: For sharing a more precise location, use a Pin icon under the searchbox at the top to activate it. Click anywhere on the map to place the pin.
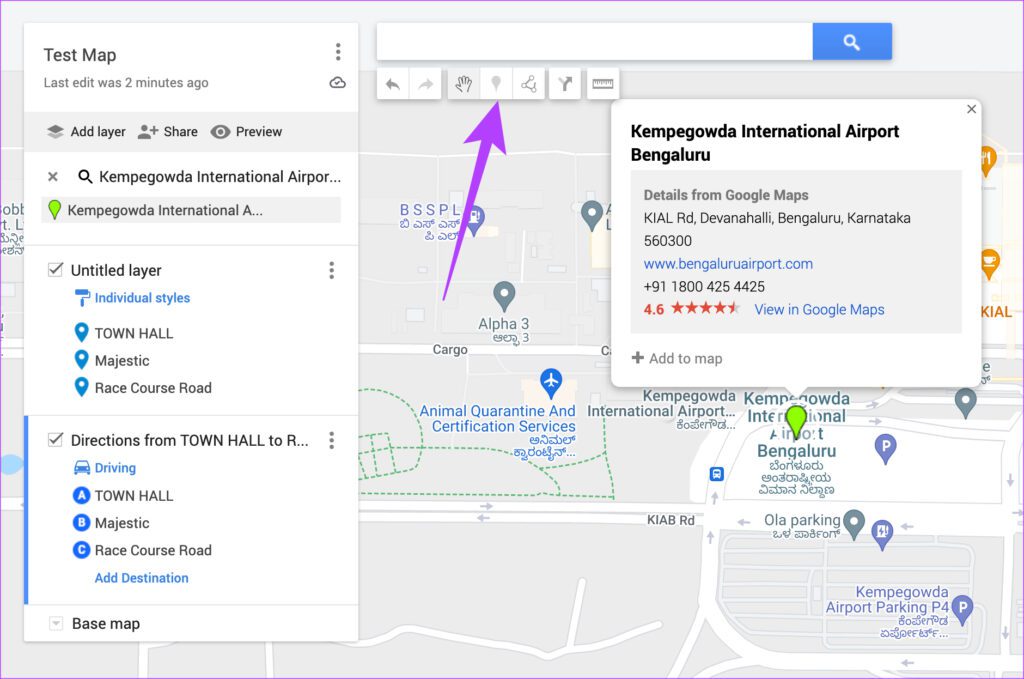
Step 12: Name the pin and click Save.

After adding all the pins for locations, you will see that all the selected destinations will be added in the left column.
Step 12: When the final map is ready, click on Share button to send it.

Step 13: You can either let anyone with the link view the route or share it with specific individuals using the Share on Drive button.

Step 14: Copy the link displayed at the bottom and send it to the relevant contacts. They can access the custom route and directions by clicking on this link on and viewing it on their smartphones.

This is how you can create a custom map with directions and routes on your PC.
How to Share Custom Directions on Google Maps via Android
Instead of using the web browser, you can use the Google My Maps Android app to create a custom route. Here’s how.
Step 1: Download the Google My Maps app from the Play Store on your Android smartphone.
Step 2: Open the app and select Accept & Continue.

Step 3: Swipe through the intro screen and tap on Finished.

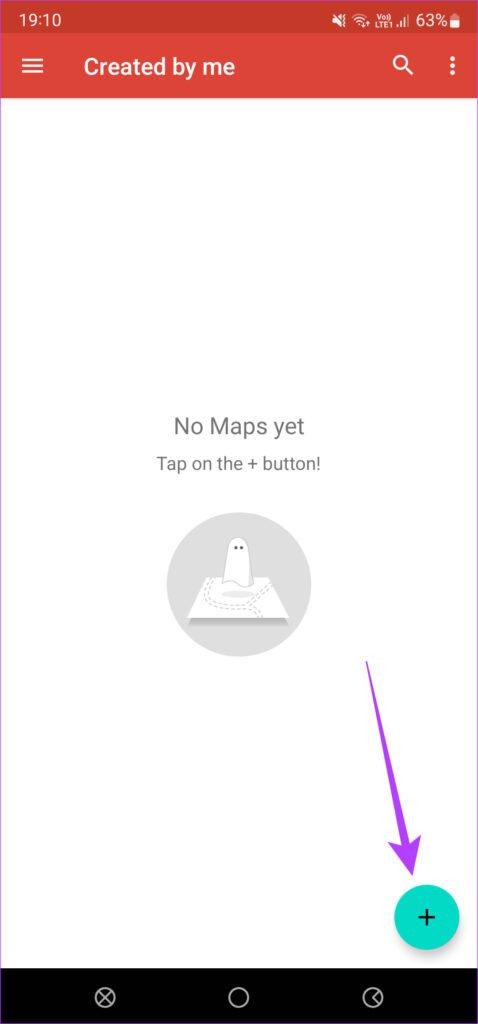
Step 4: Select the ‘+’ icon in the bottom-right corner of the screen to create a new map.
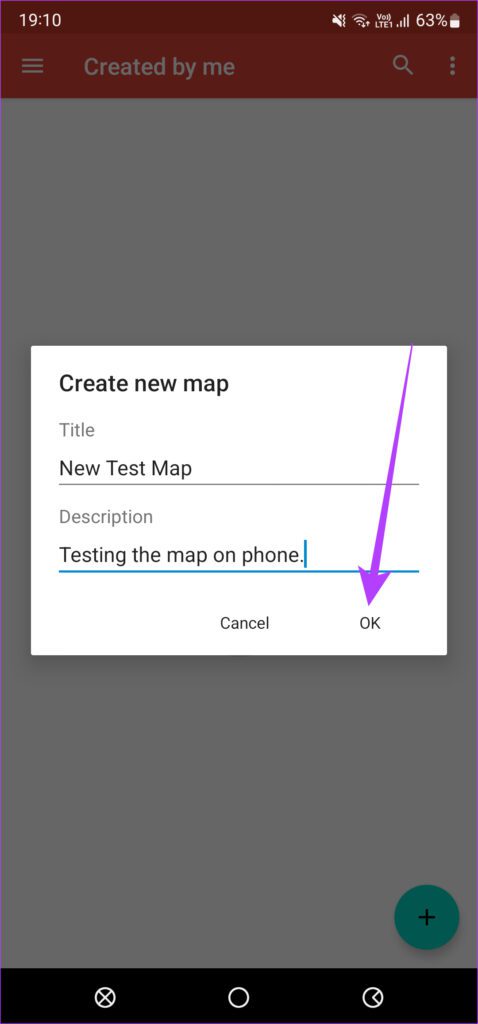
Step 5: Enter a name and a description for your map and select OK.
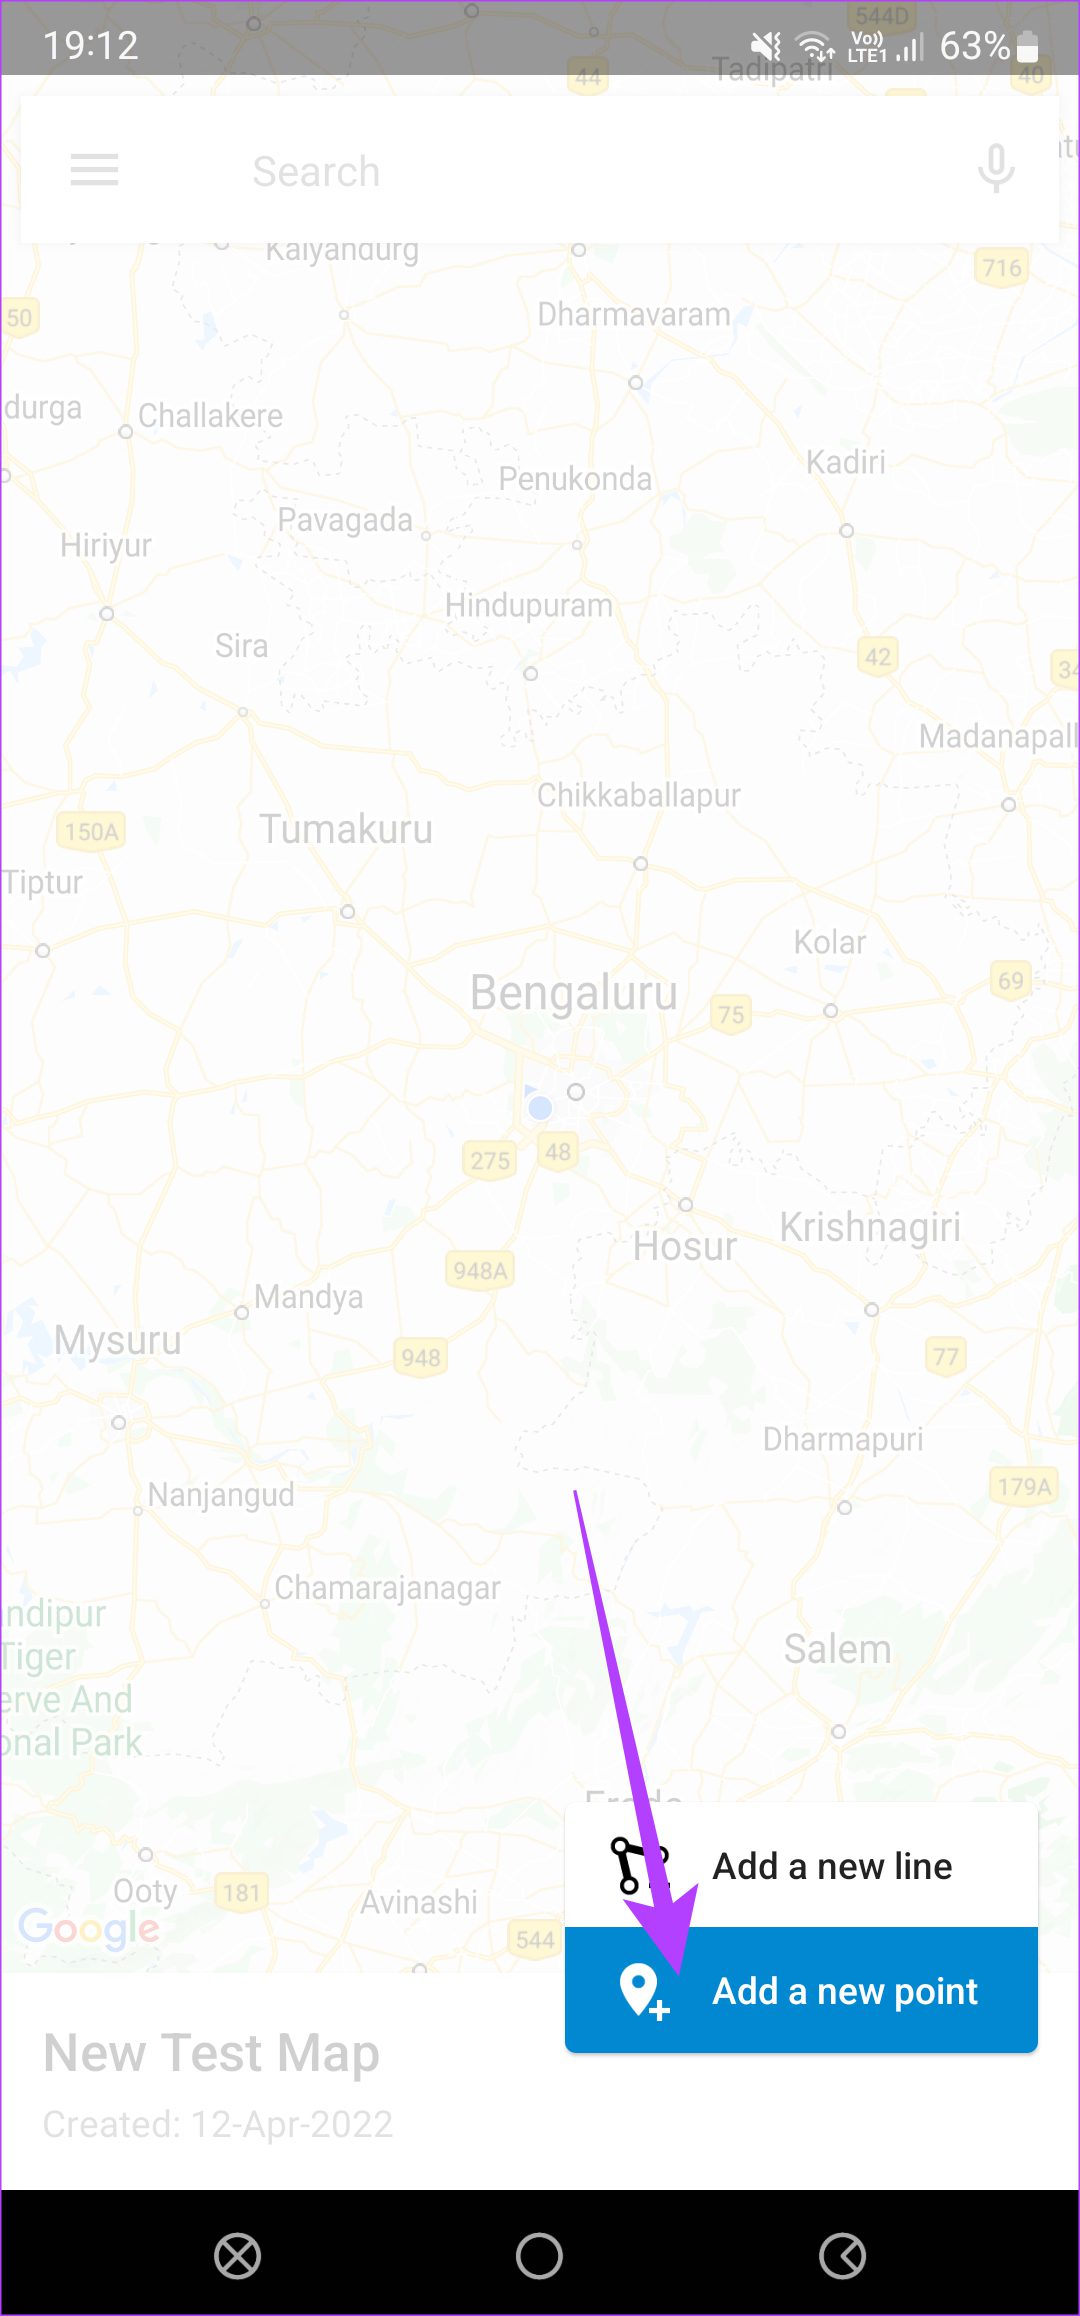
Step 6: Once you’re on the maps screen, tap on the ‘+’ icon again and select Add a new point.
Step 7: Search for the destination using the search button in the top-right corner.

Step 8: Tap on the relevant result to show it on the map.
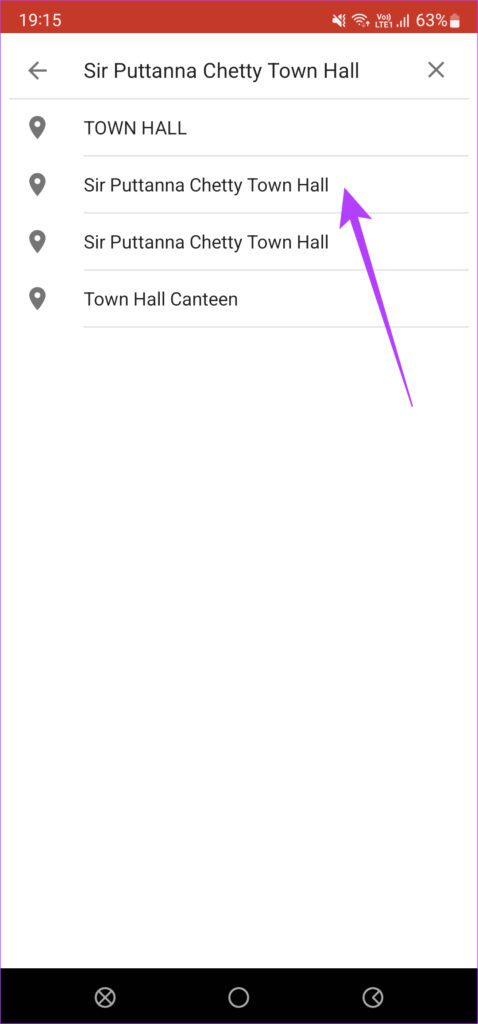
Step 9: At the bottom of the screen, tap on Select this location to add it to the map.

Step 10: Tap on the checkmark in the top-right to save it.
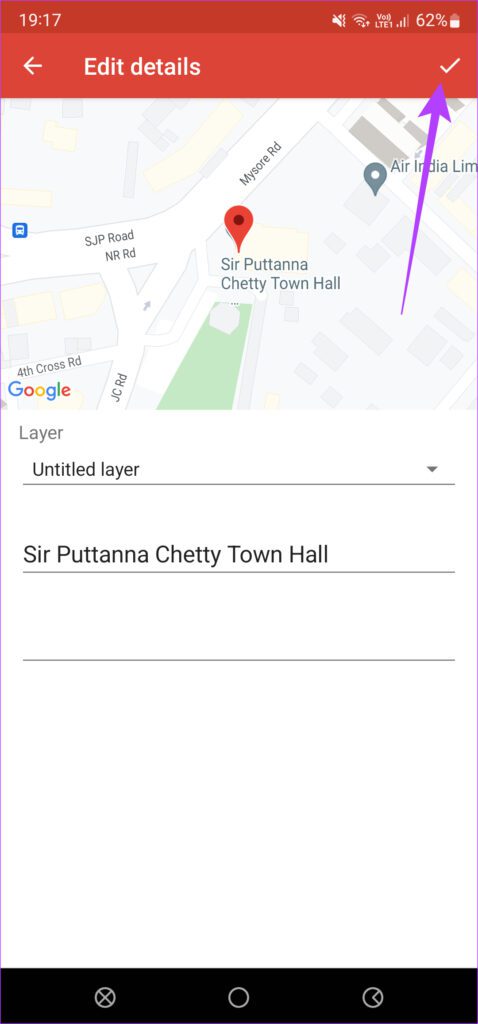
Step 11: The destination you added would be displayed at the bottom. Tap on it to enlarge that portion.

Step 12: Now, select the Directions button in the top-right to navigate to the spot. This will automatically open Google Maps on your phone and navigate to the destination.

Step 13: Repeat the process and add as many stops or destinations to the map.

Step 14: Once done, tap on the back button on your phone to go back to the main map screen.

Step 15: Tap on the name of the map at the bottom to bring up further options.
Step 16: Select the Share button in the top-right and send the map to your contacts.

You have successfully created and shared custom directions on Google Maps via your Android phone.
Share Custom Routes on Google Maps With Anyone
Creating custom routes is time-consuming. However, you can create a custom map with directions and routes for yourself or share it with friends and family. While the My Maps app is not available on iOS, you can use the website to create a custom map on your iPhone. The best way would still be to use a computer as it’s faster and easier to make changes on a large screen.
Was this helpful?
Last updated on 14 April, 2022
2 Comments
Leave a Reply
The article above may contain affiliate links which help support Guiding Tech. The content remains unbiased and authentic and will never affect our editorial integrity.







When I load my custom map in Google Maps, it cannot give instructions for the route I added.
Yes I agree with Linda, its no use to be able to save a map but not use it to navigate. This is pointless.