The Microsoft Word app on Android is quite surprisingly feature packed. But its UI is a world away from what we’re used to seeing on the desktop version.

And as such, some of the simplest actions aren’t as apparent when you first switch to it. Take saving a document as a PDF file for instance. It’s quite a simple process, but only if you know where to look for the option.
So if you’ve been struggling with the app and don’t know how to save a file in the PDF format, you’ve come to the right place. In this article, I’ll show you how to save as PDF in Microsoft Word for Android, along with a couple of other handy tricks that will make things easier for you.
Save as PDF on Microsoft Word for Android
As I mentioned earlier, saving a document as PDF on Word for Android is a pretty straightforward process, provided you know where to look. It’s quite natural to look for the setting in the Save as option, but you won’t find it there. Just follow these steps and you’ll be able to save as PDF in no time.
Step 1: Tap on the three-dot menu in the top-right corner of the app and then click on print.
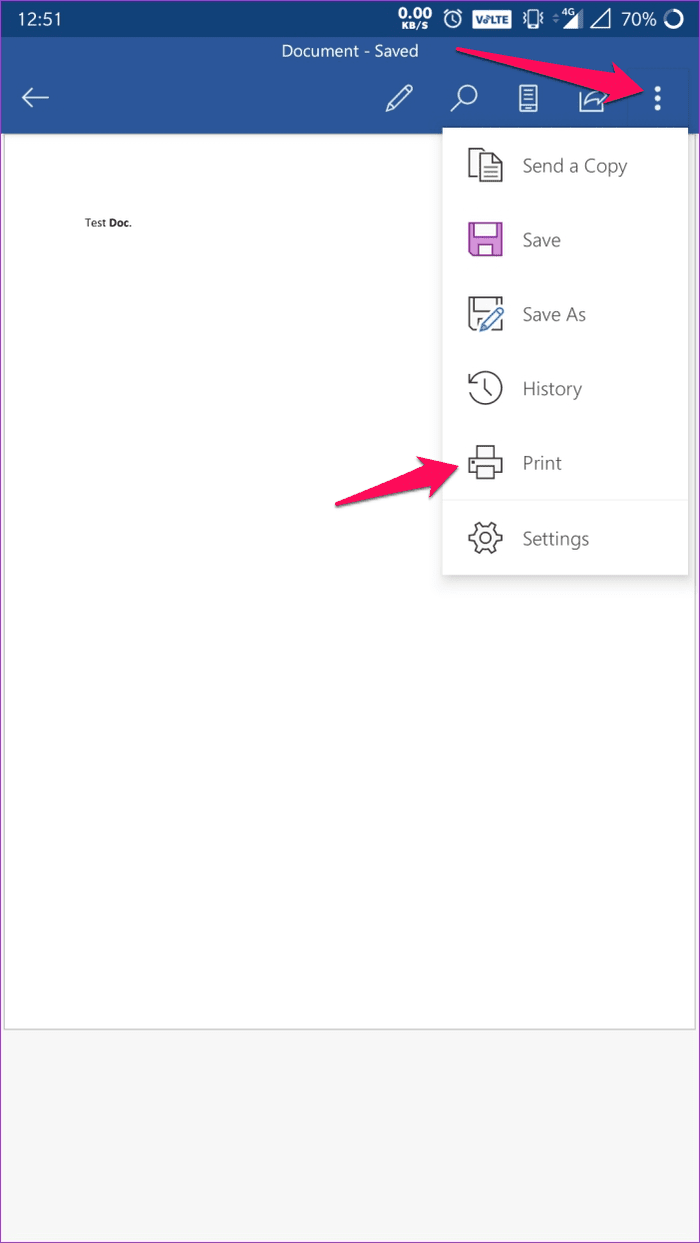
Step 2: The Save as PDF option will show up in the top-left corner if you don’t have a printer connected to your phone. If you do, just tap on the connected printer and choose Save as PDF from the drop-down menu.

Step 3: Once you’ve selected the Save as PDF option, tap on the circular Save button.

Step 4: In the following screen, give your file a name, select the location where you want to save it, and then tap on Save.
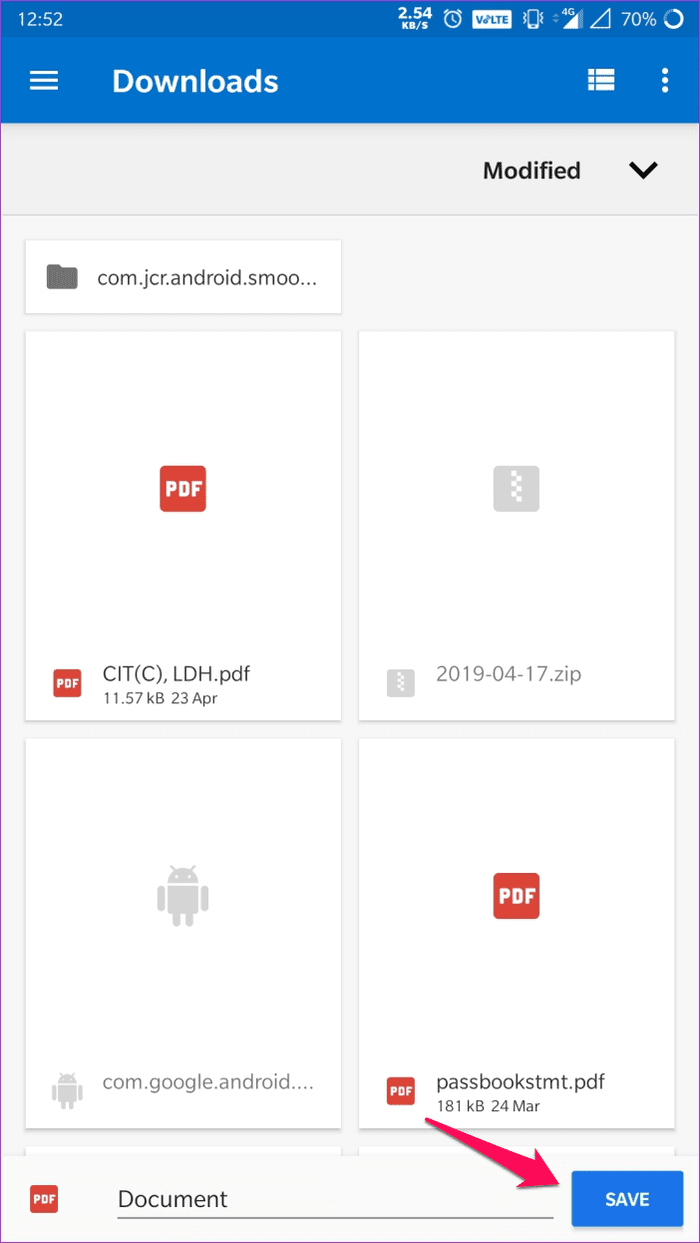
That’s it. Your document is now saved as a PDF in the destination of your choice. Isn’t that simple?
Now let’s take a look at some other cool tips:
Set Default Mobile View
By default, when you open a document on Word for Android, it’ll show up in the print layout. It’s barely legible and trying to make any changes in the document in this layout could prove to be a challenge.
While you can quickly switch to a more mobile friendly layout by tapping on the mobile view icon in the top toolbar, there’s a setting you can change to set it up as the default option.

Here’s how to change the default setting:
Step 1: Open up the app settings by tapping on the three-dot menu and choosing the Settings option.

Step 2: Scroll down to the General settings and tap on the toggle under Start Word in Mobile View option
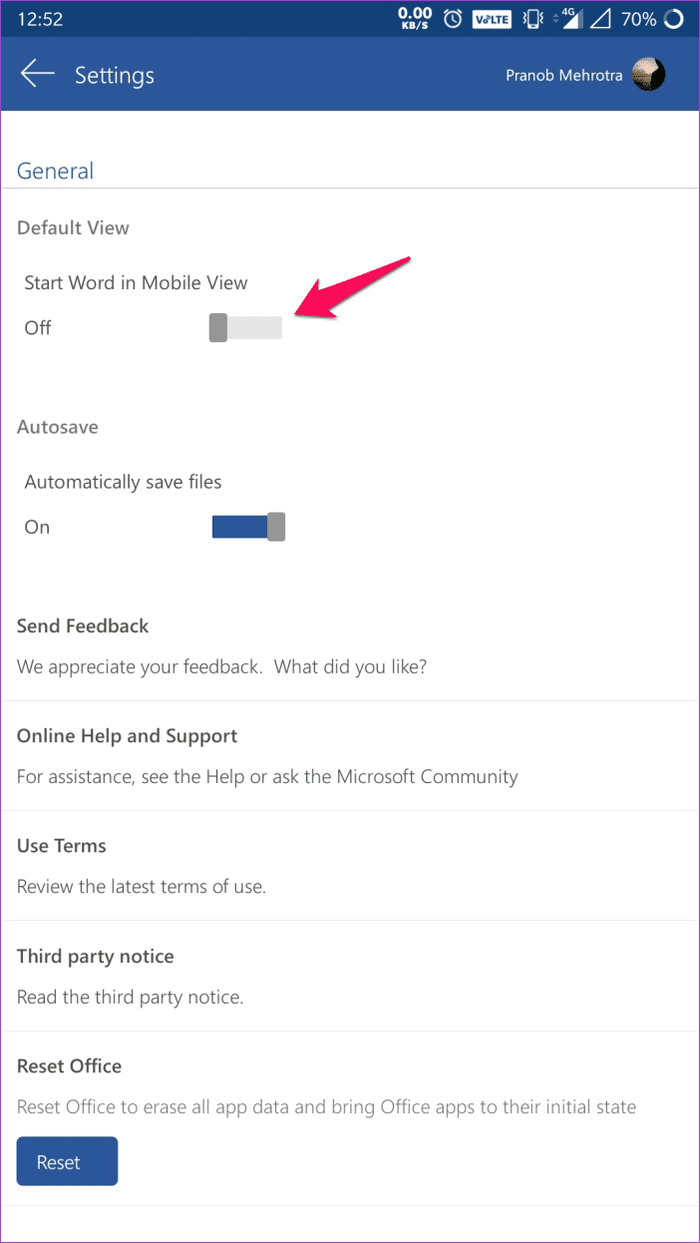
That’s it. Now every time you open up a document, it’ll appear in mobile view. To switch to the print layout, you can tap on the mobile view icon in the top toolbar.
Use Smart Lookup
The Smart Lookup feature in Word allows you to look up any word in your document online quickly. Here’s how you can use it in the Android app:
Step 1: Tap and hold on a word to select it

Step 2: Select the Smart Lookup option from the pop-up menu
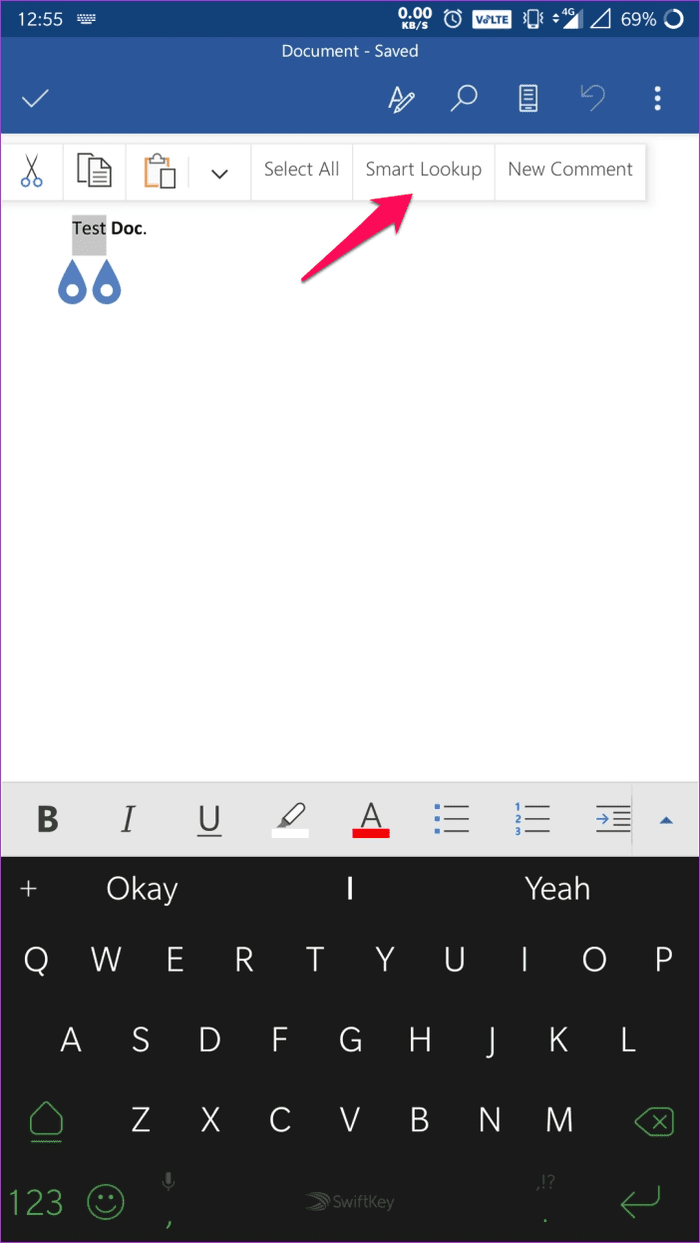
The feature will then run a quick search using the Bing search engine and display related results. The search results are divided into two sections – Explore and Define. While the Define section is self-explanatory, the Explore section shows contextual information about the keyword.
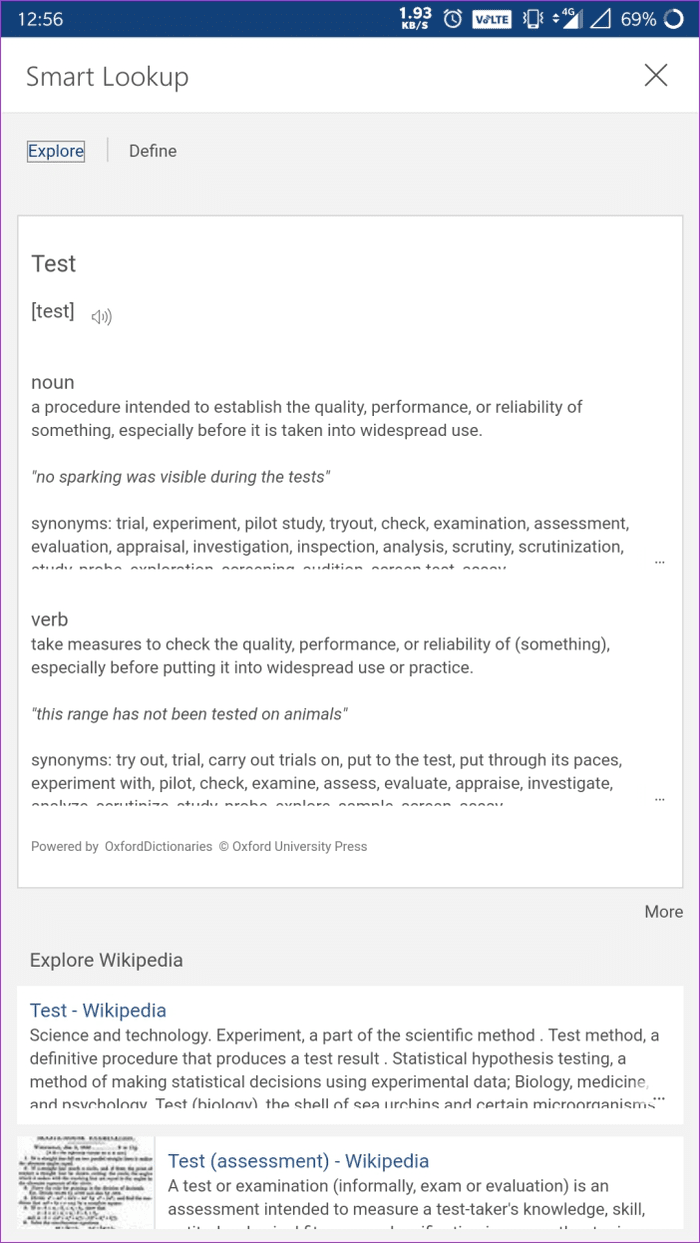
A third Web search section lists down the search results as they would appear when you search in your browser.
Use Text Commands
One of the most convenient ways to find any setting in Word is by using text commands. Yes, there’s a way you can directly enter a query and Word will bring up all the related settings for you to choose. Here’s how you can use text commands:
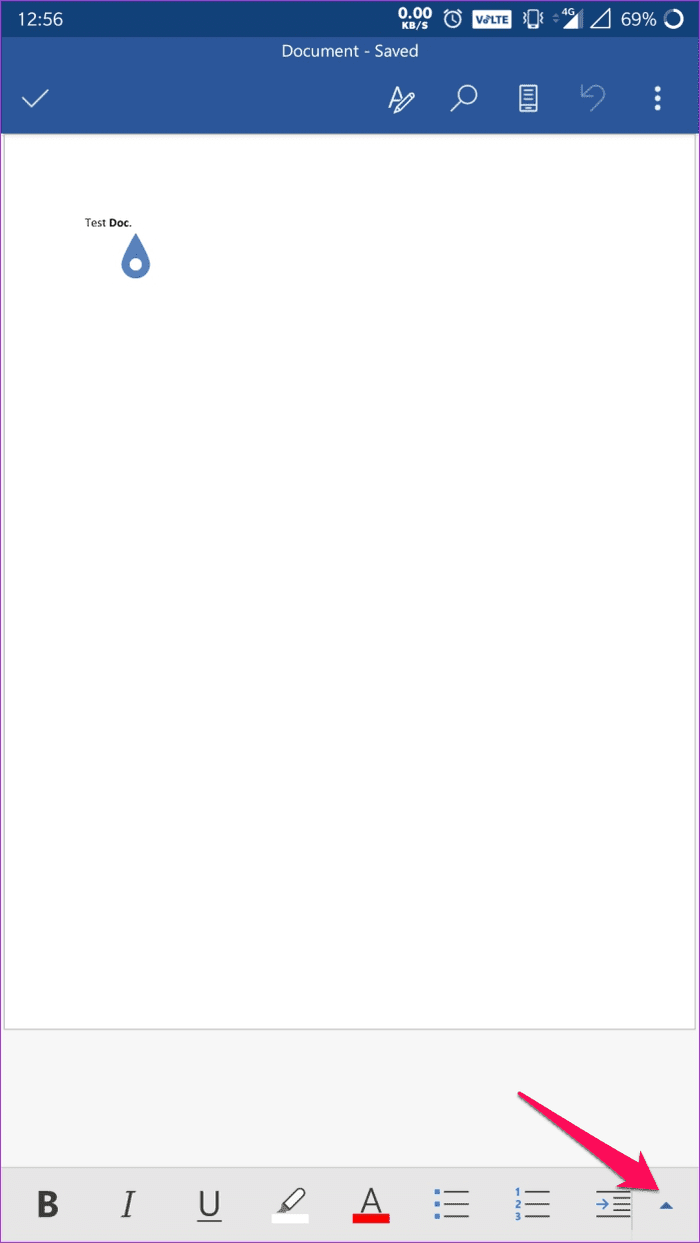
Step 1: Tap on the upward facing arrow in the right corner of the bottom toolbar
Step 2: Now, tap on the bulb icon next to the Undo button
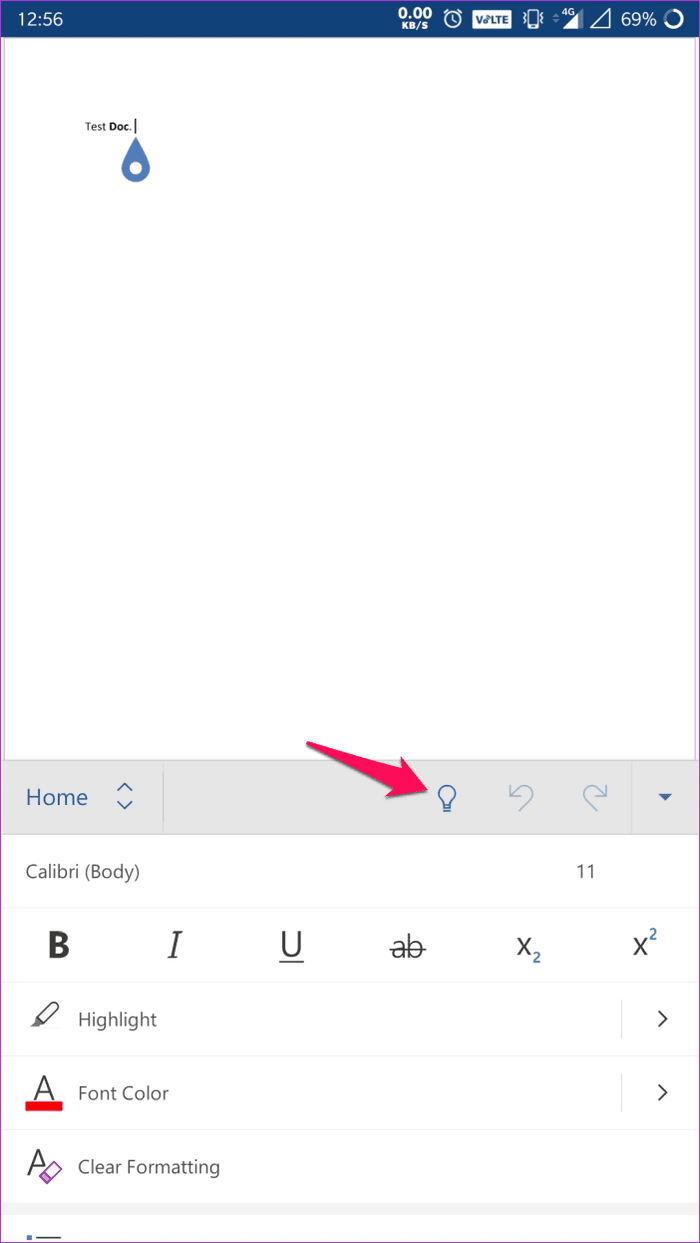
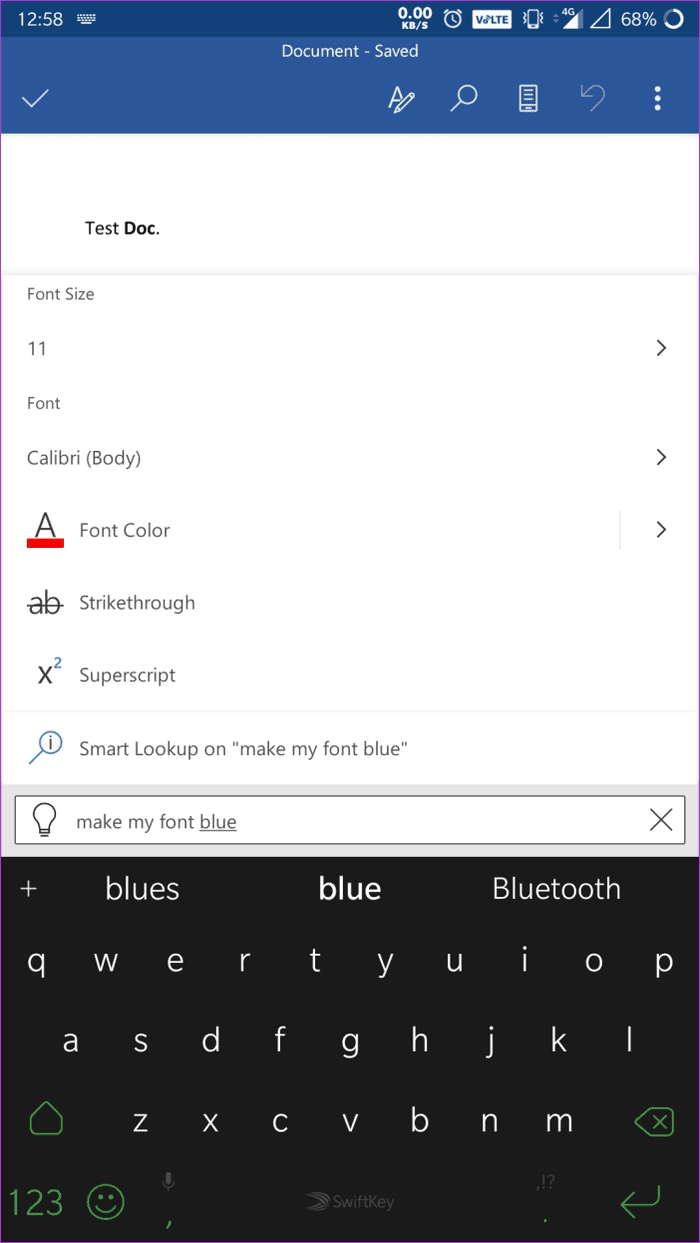
Step 3: Type in your query in the dialog box. Let’s use the “make my font blue” query as an example.

As soon as you type out your query, Word displays the related settings. In this case, it brings up all the font settings, including the font size, color, type, etc.
By using this feature, you can be sure that you won’t ever face issues looking for any setting on the app.
Use Word on Android Like a Pro
Armed with this information, I’m sure it won’t be long before you start using Microsoft Word on Android like a pro. It’s undoubtedly one of the best word processors on the platform, and it offers almost unlimited potential if you have an Office 365 subscription.
Next up: If you also happen to use an iPhone or an iPad, you should check out these productive add-ins for Word on iOS that will help you get things done even more efficiently.
Was this helpful?
Last updated on 03 February, 2022
The article above may contain affiliate links which help support Guiding Tech. The content remains unbiased and authentic and will never affect our editorial integrity.

