VLC media player has long been a go-to alternative to Windows Media Player, thanks to its open-source nature and support for various file formats. Sometimes, the audio in the VLC media player may suddenly stop working.
There’s no need to settle for watching your videos muted or for an alternative. This guide contains a few tips to fix any sound problems in VLC on your Windows 10 or 11 PC.
1. Try Another Video File
You can start by playing a different video in VLC to make sure there’s nothing wrong with the video file itself. A partially downloaded or corrupt video file won’t play in the VLC media player. Even if it starts playing, it will stop abruptly after some time.
2. Enable Audio
The VLC media player also includes an option to disable audio. If you have inadvertently enabled this option, there will be no sound while playing videos on the VLC media player. Here’s how to change that.
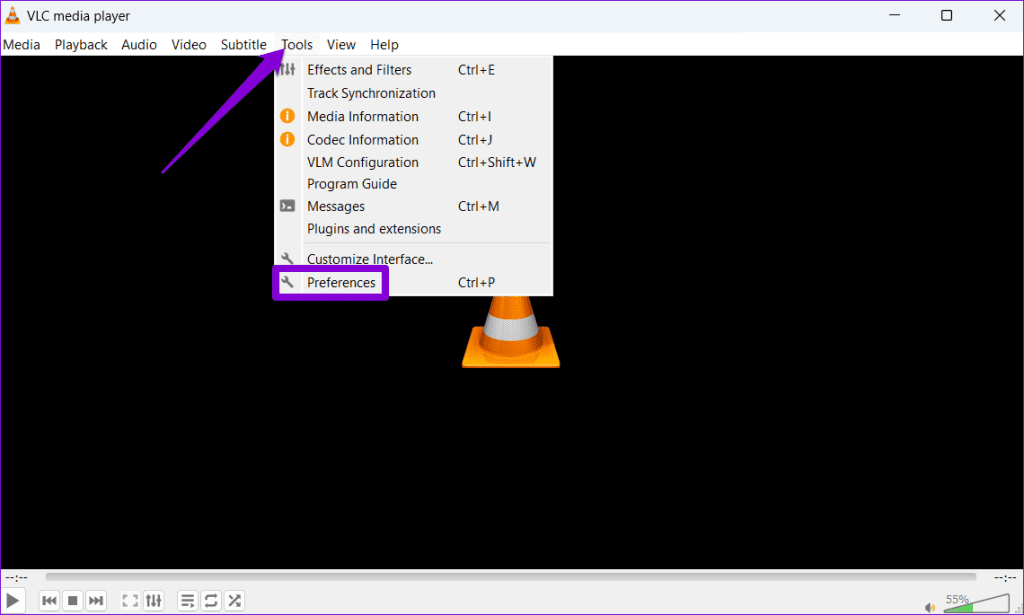
Step 1: Open the VLC media player, click on Tools menu at the top, and select Preferences from the context menu.
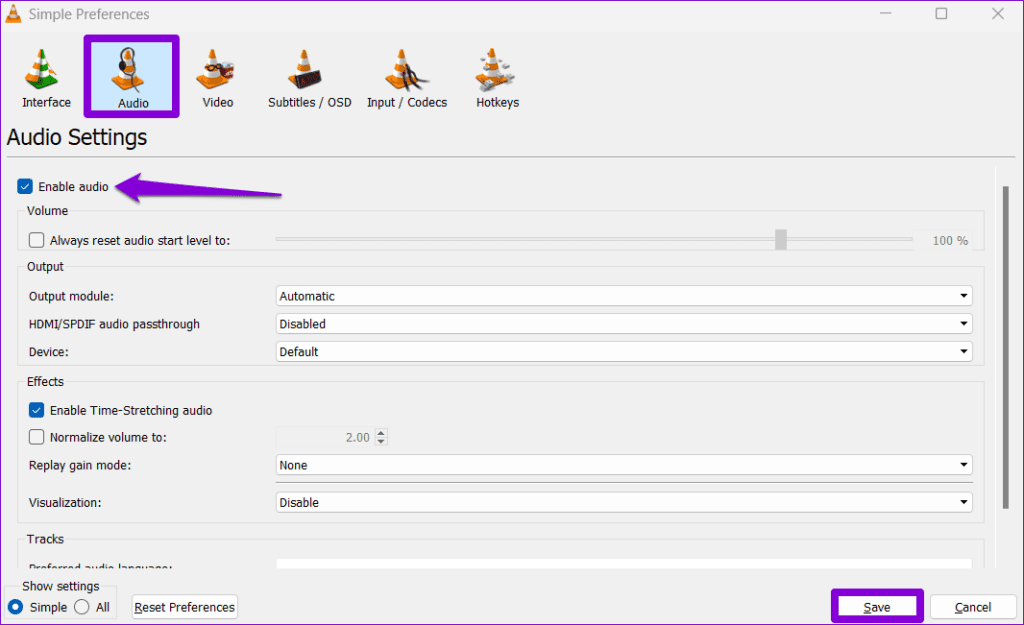
Step 2: Switch to the Audio tab, tick the Enable audio checkbox, and click Save.
3. Disable and Re-Enable the Audio Track
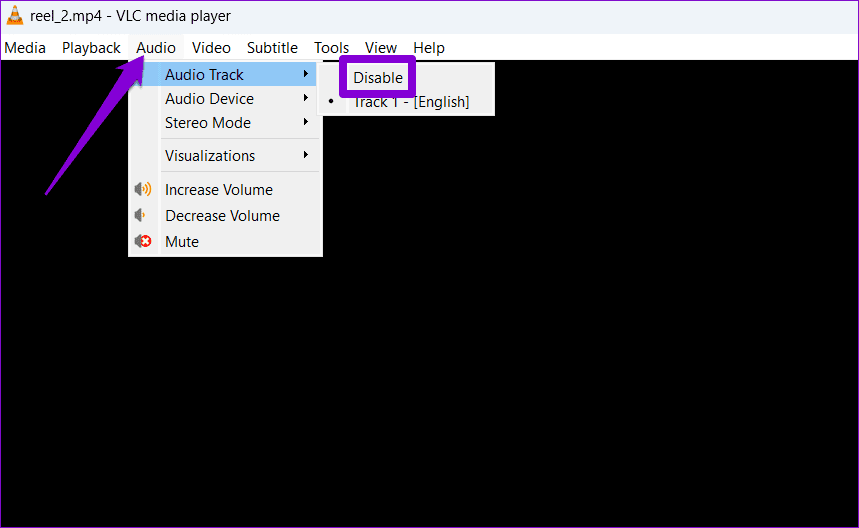
Sometimes, VLC may fail to pick up the audio track due to temporary app glitches. In most cases, you can fix the issue by disabling and re-enabling the audio track. To do so, play your video in the VLC media player. Click the Audio menu at the top, click Audio track, and select Disable.
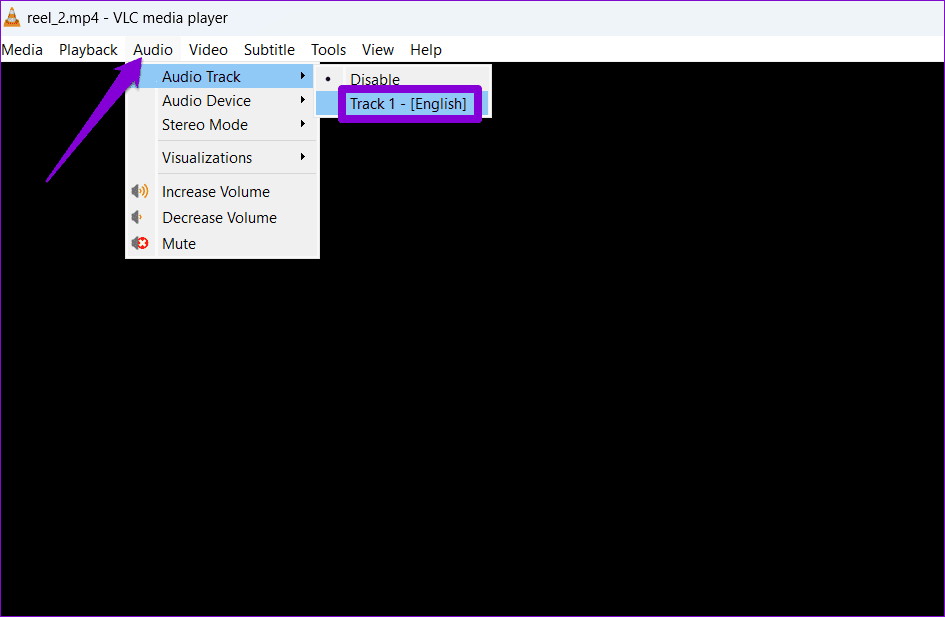
Click the Audio menu again, click Audio track, and select a track from the submenu.
After that, check if the audio starts working again.
4. Modify Audio Output Settings
Windows lets you choose a specific audio output device – speaker or headphone. However, apps like VLC Media Player let you customize specific audio output. So you can try changing the audio output module for VLC to handle the decoding and playback of audio. Here’s how to do it.
Step 1: Open the VLC media player and press the Ctrl + P keyboard shortcut to open the Preferences menu. Then, select the All option under Show settings.

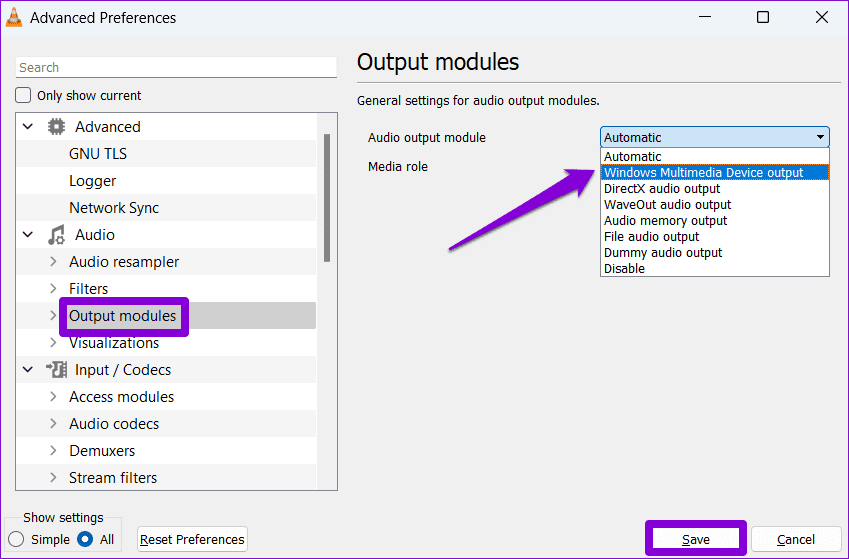
Step 2: In the left pane, select Output modules under the Audio section. Then, choose Windows Multimedia Device output from the drop-down menu on your right.
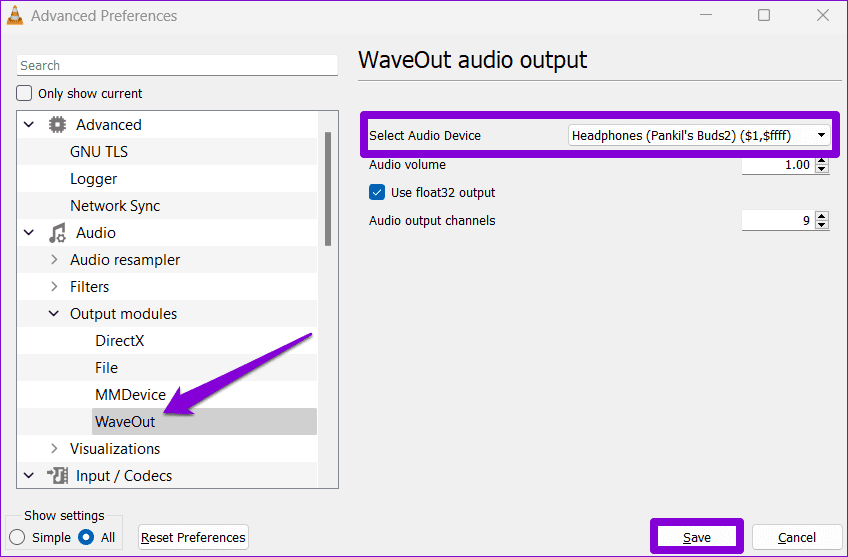
Step 3: Expand Output modules and select Waveout. Choose your speakers or headphones using the ‘Select Audio Device’ drop-down menu and click Save.
Close VLC and play a video file again to check if the audio works.
5. Turn Off Hardware Acceleration
The hardware acceleration feature in VLC allows the app to use your computer’s GPU chip to accelerate the video decoding process – to use GPU for video playback instead of passing the load to the processor. However, if this feature fails to work, the audio may stop working in VLC. You may disable this feature temporarily to see if that helps.
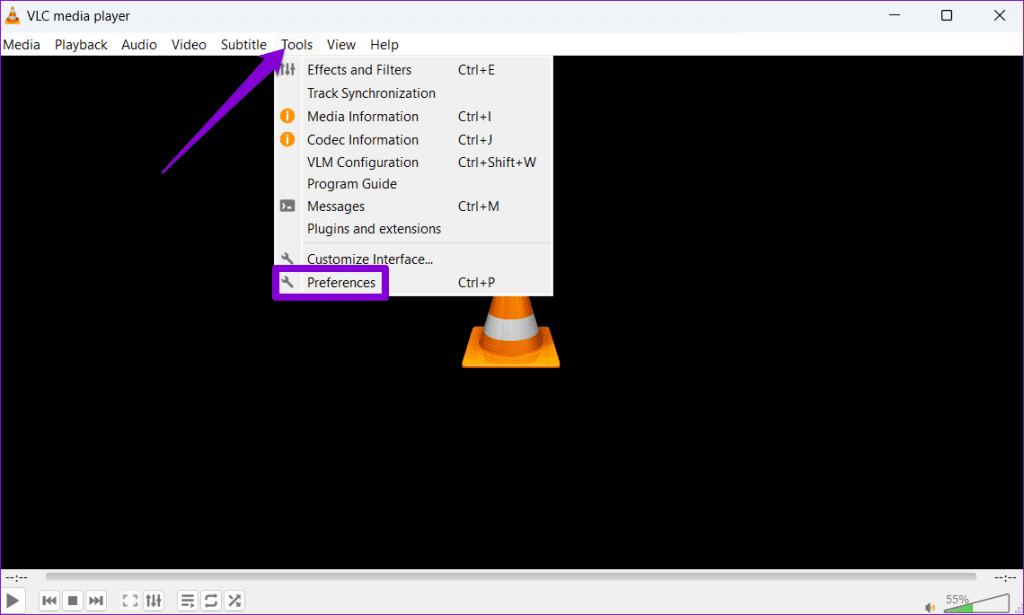
Step 1: Open the VLC media player, click on Tools, and select Preferences from the list.
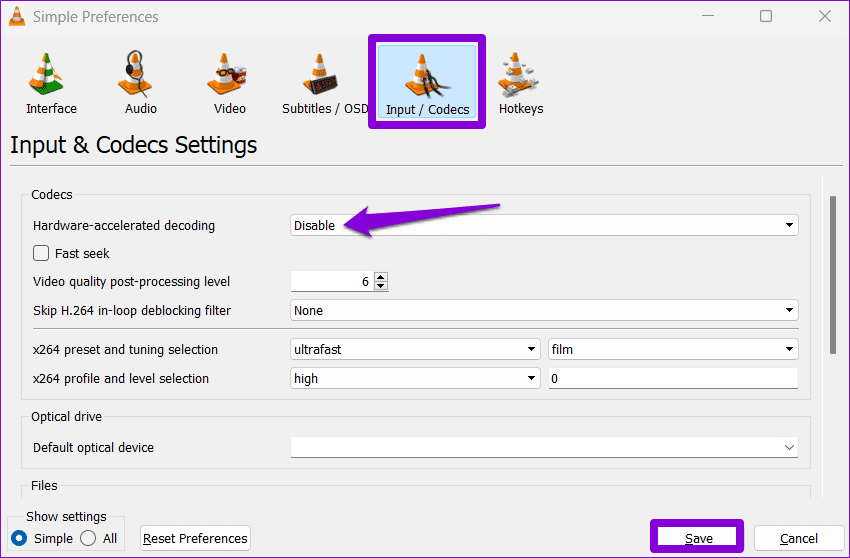
Step 2: Click the Input / Codes tab at the top. Use the drop-down menu next to Hardware-accelerated decoding to select Disable. Then, click on Save.
Close VLC and play a video file again to check whether it plays audio.
6. Reset VLC Preferences
VLC packs several features and customization options. If you’ve tinkered with those settings and forgot to turn one on or off, it may not play audio expected. If that’s the case, resetting VLC preferences will help restore normalcy.
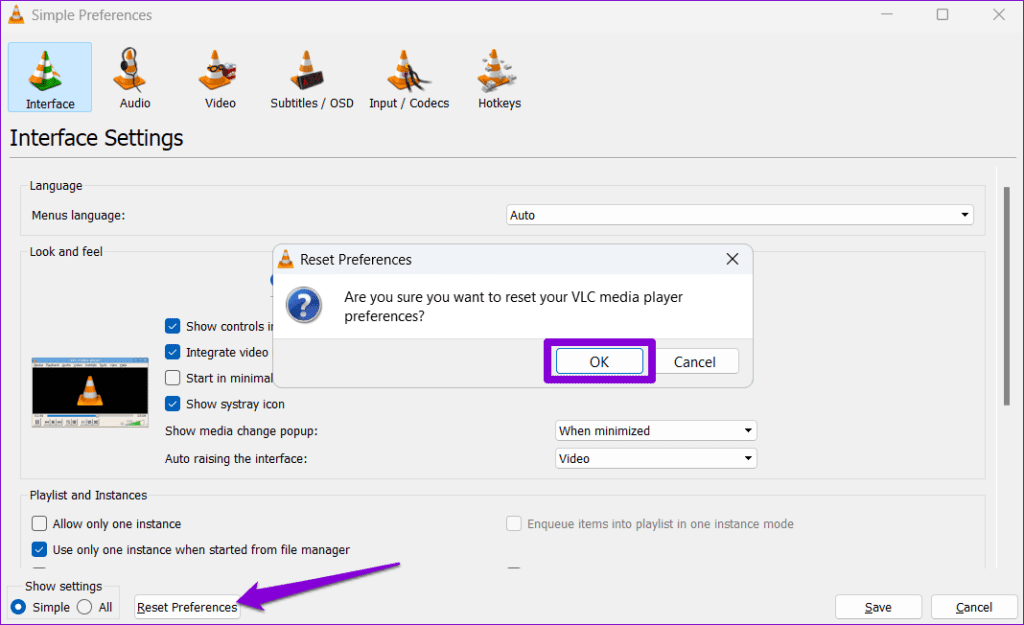
Open VLC and press the Ctrl + P keyboard shortcut to open the Preferences window. Click the Reset Preferences button at the bottom and click OK to confirm.
7. Disable Audio Enhancements
The built-in audio enhancement packages on Windows can also cause audio to stop working in VLC. Try turning off these audio enhancements to see if that solves the problem.
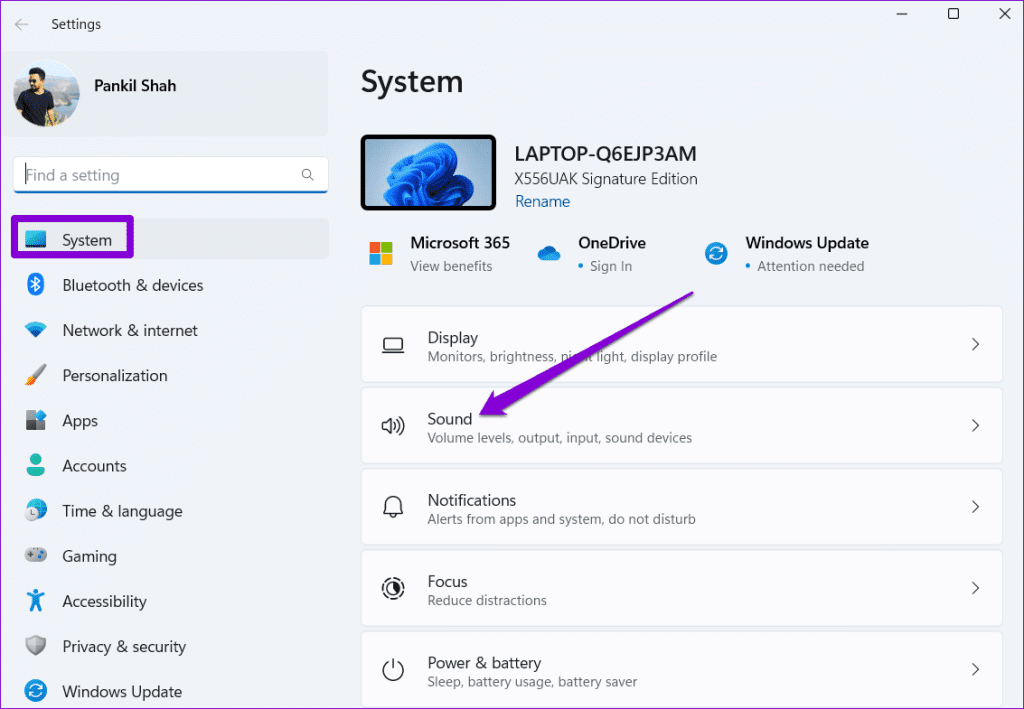
Step 1: Press the Windows key + I keyboard shortcut to open the Settings app. In the System tab, click on Sound.
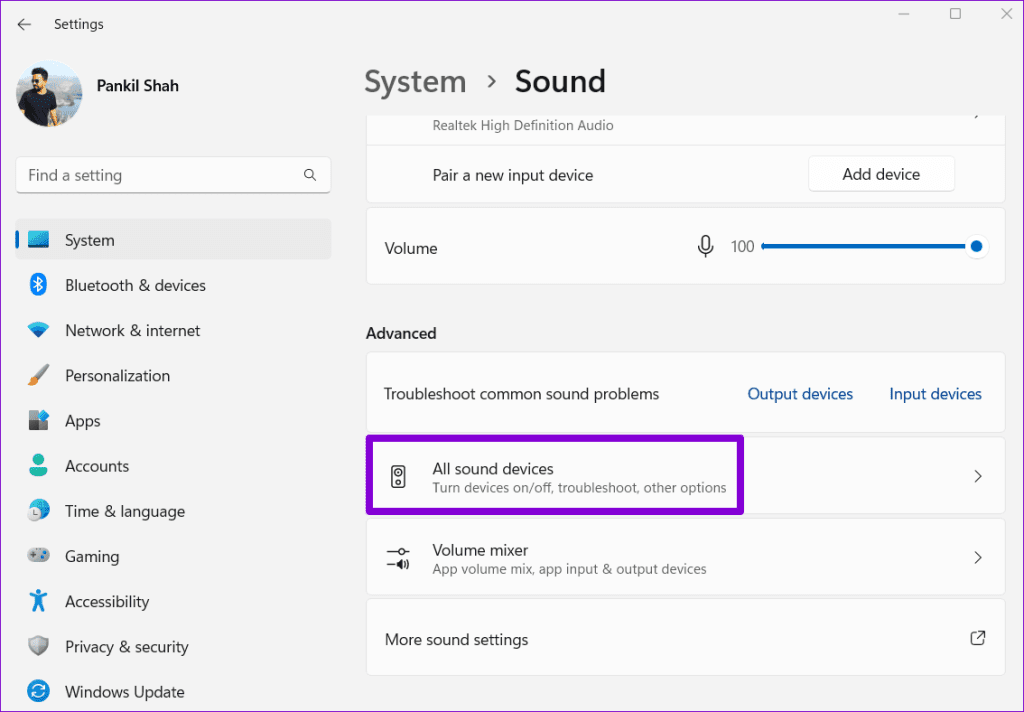
Step 2: Scroll down to the Advanced section and click on All sound devices.
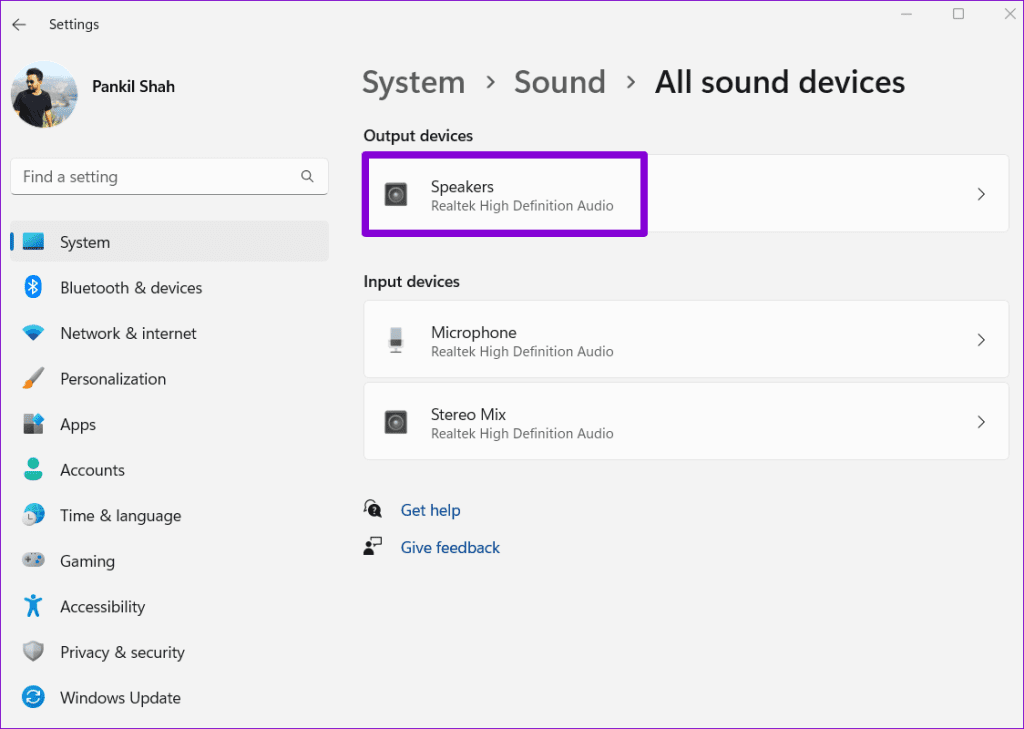
Step 3: Select the output device that you’re facing issues with.

Step 4: Click the drop-down menu next to Audio enhancements and select Off.
8. Clear VLC Player Cache
Corrupt or outdated cache data associated with the VLC media player can also cause it to malfunction on Windows. You can try clearing the existing VLC cache data to see if that solves the problem.
Step 1: Press the Windows key + R keyboard shortcut to open the Run dialog box. Type %appdata%\VLC in the text box and press Enter.

Step 2: In the File Explorer window, select all the files and click the trash icon at the top.
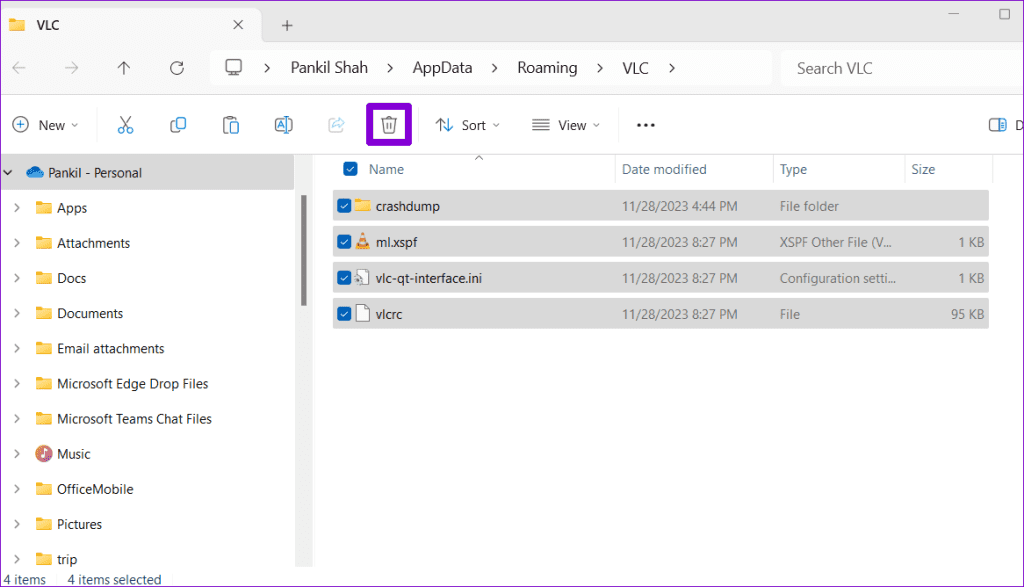
Restart the VLC media player after this and check if the issue is still there.
9. Reinstall VLC Media Player
If clearing the VLC cache proves ineffective, you can consider uninstalling the app from your PC and reinstalling it. Doing so will fix any issues caused by damaged app files. Press the Windows key + S keyboard shortcut to open the search menu. Type VLC media player in the box and select Uninstall.
Once removed, use the following link to download and install the VLC media player again.
10. Update or Reinstall Audio Drivers
The audio driver on your PC helps Windows identify and interact with your audio devices. You could experience sound issues with apps like VLC if this driver is outdated. You can fix the audio driver by updating it. Here’s how to do that.
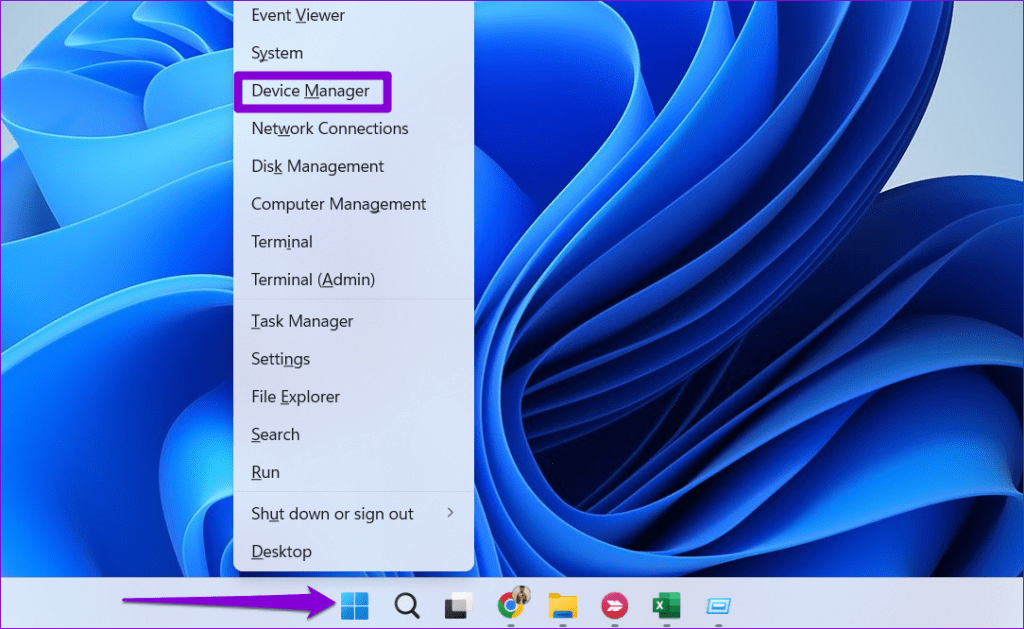
Step 1: Right-click on the Start icon and select Device Manager from the list.
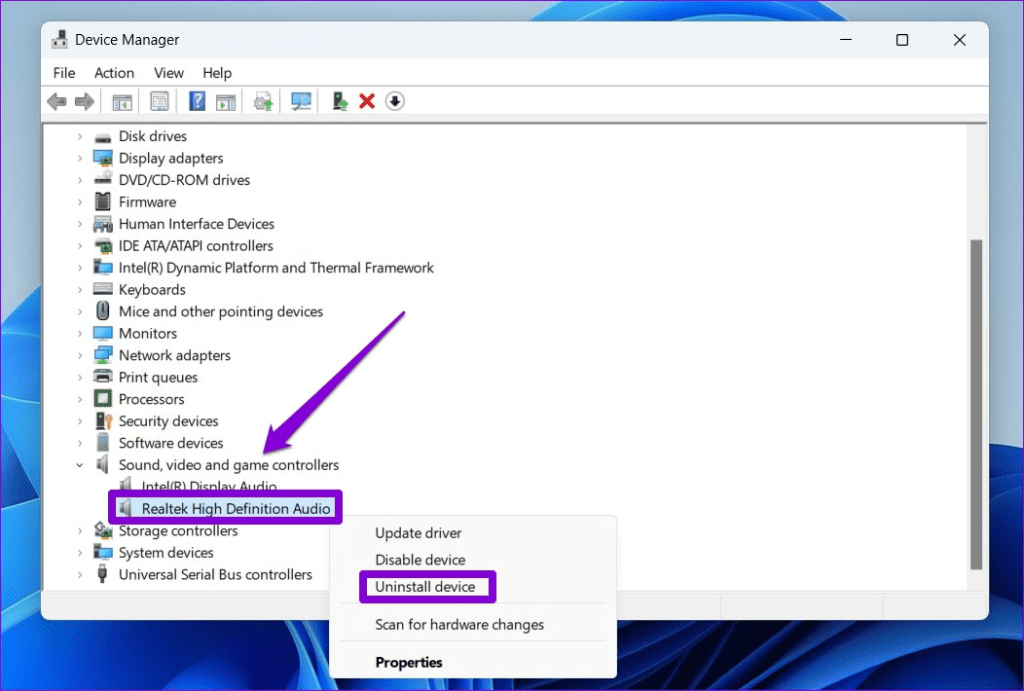
Step 2: Find and expand ‘Sound, video and game controllers.’ Right-click on the audio device, and select Update driver from the list.

Follow the on-screen instructions to finish updating the driver. If the issue persists, uninstall the problematic driver and restart your PC. This will allow Windows to reinstall the missing driver, resolving any issues.
Loud and Clear
When the audio stops working in the VLC media player, it turns your multimedia experience into a silent movie. Unless there’s a problem with the video file, one of the above tips should help get the audio in VLC working again on your Windows 10 or 11 PC.
Was this helpful?
Last updated on 29 November, 2023
The article above may contain affiliate links which help support Guiding Tech. The content remains unbiased and authentic and will never affect our editorial integrity.


