Today Xiaomi is not known solely for their smartphones in India. In the last few years, it launched gadgets and accessories like power banks, Bluetooth speakers, and fitness bands. Lately, it has forayed into the smart home segment with the Mi Wi-Fi Smart Bulb. This smart light doesn’t need any bridge and also works with both Amazon Alexa and Google Assistant as well.

Yep, it has all smartness, but how difficult would be the initial setup? Well, that’s where we come in. In this post, we walk you through all the steps needed to set up the Mi Smart Bulb and to connect it to your phone. And the story doesn’t end there. We’ll also show you how to connect the smart bulb to Google Assistant.
Let’s get started.
How to Connect Xiaomi Mi Smart Bulb to Phone
Connecting the new Mi Smart bulb to your phone requires some patience and attention. For this guide, we used an Android phone. Here are the steps to initiate the setup.
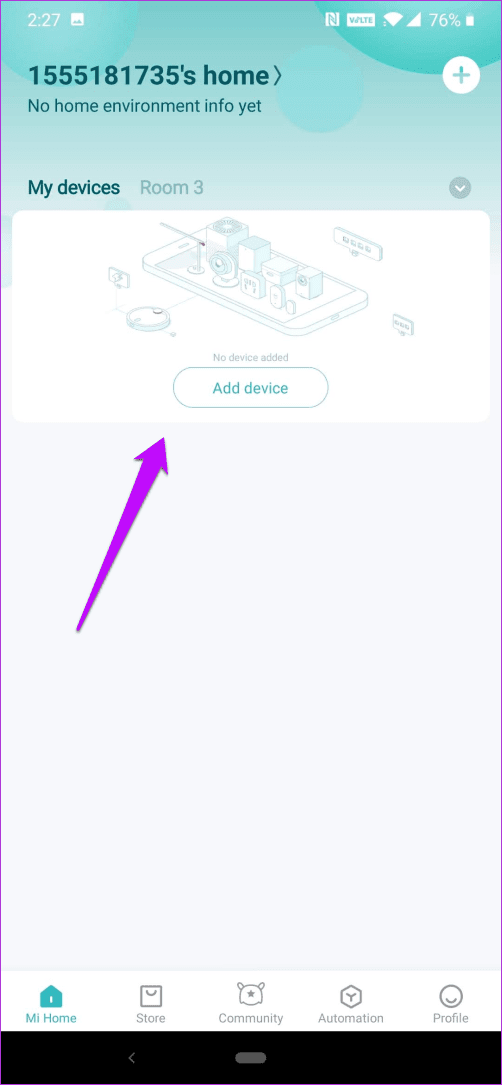
Step 1: First and foremost, you’ll need to download the Mi Home app. After that, log in using your Mi account. This step will help you connect all your other Mi smart home products such as air purifiers and security cameras.
Once you’ve logged in, you’ll see the Add device button on the home screen. Tap on and then select Lighting > Mi Smart LED.
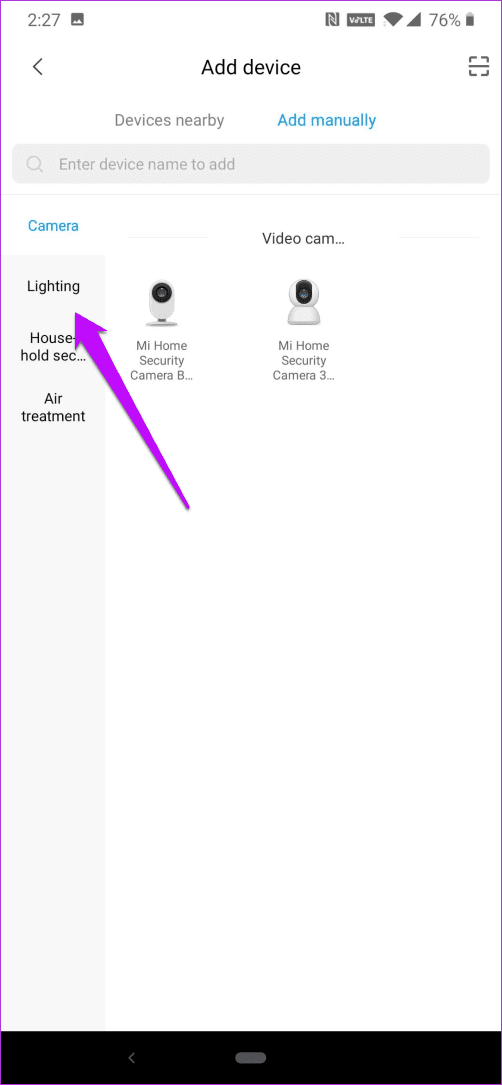
Step 2: At the same time, plug the bulb into the socket and switch it on. While the bulb will turn on immediately, you’ll need to reset it once. For that, toggle the switch on/off for about five times till you see the bulb emitting a colorful display.
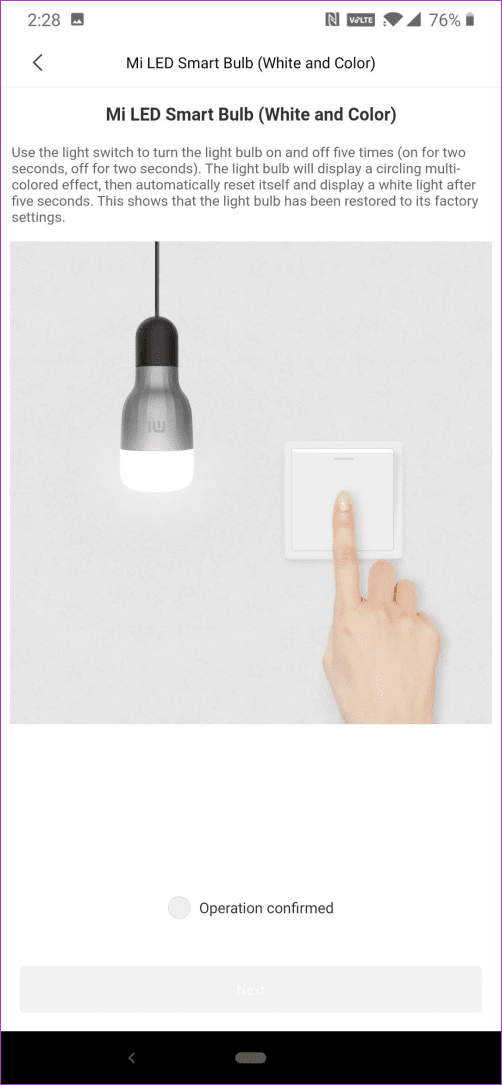

Once done, tap on Operation Confirmed and hit the Next button. That’s when you should connect the Mi Bulb to your home Wi-Fi.
Tap on the ‘Connect to another router link’ and enter the Wi-Fi password, and so begins the actual process of connecting the bulb to your phone. While doing that, make sure you are close to the lamp.
Step 3: The initial setup takes around 2-3 minute, and you’ll see the timeline of your progress.


Once done, assign a room to the device. Again, give it a simple name instead of a complex 2-3 word name, and that’s it! Congratulations, you just completed the setup for the Mi LED Smart Bulb.
Step 4: Once it is set up, you can do all that this smart bulb has to offer. Initially, the color of your Mi Home interface will be the same as that of the lamp.

To reduce the brightness, slide down on the left side. To see the lamp changing color, tap on Flow.
How to Access Presets in Mi Home App
Yeah, the bottom menu lets you play around the light settings a lot. But, those are just basic settings. Tap on the Favorites ans you’ll see different options like Sunset, Candlelight, Movie, etc.
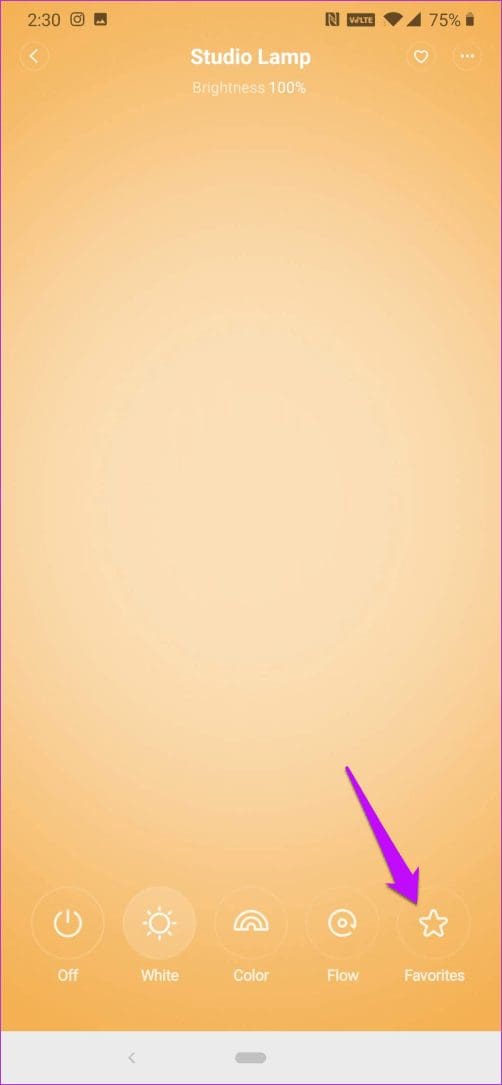

All you have to do is hit the Apply button, and the bulb will change color in a few seconds. From movie night to birthday theme, you can play with a lot.
My favorite? Sunrise, it is.
How to Set up Google Assistant for Mi LED Bulb
Though you can control a lot of things with the Mi Home app, it doesn’t have voice control. And if you have a Google Home or Amazon Echo product with you, the smartness would be a little lost if you don’t use it to its full potential.
And even if you didn’t have a smart assistant device, the ability to switch on the light just by your voice can be a charming experience. Yep, you read that right. You can control the smart bulb via your phone’s Google Assistant.
To integrate your Mi Smart Bulb with the assistant, you’ll need the Google Home app.
Step 1: Once you’ve logged in to the app, tap on the Add button at the top. That will enable you to add any smart devices. The good news is that the process is similar for all types of smart devices, be it a smart bulb or an air purifier.
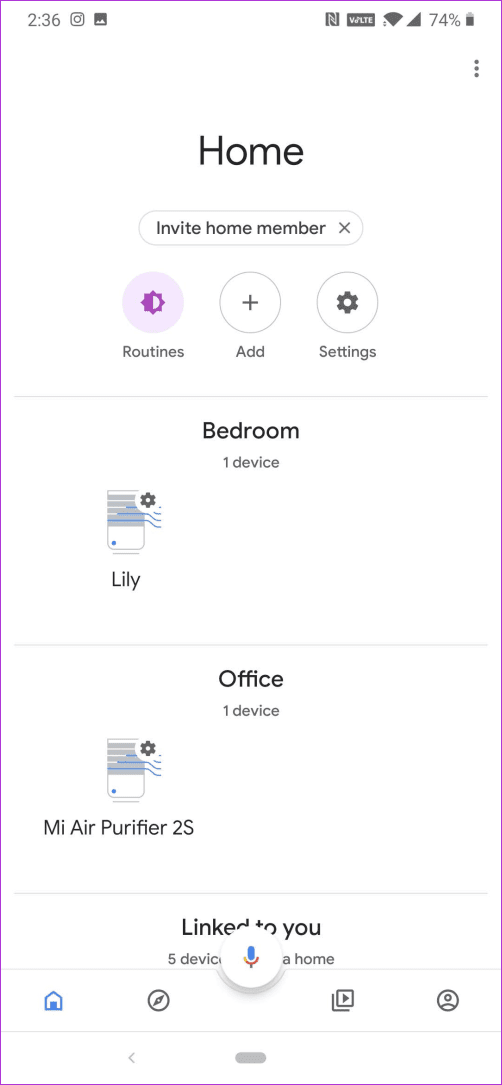
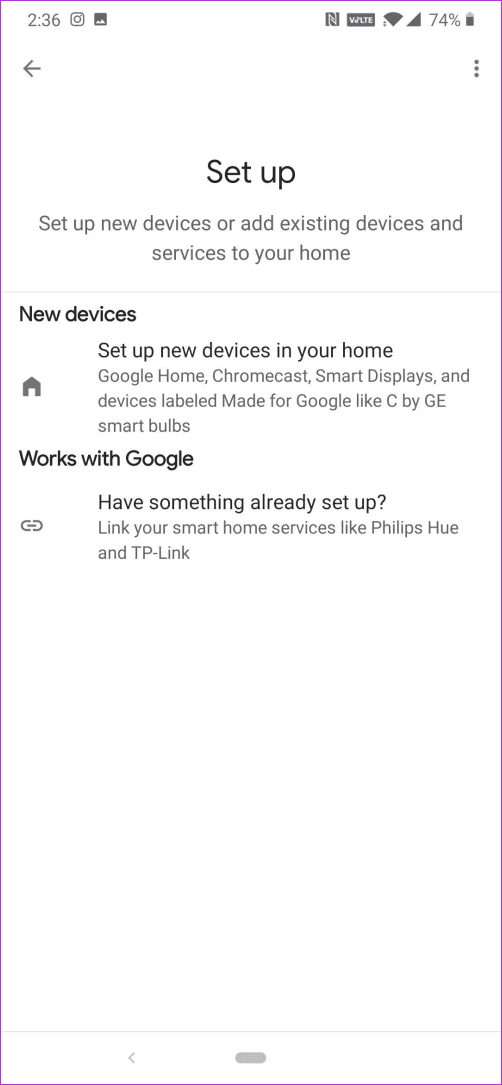
On the next page, select the second option for a non-Google device.
Step 2: Give a name to the Home and tap on Next to set up the device. Here, tap on Set up Device and search for Mi Home in the search page, as shown in the second screenshot.
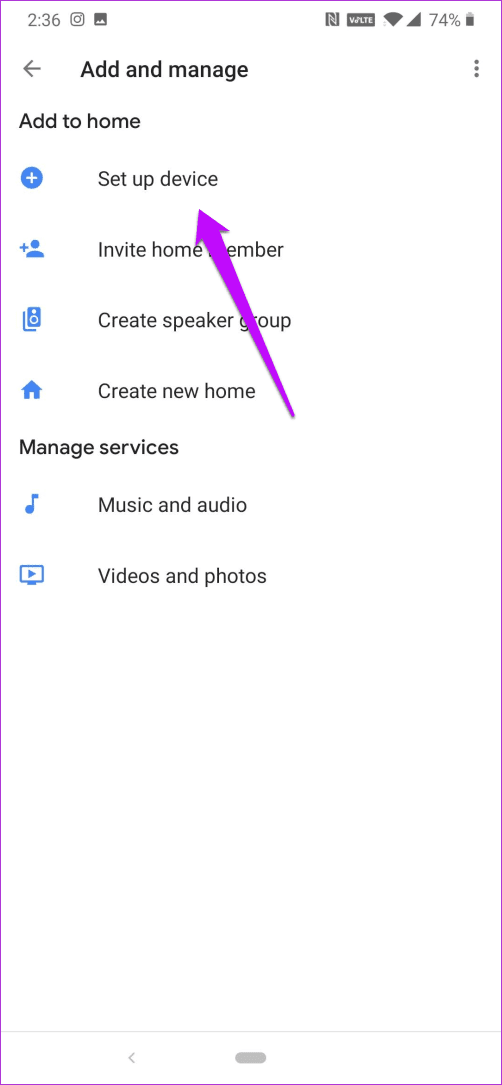
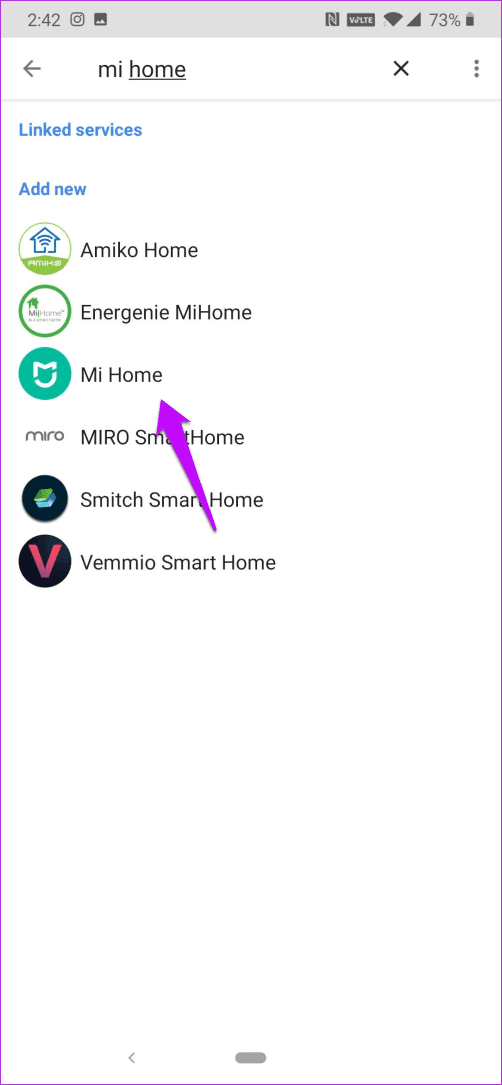
Next, enter your Mi account credentials that you used in logging to the Mi Home app previously. Once everything is verified, all the connected devices will appear on a list. If this is your first time using Google Home, the chances are that most of the devices will have unassigned rooms.
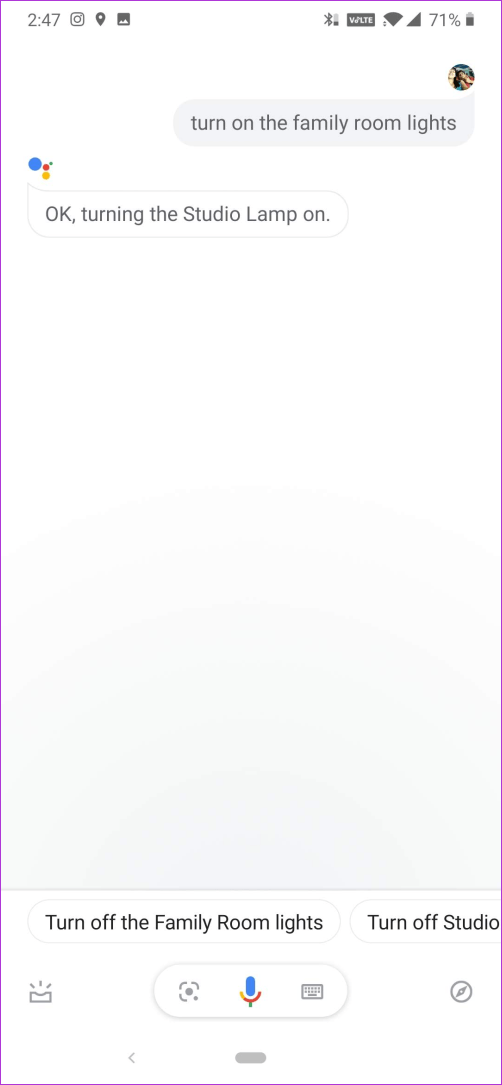
Assigning names allow you to group two or more devices in a single room. This way, you can just say “Ok Google, turn on Bedroom lights,” and all the lights in that room will be switched on. In a nutshell, it makes life easier.
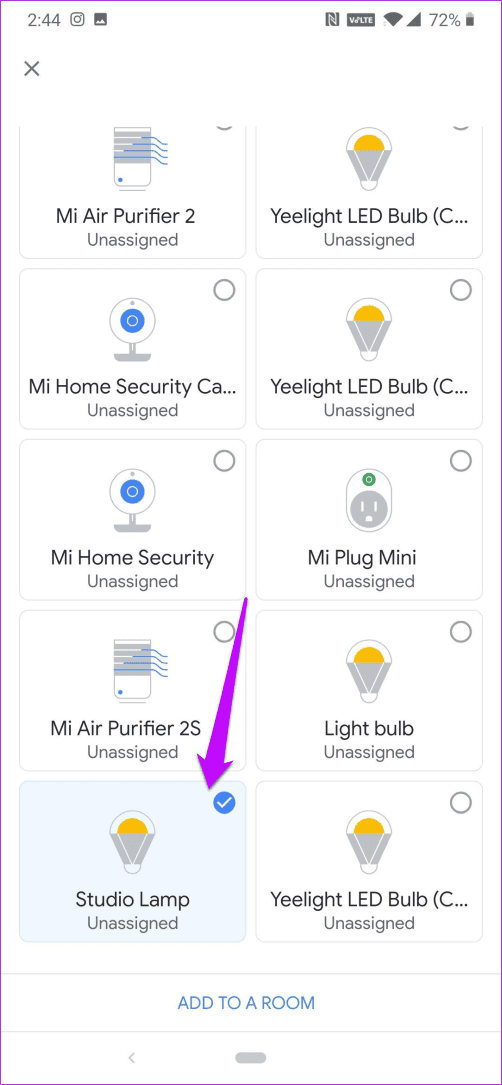
To assign a room, tap on the Add to a room button, and assign a proper name. In my case, I have assigned it to the Living room.
Once everything is set up, you make a few tweaks using the Mi Home app. For instance, you can switch the light on/off or change the color of the lamp.
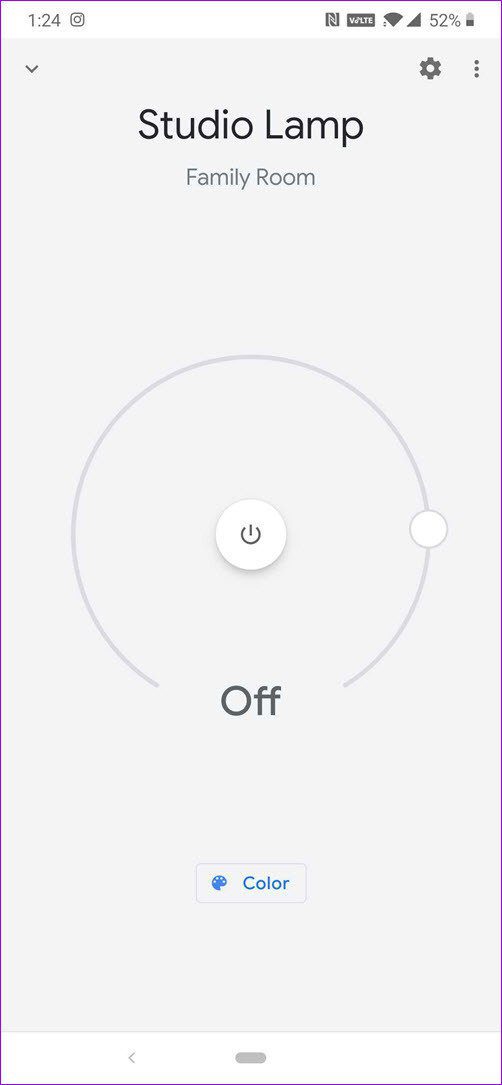

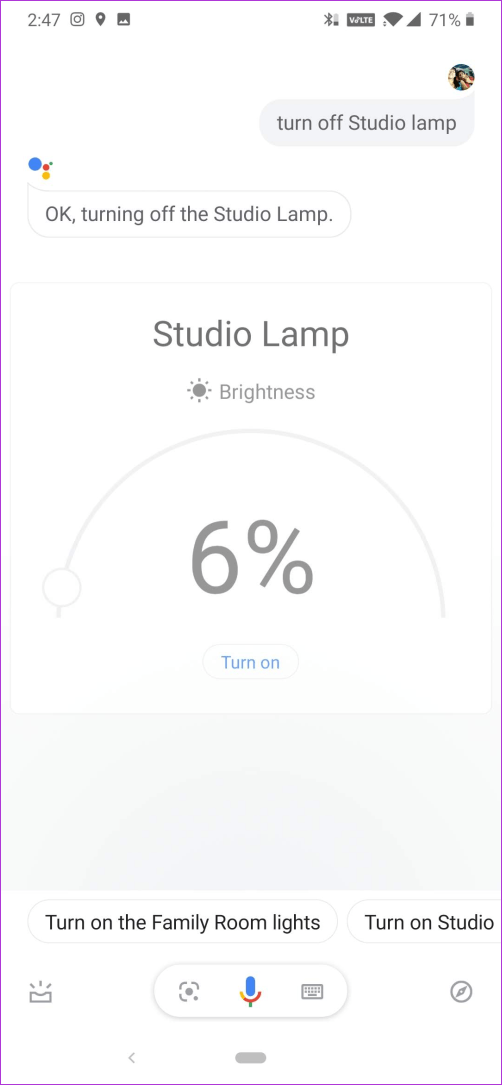
To test the Mi Smart Bulb with Google Assistant, wake up by long pressing on the Home button or via the wake-up command. Now, say the command and watch the lights come alive.
Get Smart!
Setting up the Mi LED Wi-Fi Smart Bulb takes a couple of minutes. The best part is that you can connect it to smart assistants and also add schedules to it.
To do so, go to the Settings page of the Mi Home app via the three-dot menu and press the Plus button at the lower-right corner.
Next up: Did you know you can also connect the Xiaomi Air Purifier to the Google Assistant? Read the article below to find out how.
Was this helpful?
Last updated on 03 February, 2022
The article above may contain affiliate links which help support Guiding Tech. The content remains unbiased and authentic and will never affect our editorial integrity.


