Windows lets you map network drives to skip typing the address every time you want to use them. And there are times you get the ‘local device name is already in use’ error. The problem mostly occurs if there are issues with the file and printer sharing settings and unassigned drive letters. Luckily, there are a few ways to fix it.

There are several causes of the error. The most common ones are:
- Unassigned or wrong drive letters.
- Disabled file and printer sharing options.
- Insufficient disk space in the network server.
- Problems during the mapping process.
We have compiled solutions to fix the ‘local device name is already in use’ error on Windows 10.
1. Assign or Change Drive Letter
A missing or wrong drive letter can cause the ‘local device name is already in use’ error on Windows. To assign or change the drive letter, follow this process.
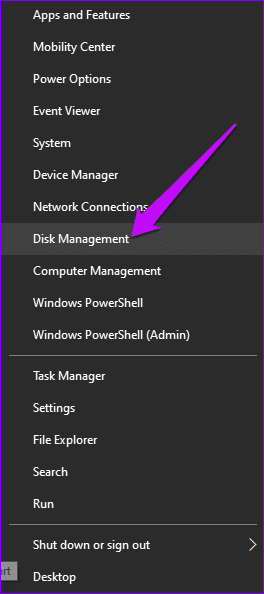
Step 1: Right-click on the Windows Start button, locate Disk management, and click on it.
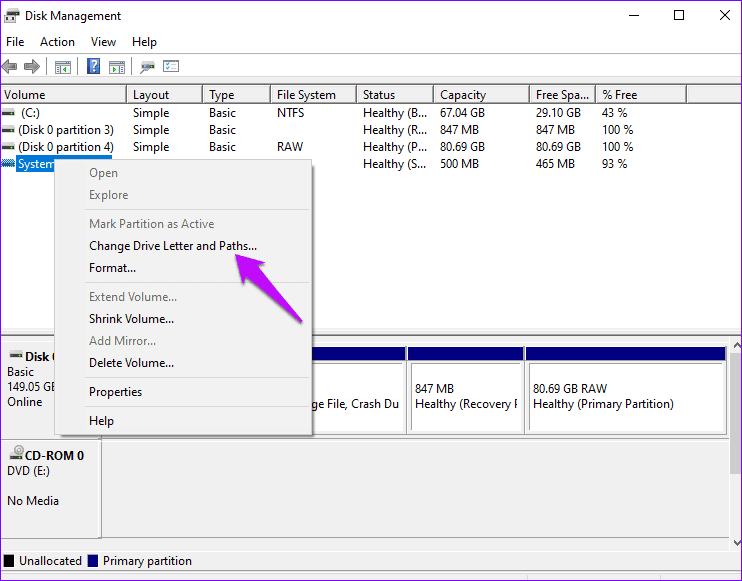
Step 2: When the Disk Management window opens, locate the partition you want to change the letter of, and right-click on it.
Step 3: Select, Change Drive Letter and Paths.
Step 4: On the next window, click Add.

Step 5: Select Assign the following drive letter and choose a preferred drive from the drop-down menu. Press OK to update the changes.

Note: It is recommended not to pick drive A or B from the new drive letters. This is because these drives contain floppy versions from previous software, and assigning them to the current drives can disrupt older programs.
2. Remap the Network Drive
The Windows system assigns specific letters to your computer drives. But during network mapping, the drive letters may become mixed up, or lack assigned drive letters for mapping. In such instances, you need to remap the network drive to fix the issue. Here’s how you can do it.
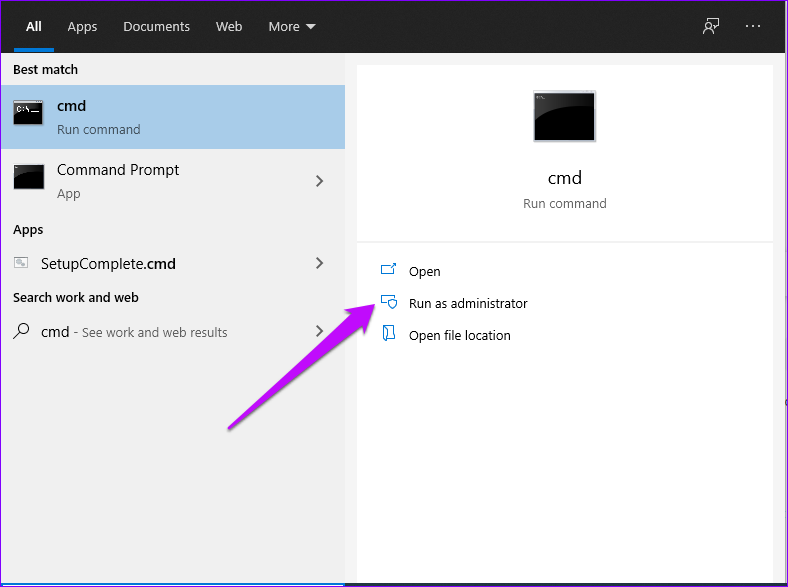
Step 1: Type cmd on the Windows search bar and select the Run command option on the left-hand side.
Step 2: On the right-hand side, click Run as administrator.
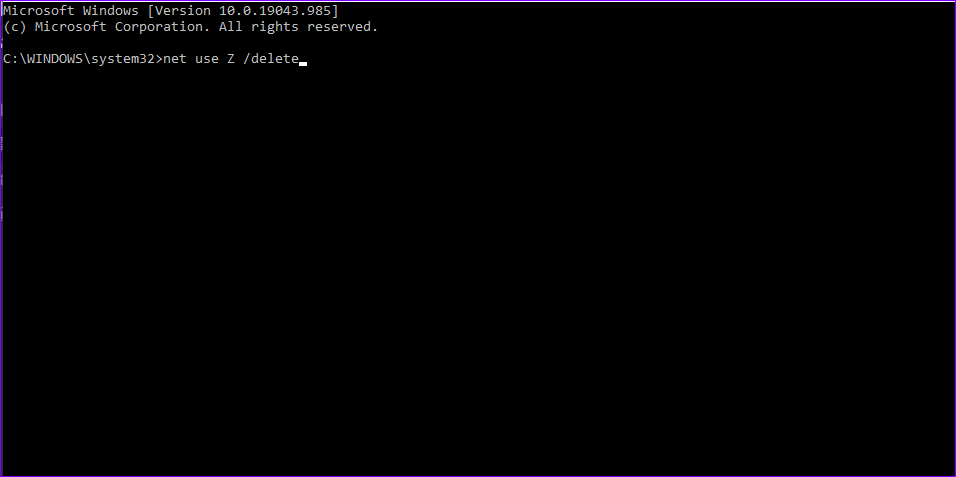
Step 3: Copy and paste this command and press Enter.
net use Z /delete
Remember to replace ‘Z’ with the partition you want to delete.
Step 4: After deleting the device name, modify it by running this command.
net use Z: \\server\share /user:username password
Remember to use the same drive letter ‘Z’ with where you want to map the drive. Also, input a relevant user and username password for the drive you want to modify.

Step 5: Restart your device and confirm that the mapping issue has resolved.
3. Enable File and Printer Sharing
The error can also pop up if the file and printer sharing options are off. To clear the error, enable the settings through the Windows Defender Firewall. Here’s how you can do it.
Step 1: Type Control Panel on Windows search bar, and press Enter.

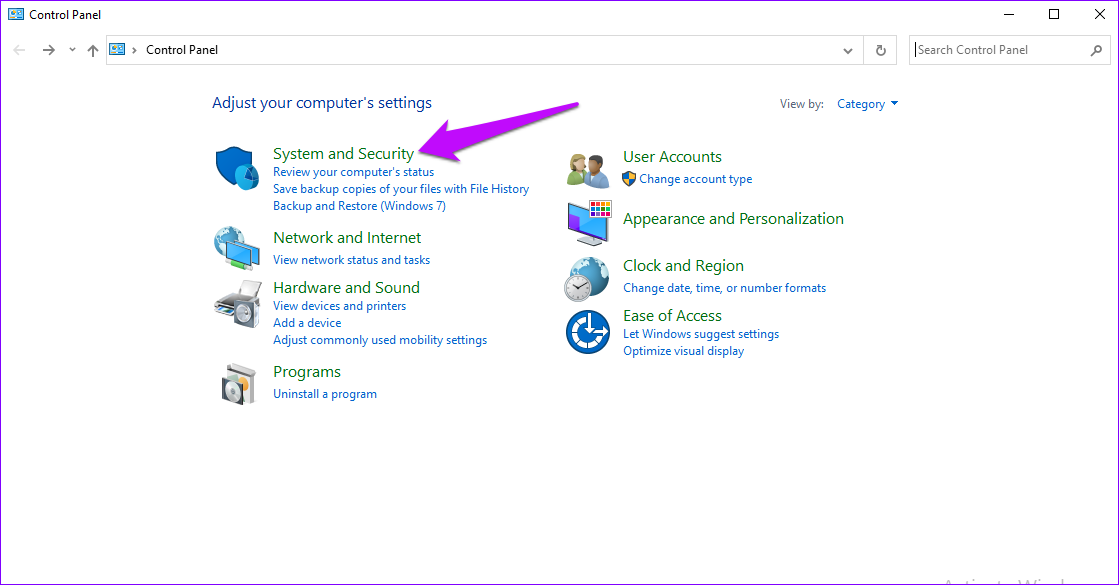
Step 2: Click System and Security.
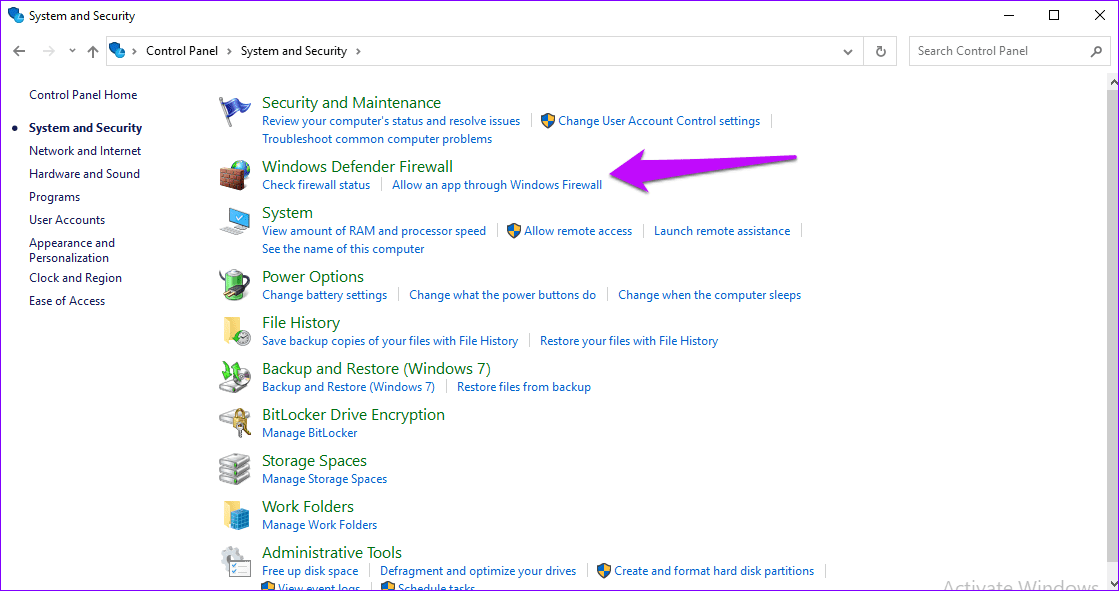
Step 3: On the Allowed apps window, locate Windows Defender Firewall and tap ‘Allow an app or feature through Windows Firewall’ option.
Step 4: Tap Change settings, and if administrator permissions are required, allow them.
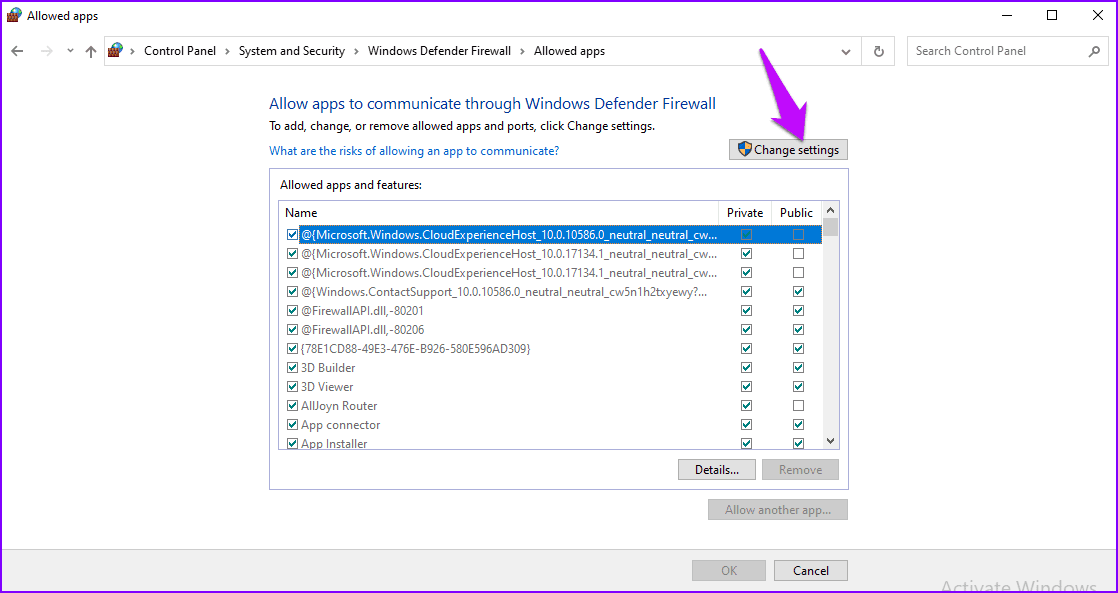
Step 5: Navigate to the File and sharing option and check the boxes.

Complete the process by pressing OK and restarting your computer.
4. Change Value of Protection Mode
Modifying the value of the protection mode can also fix the issue. You can use the Registry editor to carry out this process.
Step 1: Press Windows + R keys , type regedit in the text box, and press Enter to open the Registry editor.

Step 2: Locate this path on the next window.
HKEY_LOCAL_MACHINE\System\CurrentControlSet\Control\SessionManager\
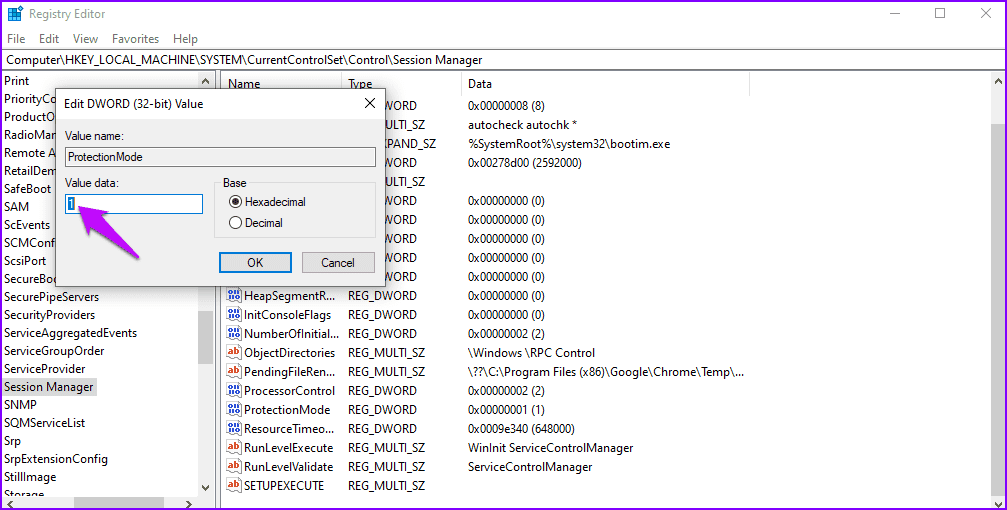
Step 3: On the right-hand pane, locate ProtectionMode and double-click on it.

Step 4: Change the value to ‘1’ and click OK to save.
Restart your device and confirm if the error has cleared.
5. Delete MountPoints2 Key
Deleting some registry keys could resolve the mapping issues in your system. Here’s how you can erase the MountPoints2 key.
Step 1: Press the Windows + R keys to launch the run dialog box, type regedit in it, and hit Enter to open the Registry Editor.

Step 2: Locate this path on the next window.
HKEY_CURRENT_USER\Software\Microsoft\Windows\CurrentVersion\Explorer
Step 3: Right-click MountPoints2 and select Delete. Confirm the dialog boxes that may appear and restart your system.

Fixing the Local Device Name
These solutions should help you fix the ‘local device name is already in use’ error on Windows 10. Remember that insufficient storage in the server could also result in this error. To resolve storage problems, include additional storage or free up some space on the server. Keep in mind that updating your system is also another easy way of fixing the error.
Was this helpful?
Last updated on 07 February, 2022
The article above may contain affiliate links which help support Guiding Tech. The content remains unbiased and authentic and will never affect our editorial integrity.

