Have you ever wondered why some documents have so many blank spaces in between? Or why there are blank pages in the middle two paragraphs? Well, it could be anything from a forgotten page or a setting gone rogue. To fix this, here’re easy ways to delete unwanted blank pages in Google Docs.
While deleting a page is simple, it becomes complicated if a problem with your doc’s settings might be causing that empty space to appear. And sometimes, that blank page might not be blank at all. So, is there a way you can check and delete blank pages in Google Docs? Read on to find out.
Note: Before starting, ensure you’re signed in to your Google account.
How to Remove Empty Pages From Google Docs Mobile App
Although the Google Docs mobile app does not have as many options as the desktop version, it still gets the job done. So, let us have a look at 2 easy ways that can help you in getting rid of a page on the Google Docs mobile app.
1. Use the Delete Button
The first and most basic way to delete a blank page in the Google Docs mobile app is by selecting and deleting the page from your document. Here’s how to do it.
Step 1: Open the Google Docs app.
Step 2: Open your document and tap on the pencil icon.
Step 3: Now, select the space you wish to delete.
Step 4: On your mobile keyboard, tap on the delete button.
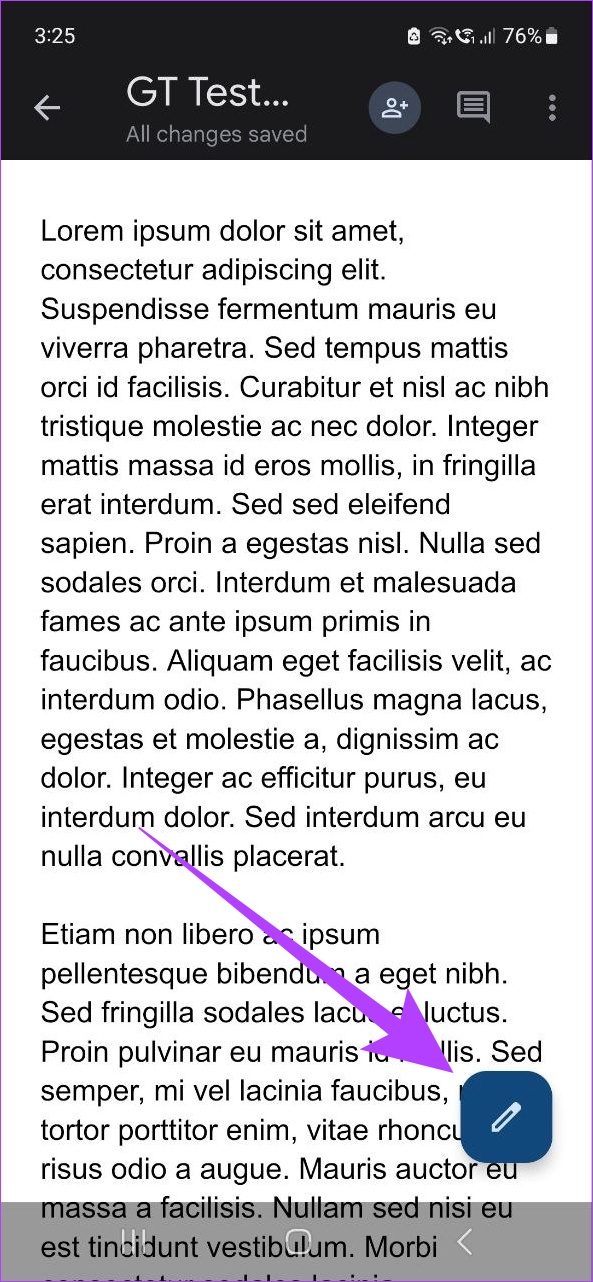
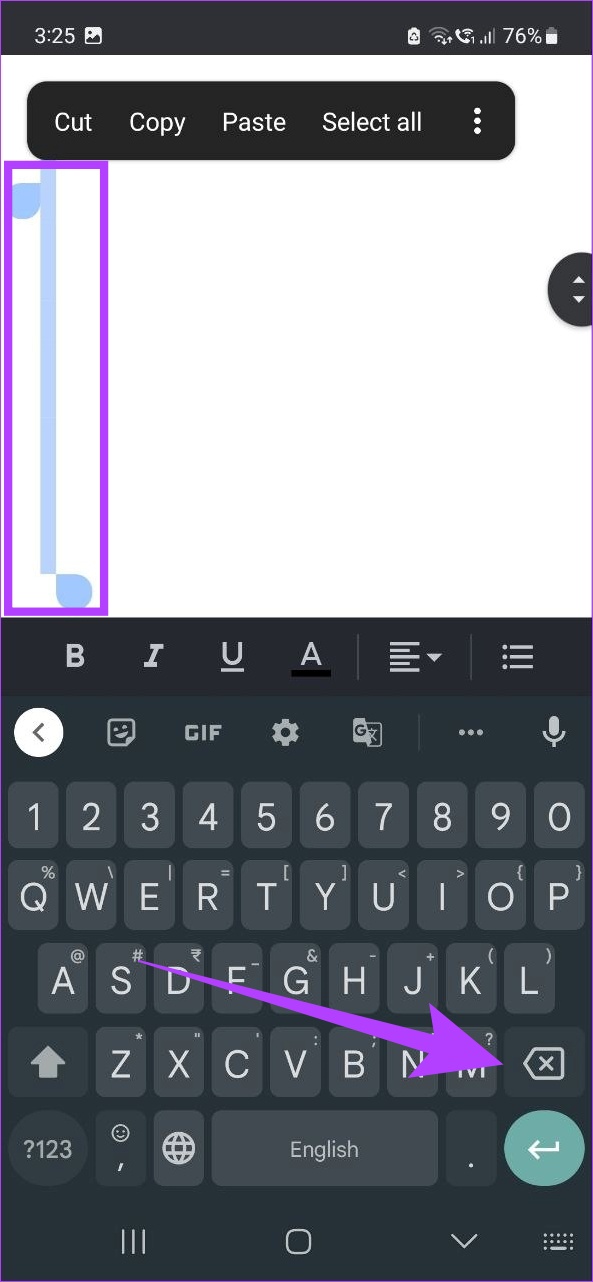
This will delete all extra space or pages within the document. You can also repeat these steps for deleting any additional pages in the document.
2. Edit Document Margins (iPhone only)
Exclusive to iOS, you can now change your document’s margins on your mobile. This way, you can remove any extra spaces in the doc that might’ve been caused due to larger margins. Here’s how to do it.
Step 1: Go to Google Docs, open the relevant document, and tap on the pencil icon.
Step 2: Now, tap on the menu icon.

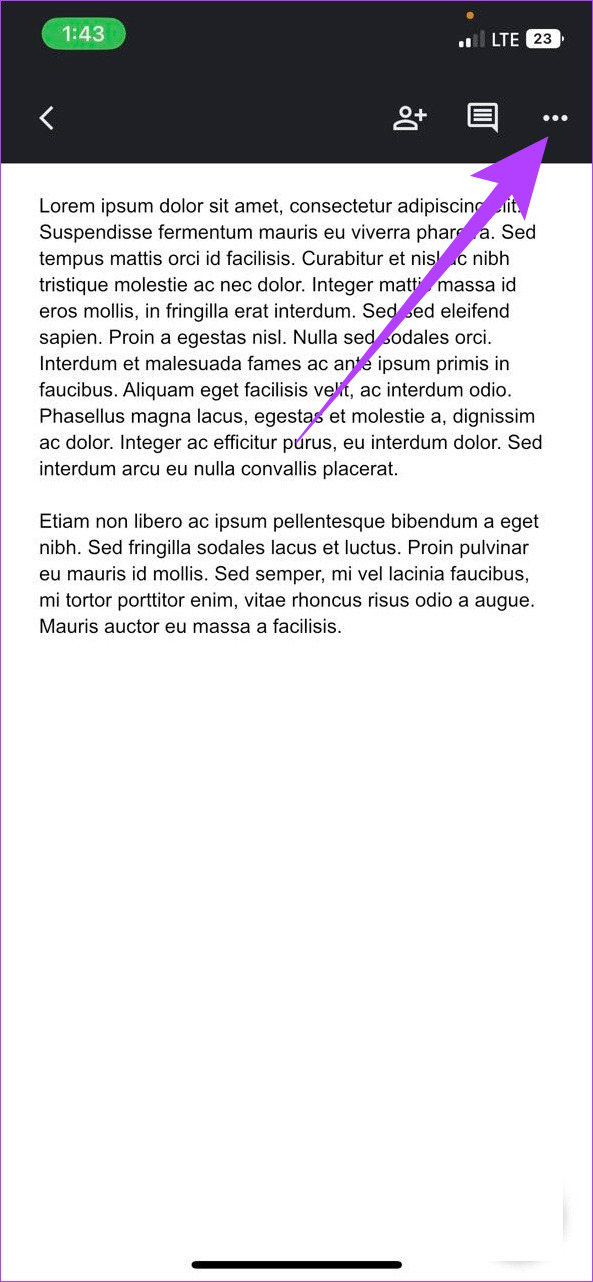
Step 3: Here, tap on Page setup followed by Margins.

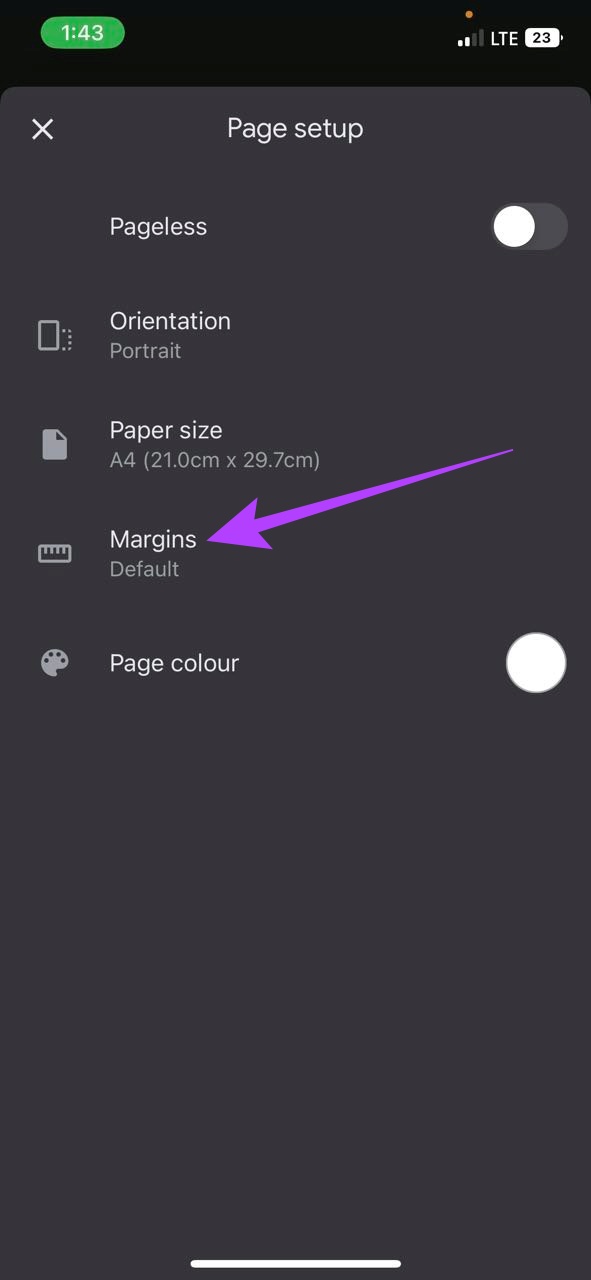
Step 4: From the options, select the margin you want.

Once the margins are adjusted, the blank space will disappear from the document in Google Docs.
How to Delete a Blank Page in Google Docs Web App
From using the Delete key to adjusting page breaks and even changing margins, let’s have a look at all the ways you can get rid of a blank page on the Google Docs web app.
1. Use the Delete Option
If your Google Docs blank page won’t delete even after repeatedly using the Backspace key, then using the Delete key might just do the trick. To do this, select the area and hit delete. Here’s how.
Step 1: Go to Google Docs and open the relevant document.
Step 2: Go to the top of the page you want to delete.
Step 3: Hold your cursor and select the entire page or till where you want to delete.
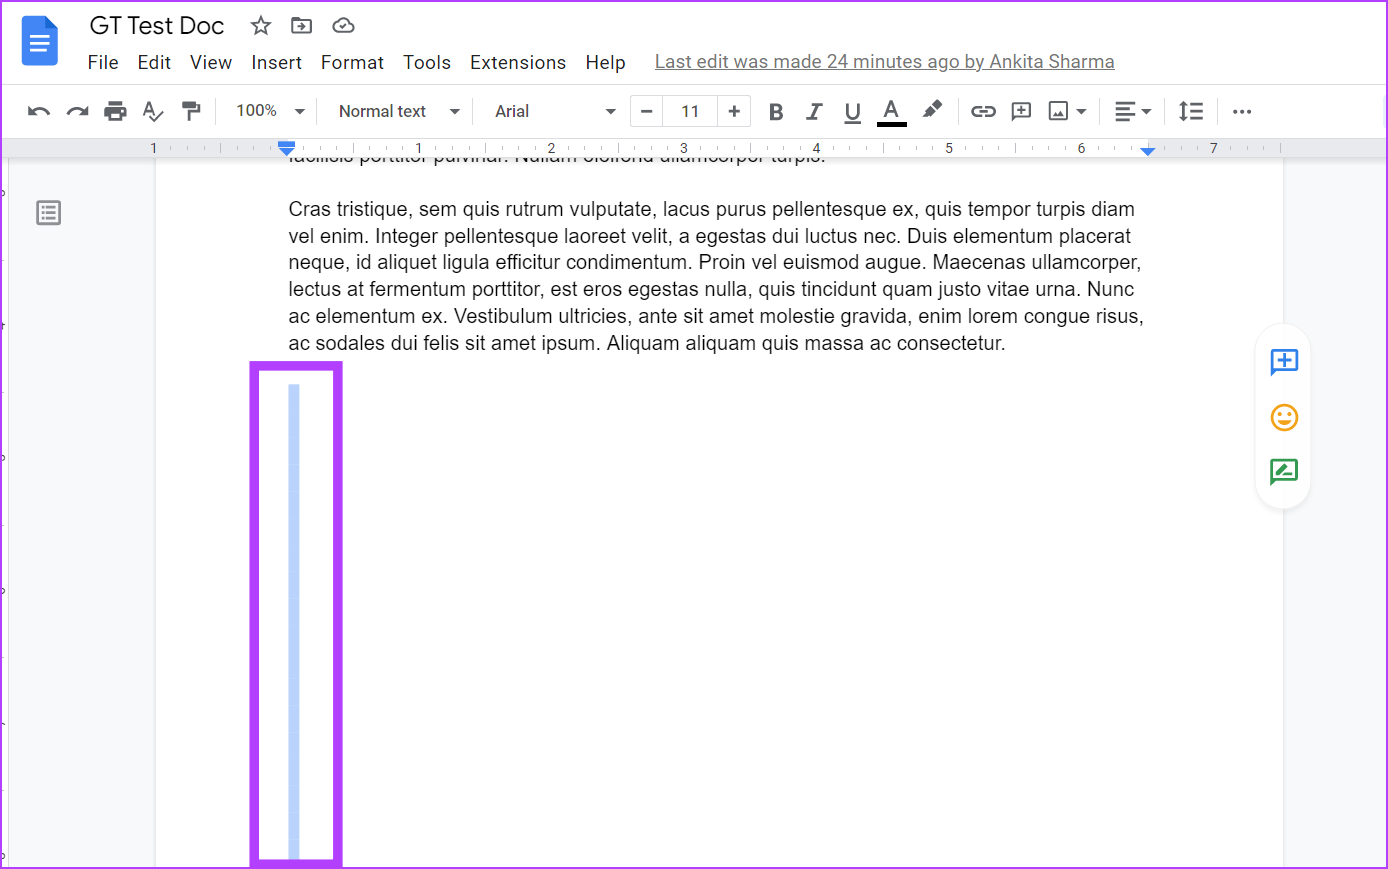
Step 4: Then, press the Delete key on your keyboard.
This will delete the blank page. You can also repeat the process if you want to delete any additional pages.
2. Change Custom Spacing Settings
Sometimes, Google Docs can add a set amount of space after every paragraph. This can also end up creating an extra blank page in the document. To prevent this, simply set the custom spacing value to zero. Follow these steps to do it.
Step 1: Open Google Docs, go to your document, and click on Format from the menu bar.
Step 2: Then, go to ‘Line & paragraph spacing’ and click on Custom spacing.

Step 3: Under Paragraph spacing, ensure the Before and After values are at 0.
Step 4: Then, click on Apply.
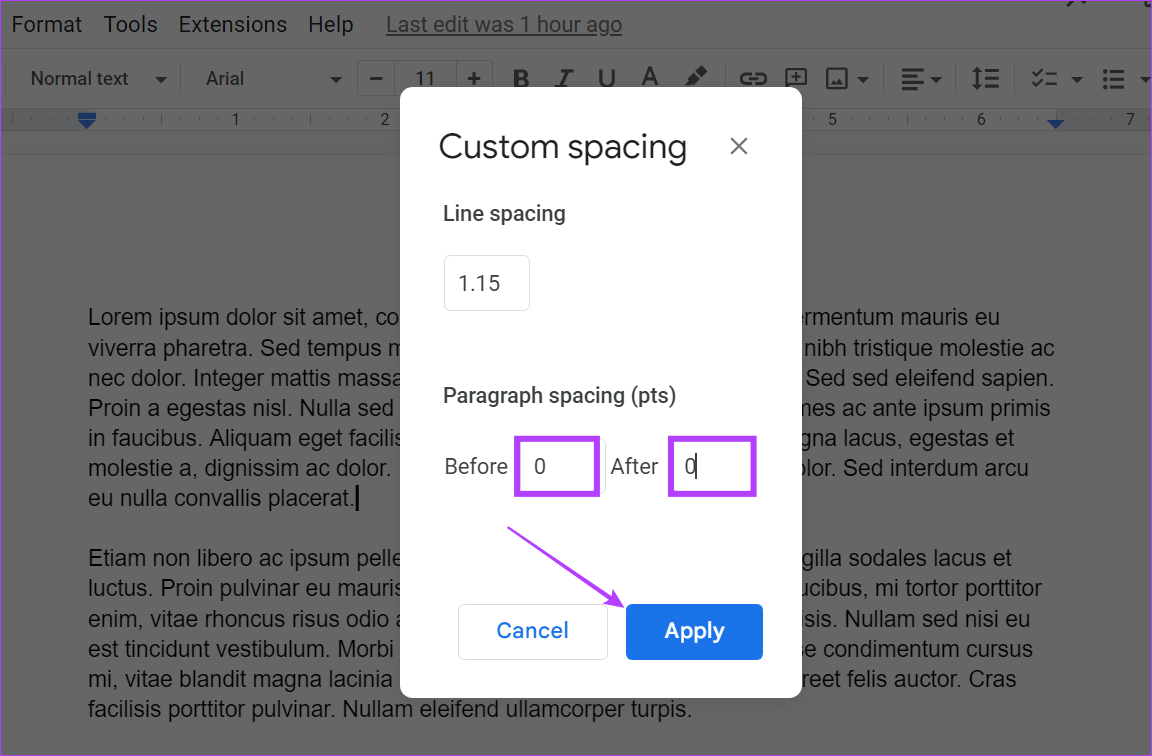
This will remove any extra space in your document. To remove spaces for other paragraphs as well, repeat the abovementioned steps.
3. Delete Unwanted Page Breaks
In Google Docs, page breaks are blank spaces sans text that can be used to end any page. However, this can also end up creating extra blank spaces in the document. To get rid of this, follow these steps.
Step 1: Open Google Docs, go to your document, and click on View.
Step 2: Here, uncheck the ‘Show print layout’ option. This will make the page break visible.
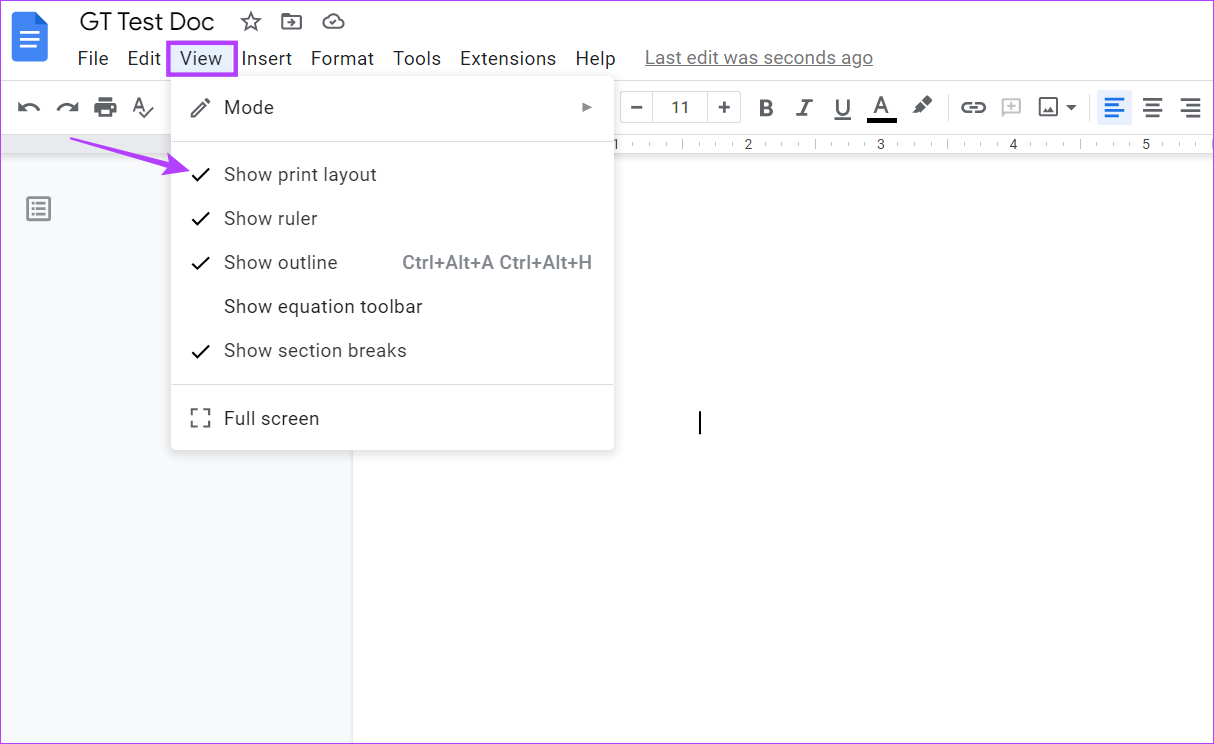
Step 3: Then, place your cursor just above the page break, select the area, and hit the Delete or the Backspace key on your keyboard.
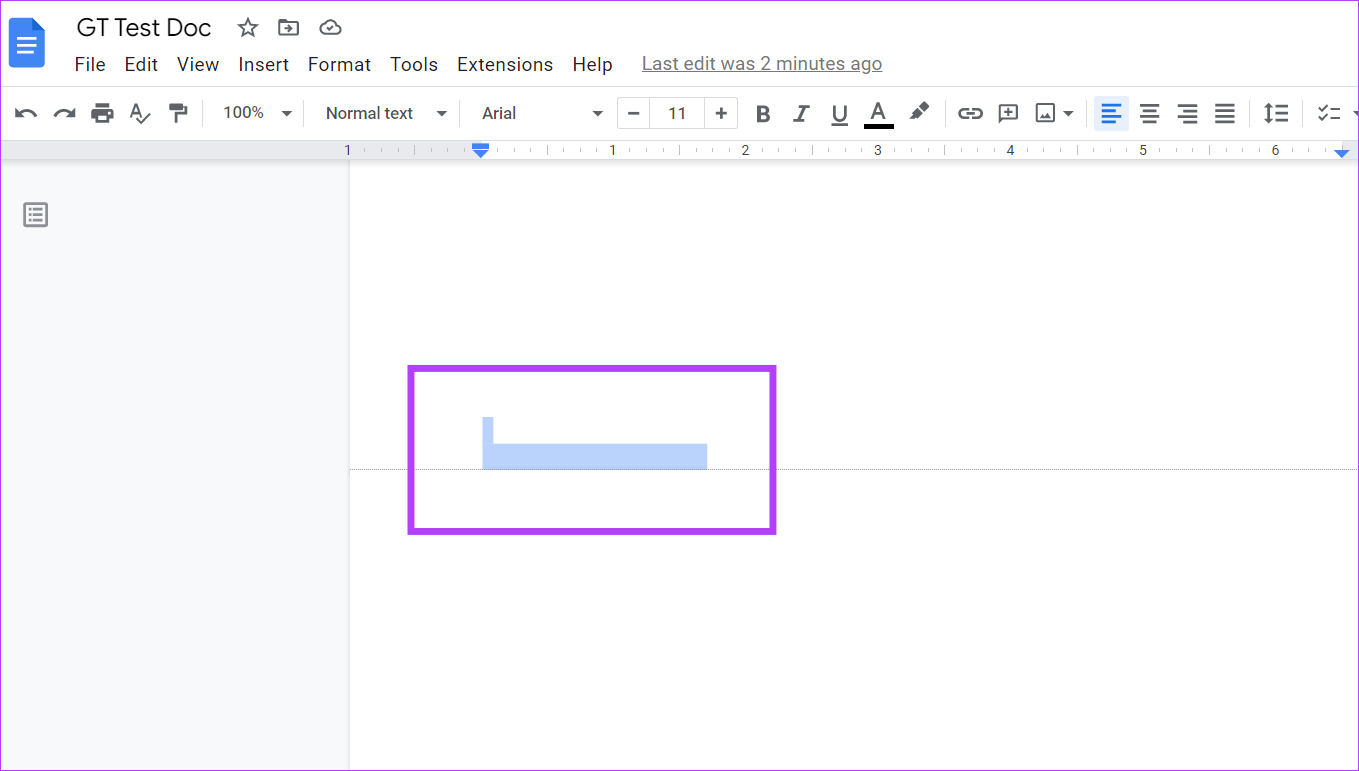
Once the page break is deleted, the blank space will go away as well. If you have any text after the page break, it will also be aligned with the rest of the text. Alternatively, you can also switch to pageless documents to avoid using page breaks.
4. Change Document Margins
While margins stop your text from merging with the document boundaries, super-long margins can end up leaving extra blank spaces. To fix this, follow these steps and change the margin settings in Google Docs.
Note: Doing this will change the margins for the entire document.
Step 1: Open the document in Google Docs and click on File.
Step 2: Scroll down and click on Page setup.
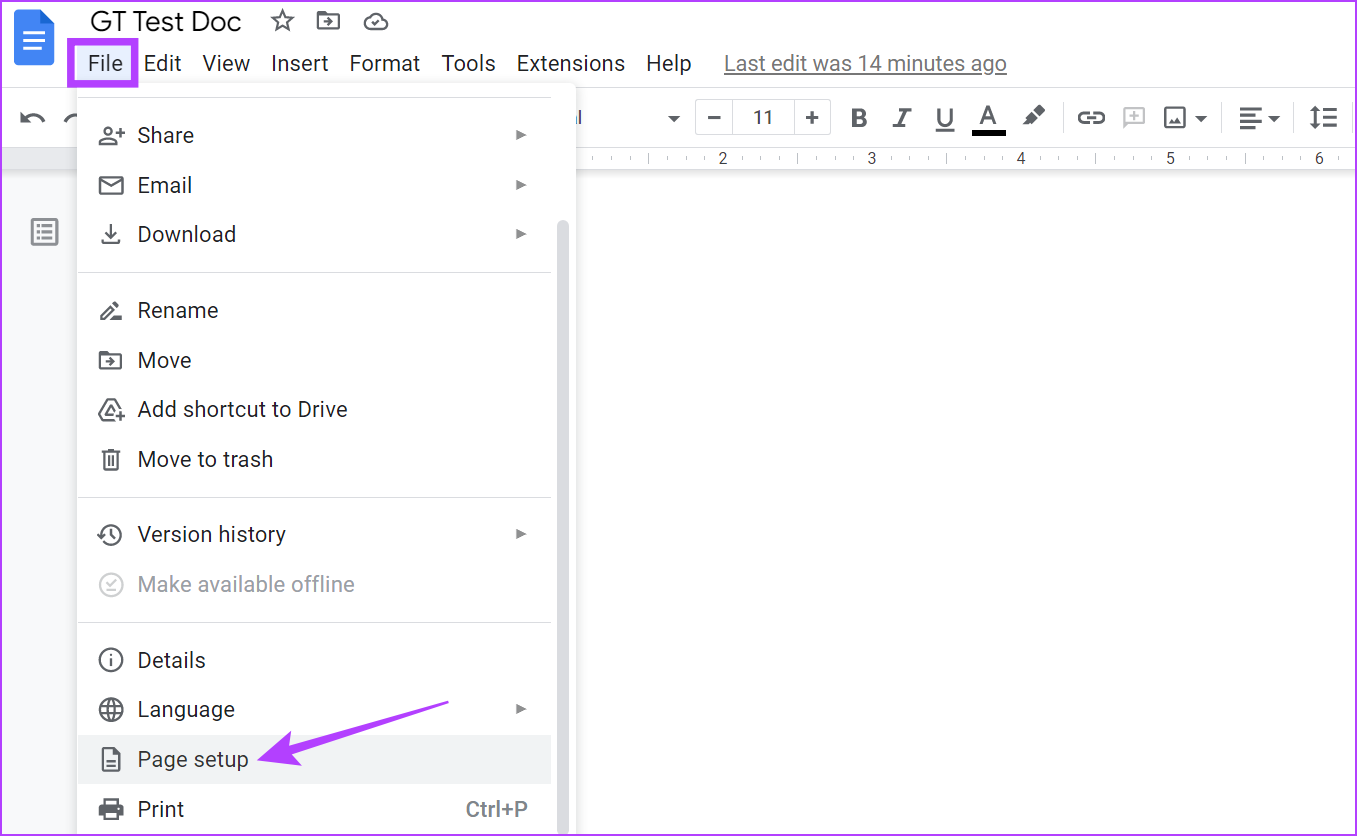
Step 3: Under Margins, change all the values to 1 or, if required, below.
Step 4: Then, click on OK.
Additionally, you can also click on ‘Set as default’ and then on OK to make this the default margin setting for all future documents. This will, however, not affect your previous documents.

All the unwanted margins will now be removed. You can also go through our guide to know more about changing margins on Google Docs.
5. Clear Document Formatting
If nothing else works, you can simply clear all document formatting, making it go back to its default settings. This way, if the blank page is caused because of a setting, it will go away once the formatting is cleared. Here’s how to do it.
Step 1: Open the relevant document in Google Docs and click on Format from the menu.
Step 2: Here, select Clear formatting. You can also use the Ctrl + I (on Windows) or Command + I (on Mac) shortcuts to use this option.
Note: You can also right-click anywhere on the page to get the Clear formatting option.

Once this is done, check if the blank page has been deleted from Google Docs.
6. Check for Hidden Tables
You can have blank pages in a document if it has tables with invisible borders. These hidden tables can push your document text after the table, thus creating a big blank space in between. To make sure this doesn’t happen, check for hidden tables on Google Docs.
Step 1: Open the relevant document and select the empty space using your cursor.
Step 2: Click on the table if it appears.
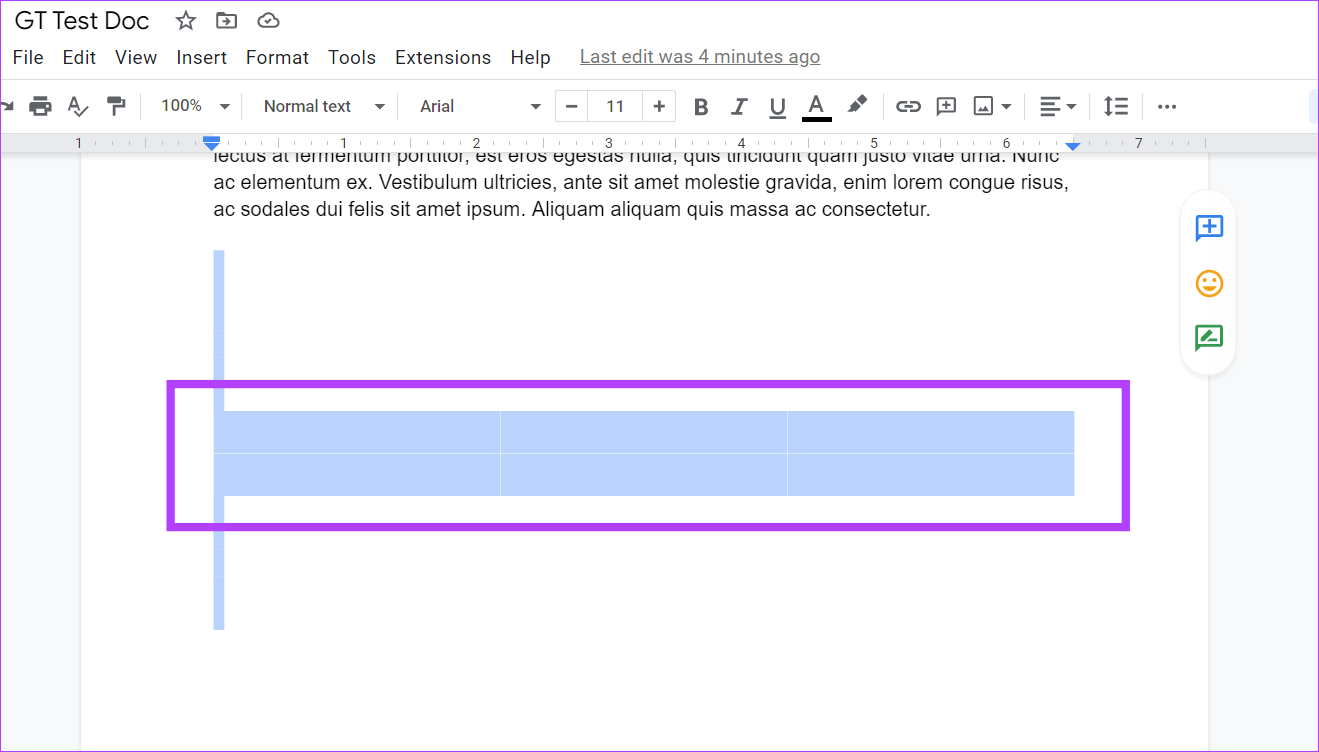
Step 3: Now, from the Table properties panel, change the Table border size and color to make the table visible.

If there is indeed a hidden table, this will make it visible. If you wish to delete it, simply select the table and hit the Delete key.
7. Scan for Section Breaks
While section breaks can help in improving the overall document formatting, they can also create big blank spaces. So, if you don’t remember whether you’ve used a section break in your current document, follow these steps to make it visible in the document and then delete them.
Step 1: Open the document in Google Docs and click on View from the menu options.
Step 2: Then, make sure the ‘Show section breaks’ option is checked.

You will now be able to see if your document has any section breaks. If they’re present, click at the end of the paragraph above the section break and use the Delete key on your keyboard to remove it.
FAQs for Deleting a Page in Google Docs
Yes, simply select all the pages you want to delete and press the Backspace or Delete key on your keyboard. This will delete all the selected pages at once.
Apart from pressing ctrl + z (undo option), you can go to the document version history, select the document version with the deleted page, and restore it. This will recover the deleted page.
You can go back to your previous margin settings. From the menu bar, click on File and then, click on Page setup. Here, enter your previous margin values and click on OK. This will reset your margin to its previous values.
Get Rid of That Blank Page
While blank space can be used to balance out the text in your document, too much of it can instead end up spoiling the look. And so, using the abovementioned ways, we hope that you were able to get rid of all the unnecessary blank spaces and blank pages in your Google Docs document.
Additionally, you might also want to check how to turn off auto-capitalization in Google Docs.
Was this helpful?
Last updated on 14 February, 2023
The article above may contain affiliate links which help support Guiding Tech. The content remains unbiased and authentic and will never affect our editorial integrity.

