Google Play is the heart of the Android ecosystem, offering a vast selection of apps, games, and entertainment for users worldwide. If you’ve moved to a new place or want to see things from a different part of the world, this article is for you. We’ll teach you how to change the country in Google Play Store.

Switching your Google Play Store location is a legal and easy way to surf the most prominent apps in that country officially. Moreover, changing the region on your Play Store allows you to download geo-restricted apps on your device. So, without further ado, let’s check how you can do so.
Things to Remember Before Changing the Country in the Google Play Store
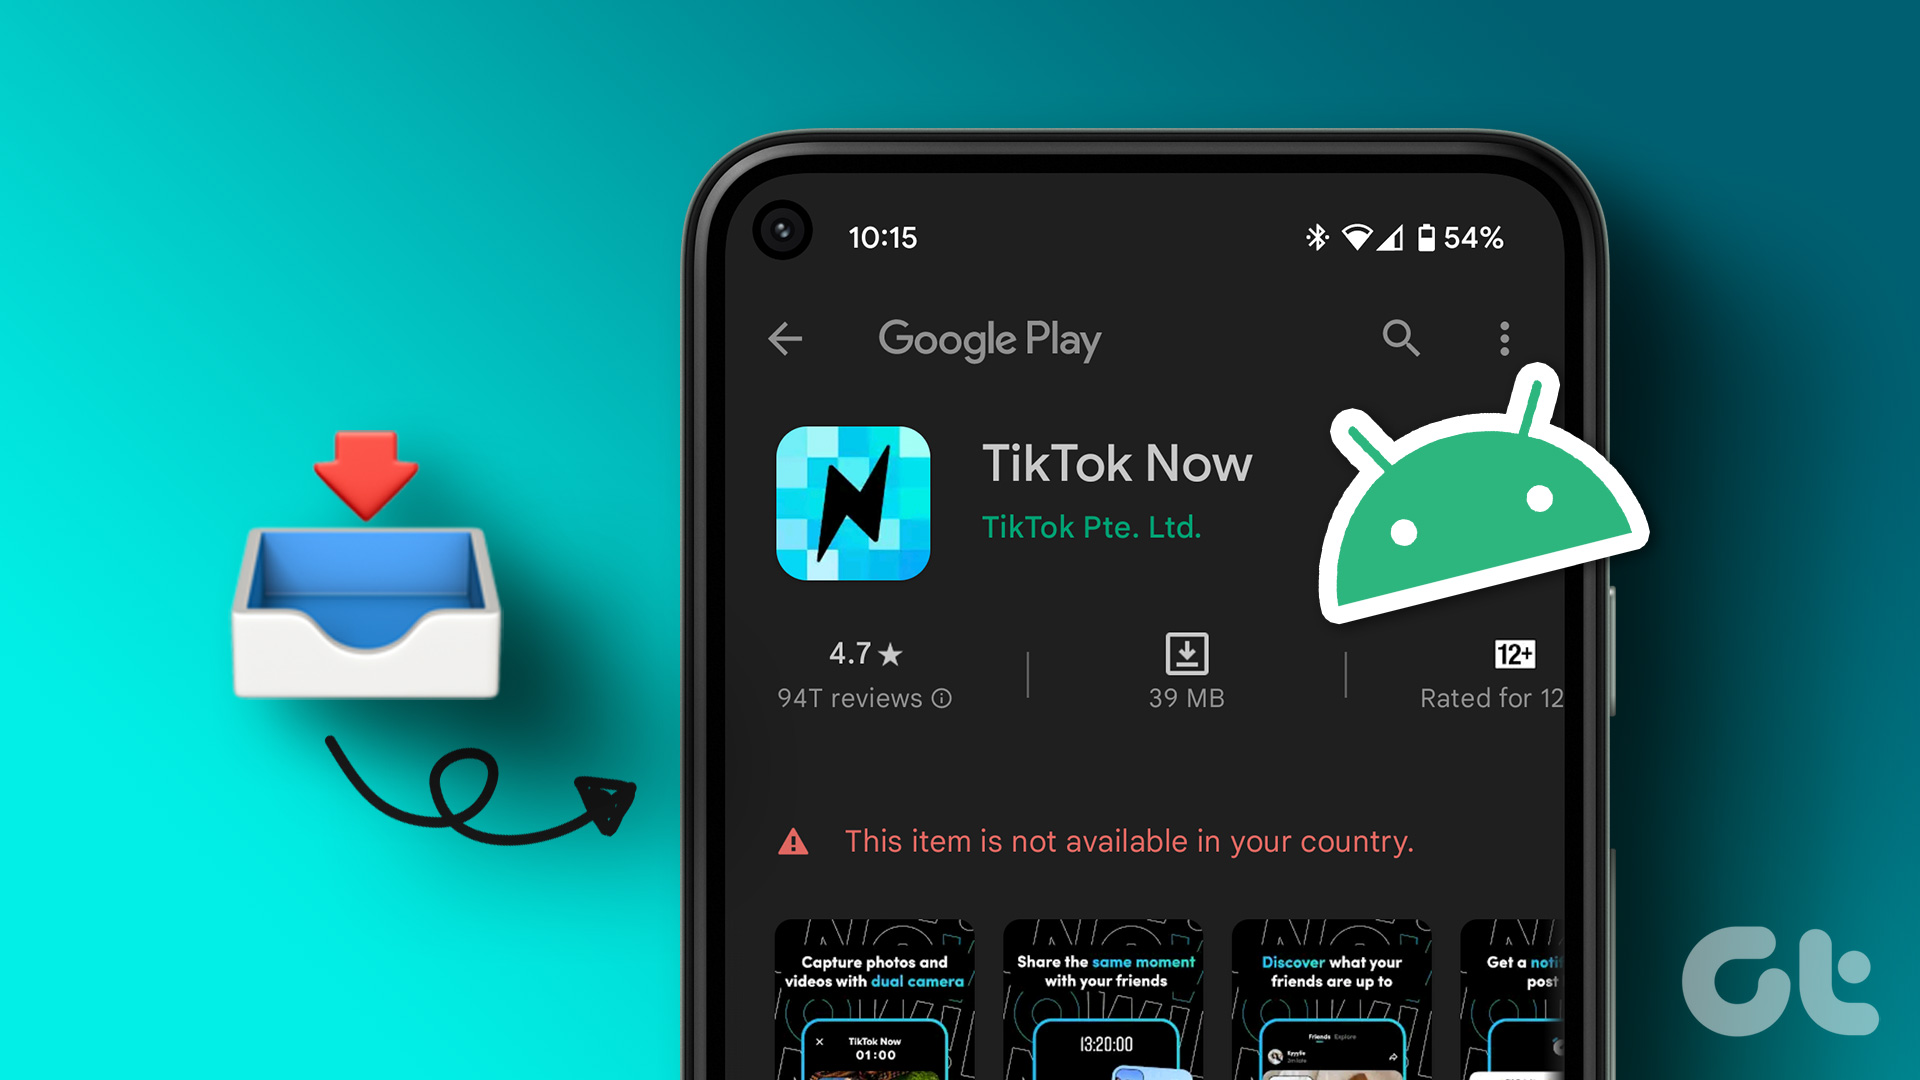
There are many reasons why you might want to switch the country setting on your Google Play Store. One big reason could be that an app you recently downloaded is unavailable in your country. But before we talk about how to change your Play Store region to fix this, let’s review some things you should remember before doing it.
1. Frequency of Country Change
You can change your Play Store country once a year. After the change, you can’t switch back to your old region for another year.
2. Payment Method
Your old payment method won’t work with your new account. You need to use a payment option from the new country for transactions.
3. Content Availability
Be aware that some books, movies, TV shows, games, and apps may not be available in your new country, potentially leading to losing access.
4. Google Play Balance
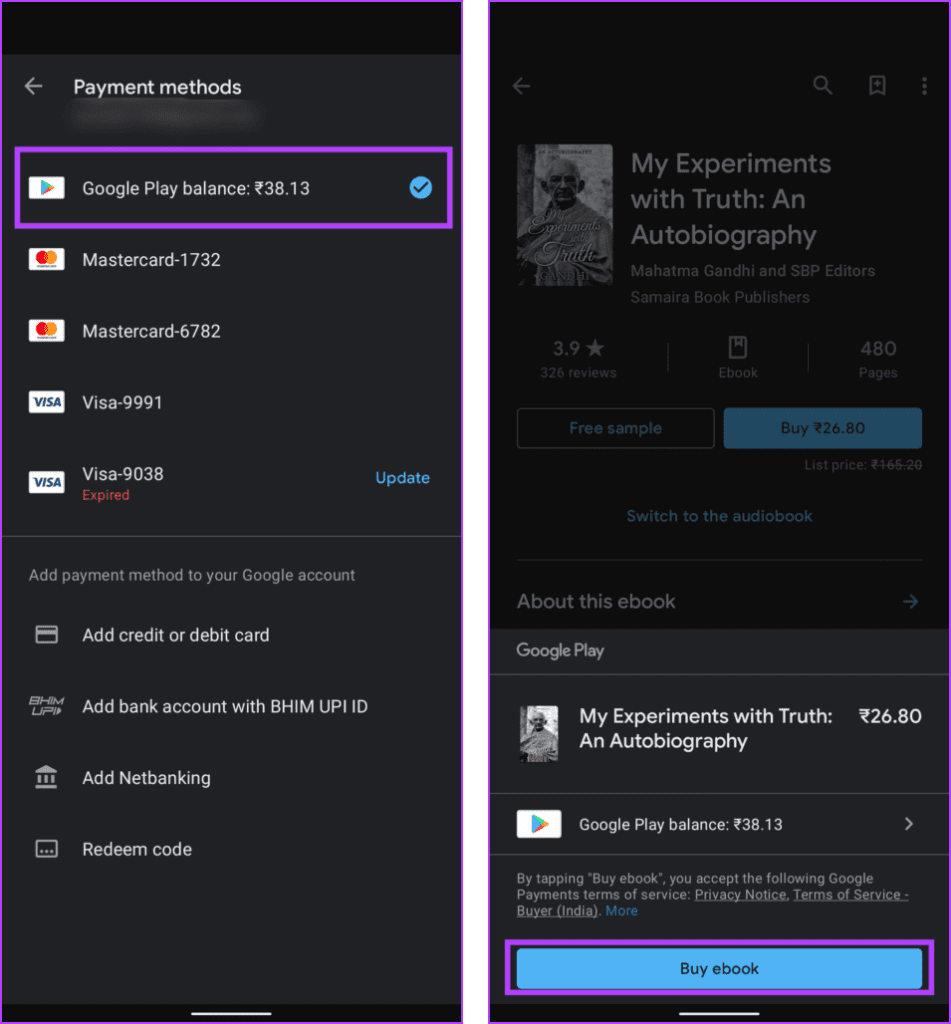
Your Google Play balance from your old country can’t be used in your new region. However, if you return to your old country, you’ll regain access to your balance.
5. Google Play Points
When you switch countries, you’ll lose access to your Google Play Points, and your game’s progress level may not carry over to your new region.
6. Google Play Pass Subscription
If you have a Google Play Pass subscription, it will only transfer to your new country if the service is available there. If not, you can’t install more Google Play Pass games and apps.
7. Available Payment Options
Ensure the new country provides suitable payment options. Some countries have limitations on the types of payment methods available.
8. Country-Specific Regulations
Be aware of any country-specific regulations or restrictions that may affect using certain apps or content in your new region.
9. Data Loss
Changing your country might lead to data loss or progress in some apps and games. So, we suggest you backup your Windows data and files before switching.
10. Family Library
If you’re part of a Family Library, switching countries may affect availability or features. Check if your new country supports Family Library.
Prerequisites for Country Change in Google Play Store
Before we move forward and check the steps to change the country or region in the Google Play Store, let’s first check the requirements to do so:
- Your Google Play account must be at least one year old.
- You must have a valid IP address from the country you want to switch to.
- You must have a valid payment method from the country you want to switch to.
Change Google Play Country on Desktop
When you’ve met all the requirements mentioned earlier, follow these simple steps to change your Google Play Store country on your computer.
Step 1: Open a web browser on your computer.
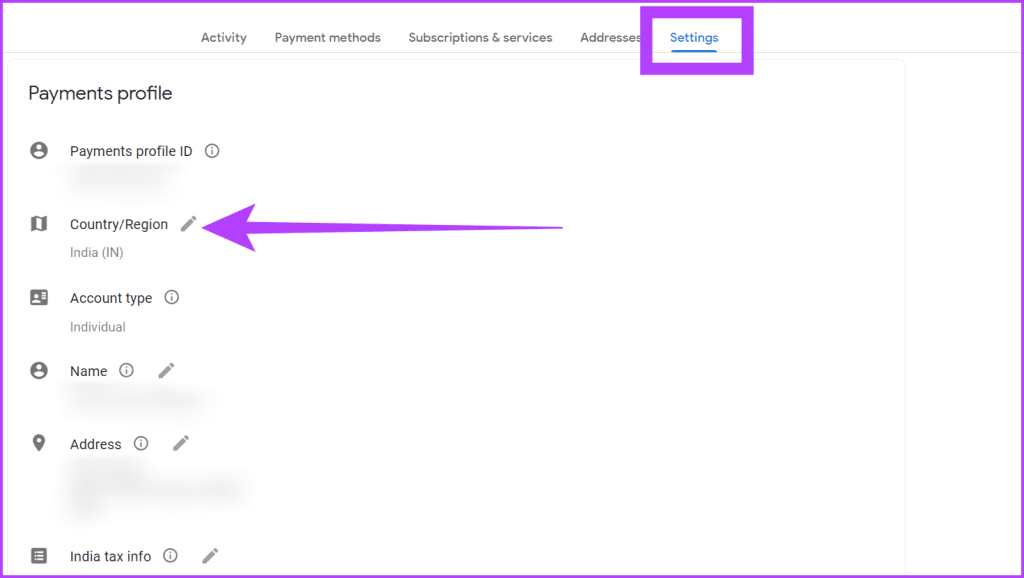
Step 2: Go to the Google Payment Center and click on Settings.
Step 3: In the Payments profile section, click the Edit button (the pencil icon) next to Country/Region.
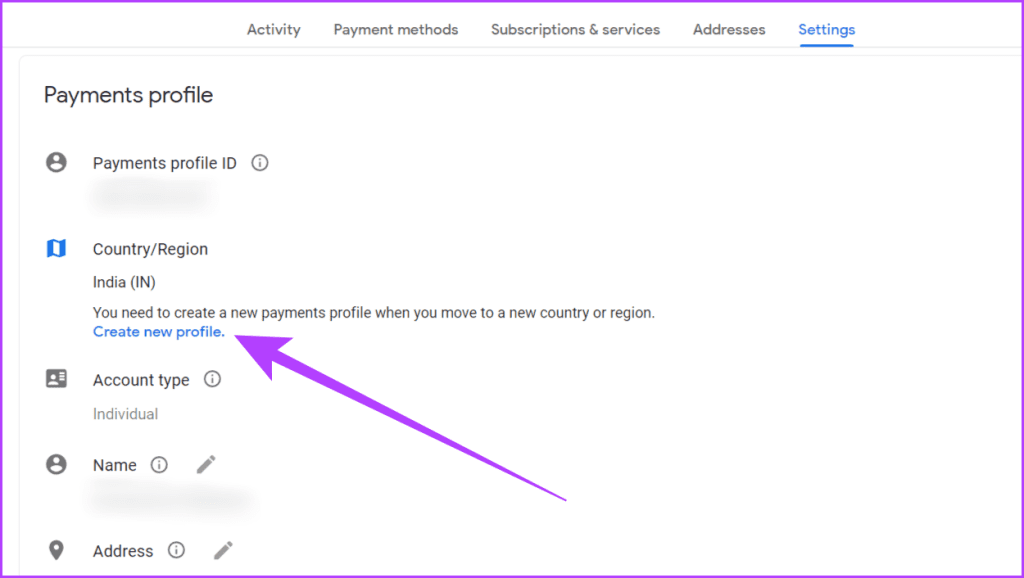
Step 4: Choose the Create new profile option.
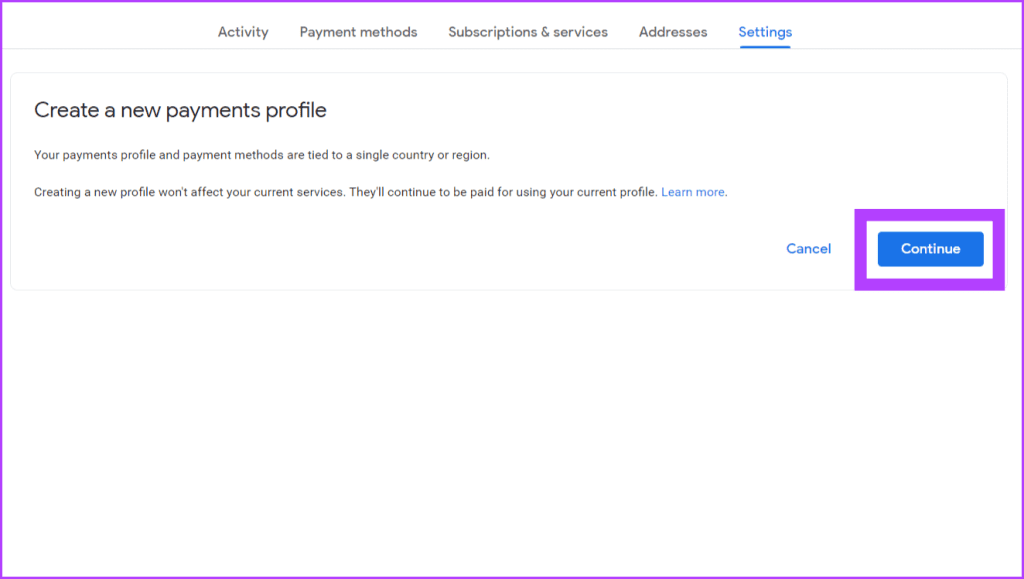
Step 5: Press the Continue button in the confirmation box to create a new profile.
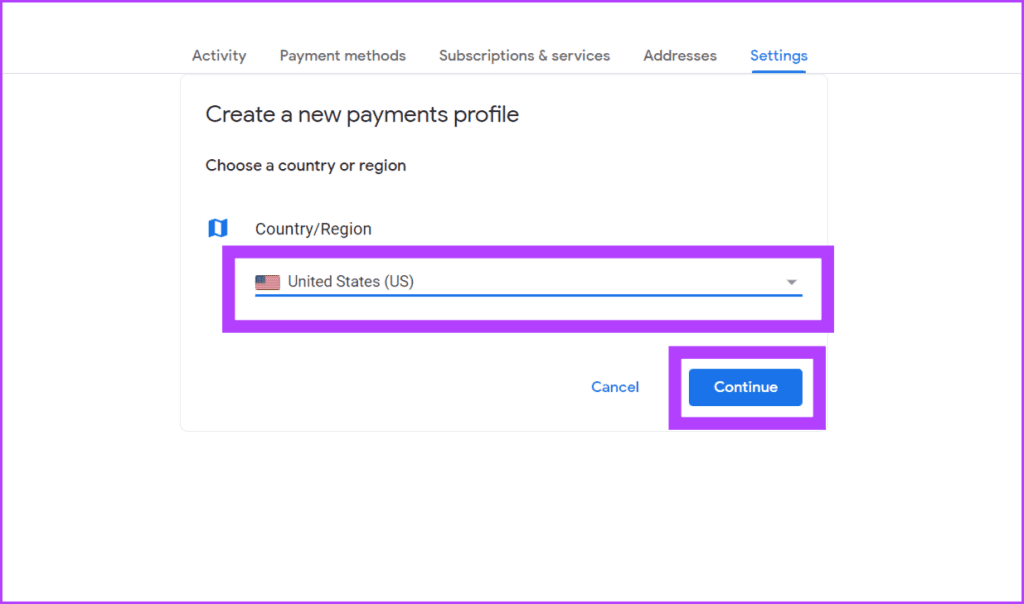
Step 6: Select a country from the dropdown menu for Country/Region and click Continue.
Step 7: Enter your payment address and click Submit.
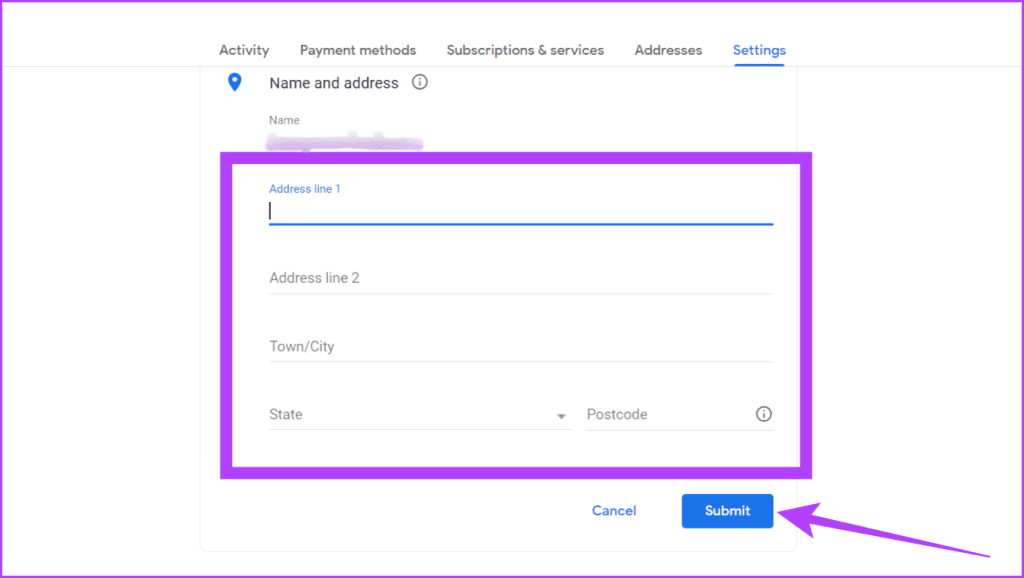
Congratulations! You’ve successfully made a new payment profile. Now, the Google Play Store will change to your new country or region within 48 hours automatically.
Change Google Play Country on Mobile
Switching the country settings in the Google Play Store on your Android device is straightforward. Follow the steps below.
Step 1: Open the Play Store on your phone and tap your picture in the top-right corner.
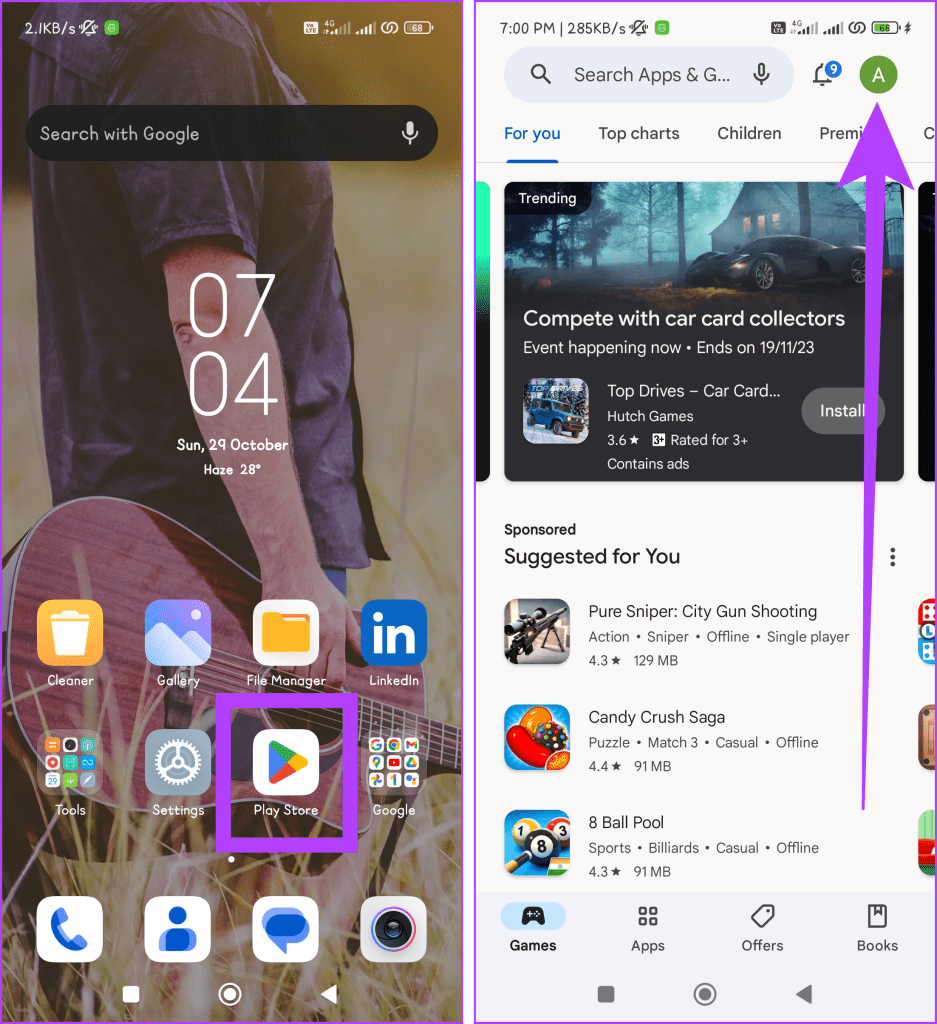
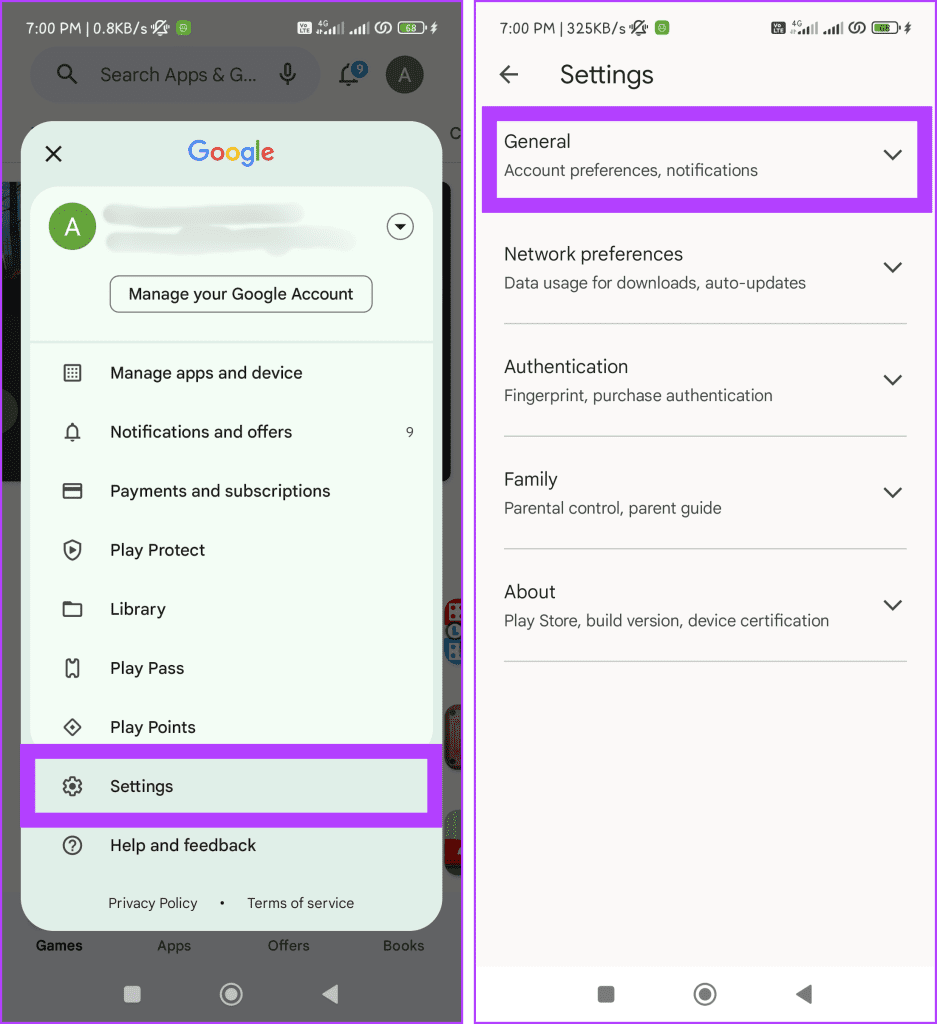
Step 2: Go to Settings and select General.
Step 3: Tap ‘Account and device preferences’ and locate the Country and profiles section.
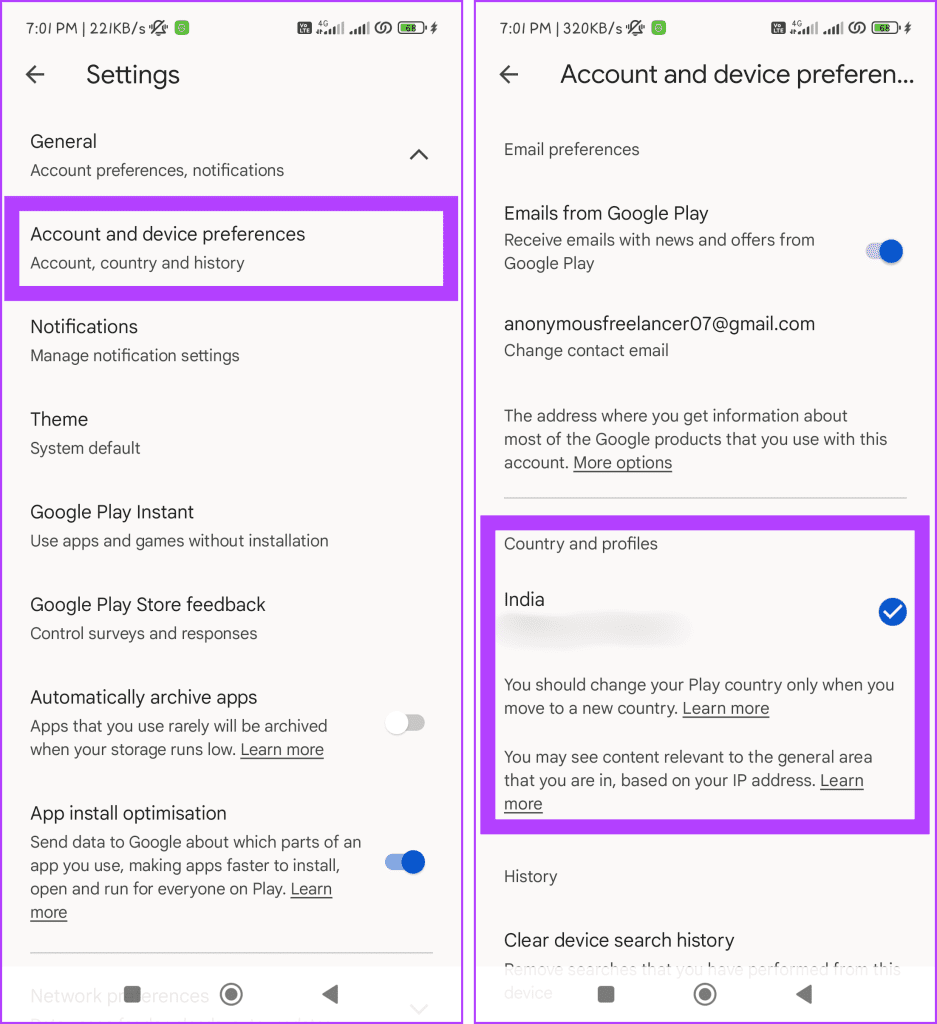
Step 4: Now, you’ll see an option to switch to the [region] Play Store if you’re in a different country than you were initially registered to.
Step 5: Finally, add a new Payment method to your account. After that, you can check out the Play Store for that region.
Note: It might take up to 48 hours for this change to work.
Change Country in Google Play Store Using VPN
If you’re looking to change your country or region in the Google Play Store, one effective method is to use a Virtual Private Network (VPN). This approach allows you to modify your virtual location, granting access to apps and content unavailable in your current region.
Also, this method allows you to change Google Play country without adding a payment method if you’ve not previously added any to your Play Store ID.
The Google Play Store’s app and content availability can significantly vary based on your physical location. To make the most of a VPN for this purpose, use a reliable, high-speed, and secure VPN network.
Remember that connecting your VPN can differ based on the VPN app and your device. In this example, we’ll use Windscribe VPN on a Windows computer for illustration purposes:
Step 1: Download and install Windscribe VPN.
Step 2: Launch the app and sign in to your account. Create a new account if you don’t already have one.
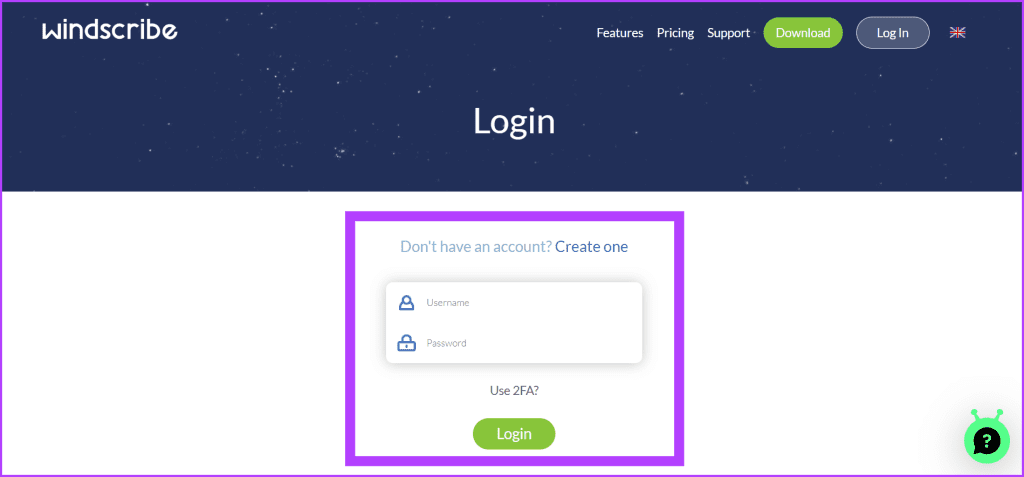
Step 3: Select the dropdown next to Locations and choose the country you want to connect to from the list. Click the power button to connect to a VPN server.
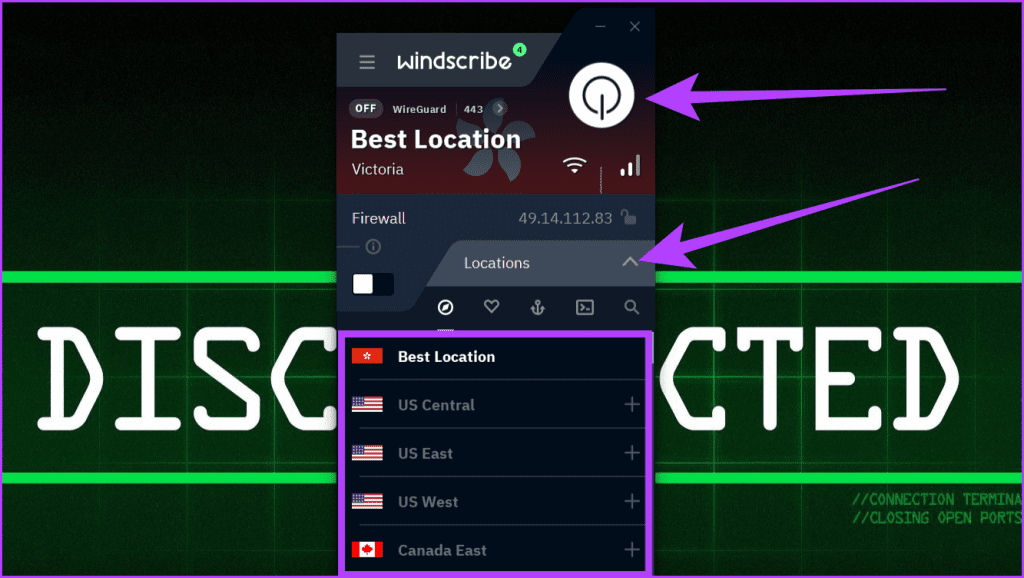
Step 4: You’re now connected to a VPN. Depending on the device you’re using, follow the steps outlined in the methods described above to change the country in the Google Play Store.
Tip: Clear your app data if using the Play Store app on mobile.
Bonus: How to Change Google Play Country Without Adding a Payment Method
If your Google account is less than a year old or you don’t have a payment method for the country you want to switch to on the Google Play Store, you can follow these steps on your Android device:
Step 1: Open the Settings app.
Step 2: Go to Accounts & Sync and choose your Google account.
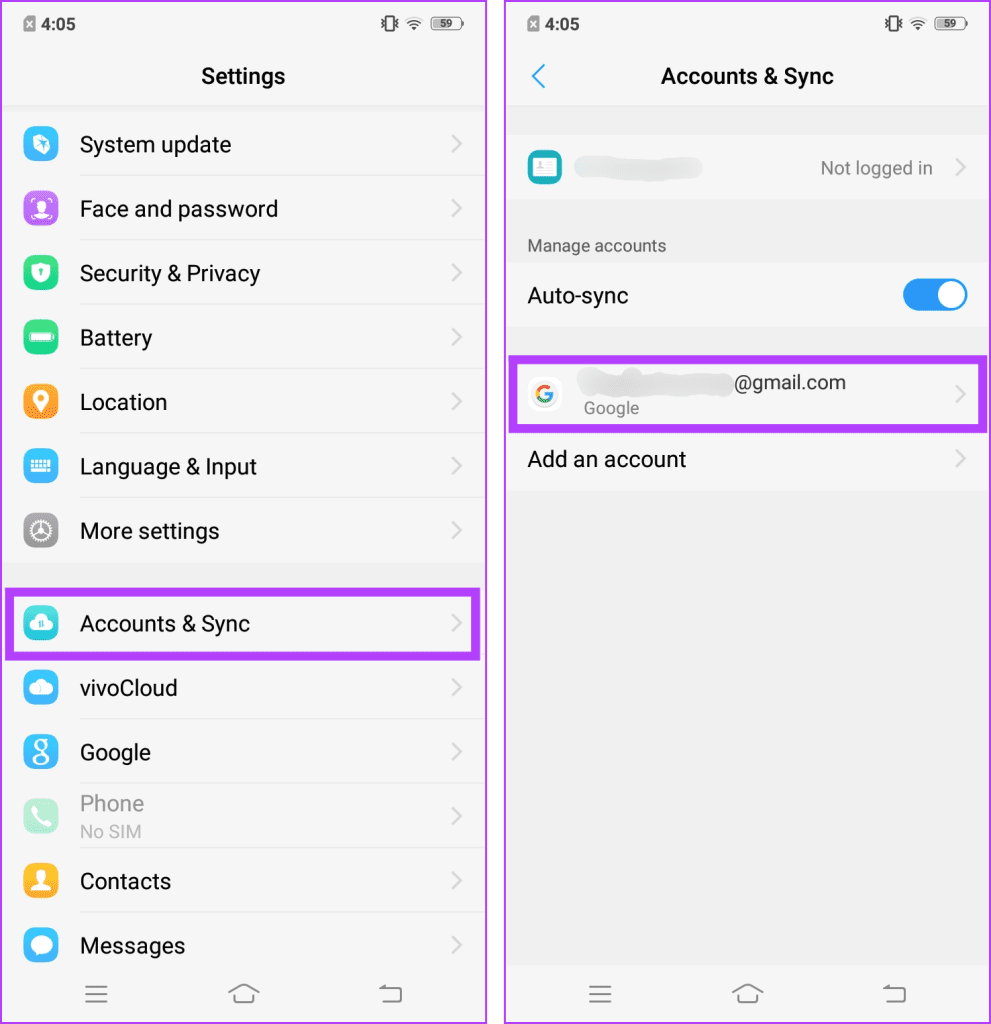
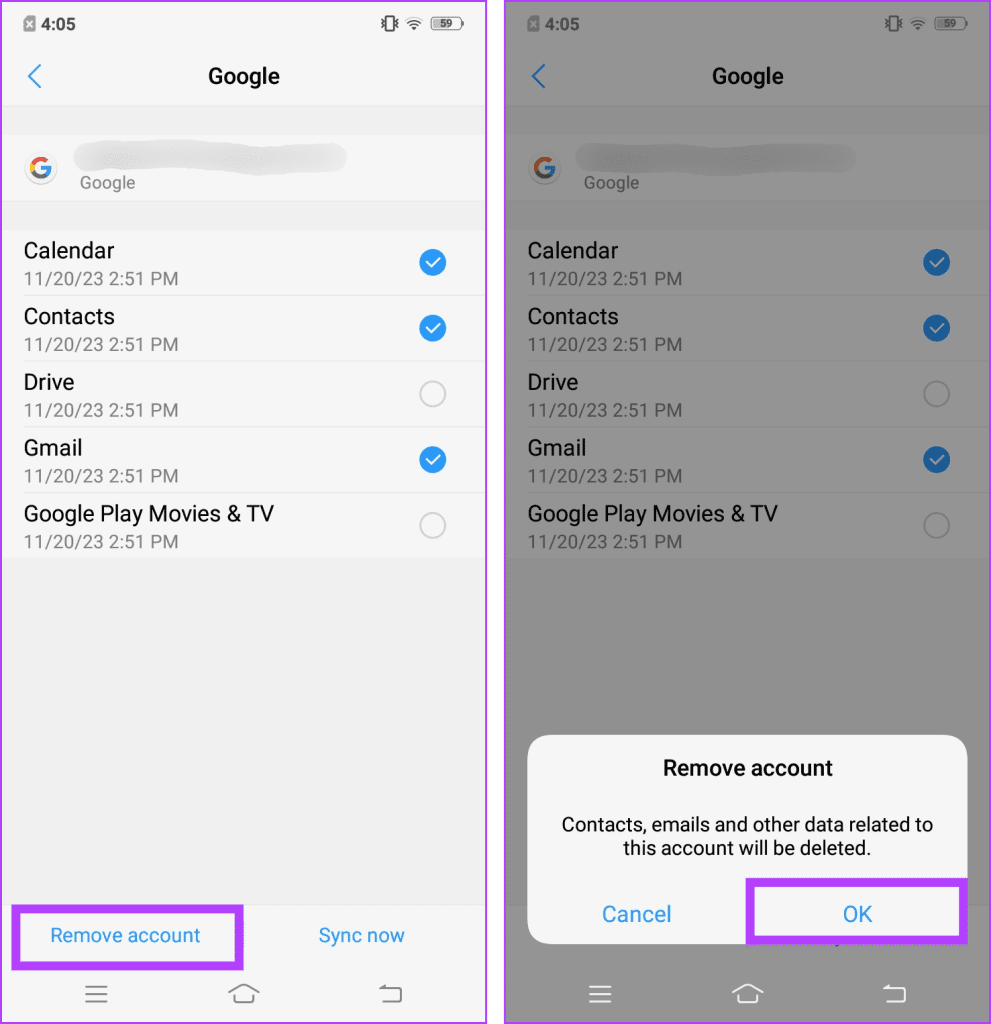
Step 3: Tap Remove Account and then select OK.
Note: Your data will remain unaffected as this will only remove your account from this device.
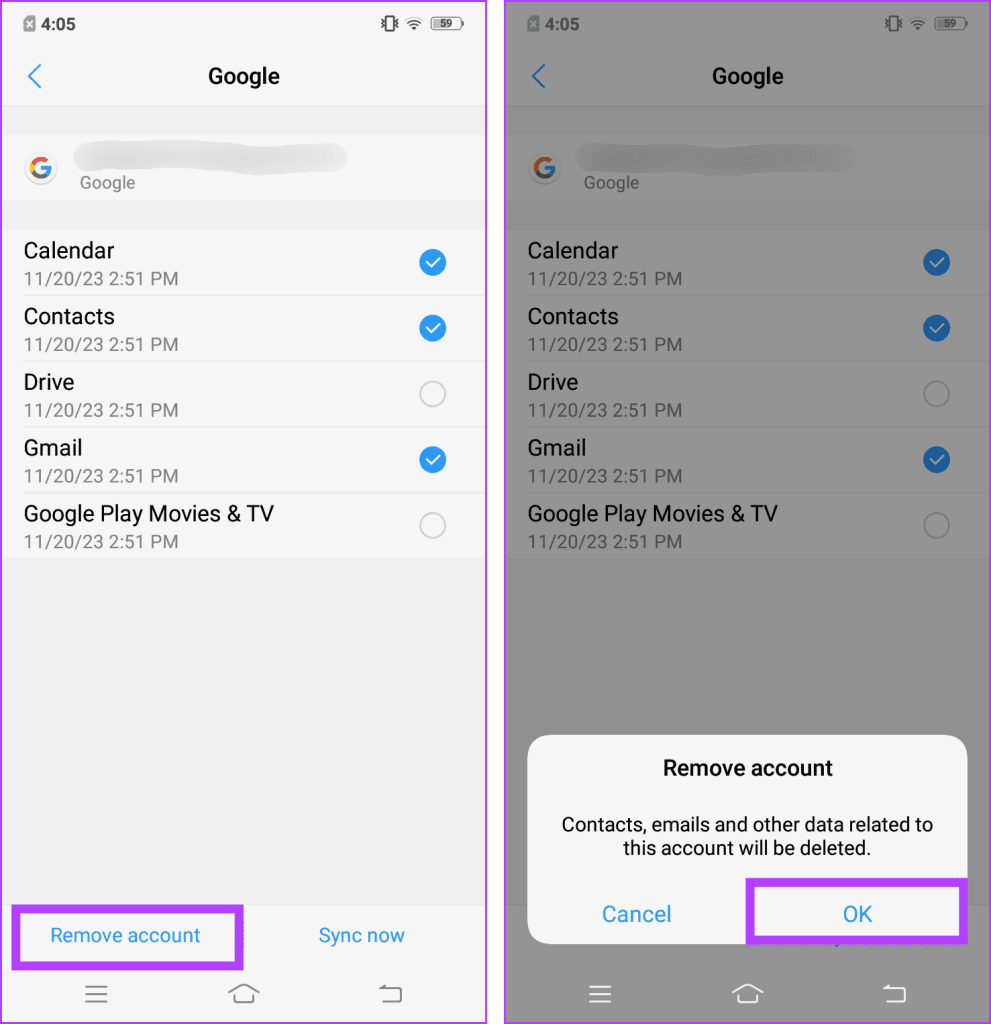
Step 4: Press the back button (< ) and go back to the Settings main menu. Find and tap More Settings.
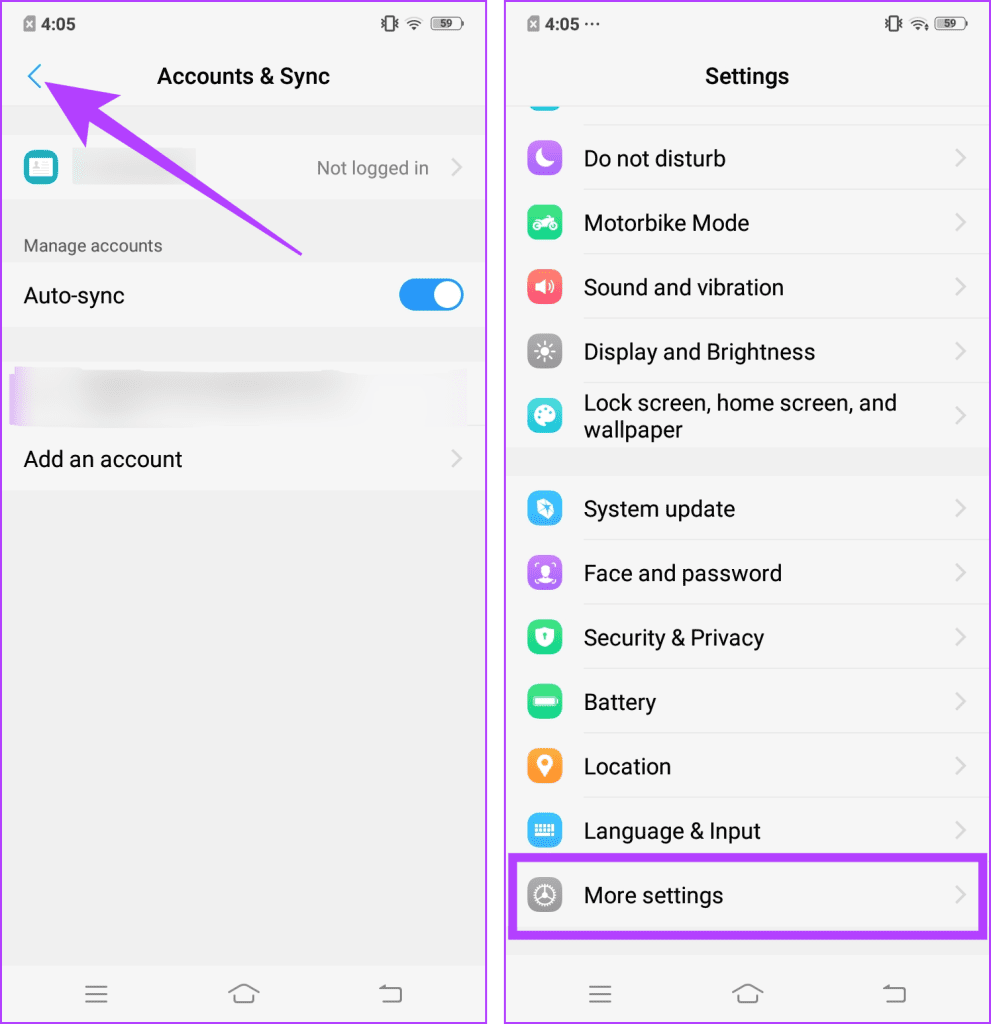
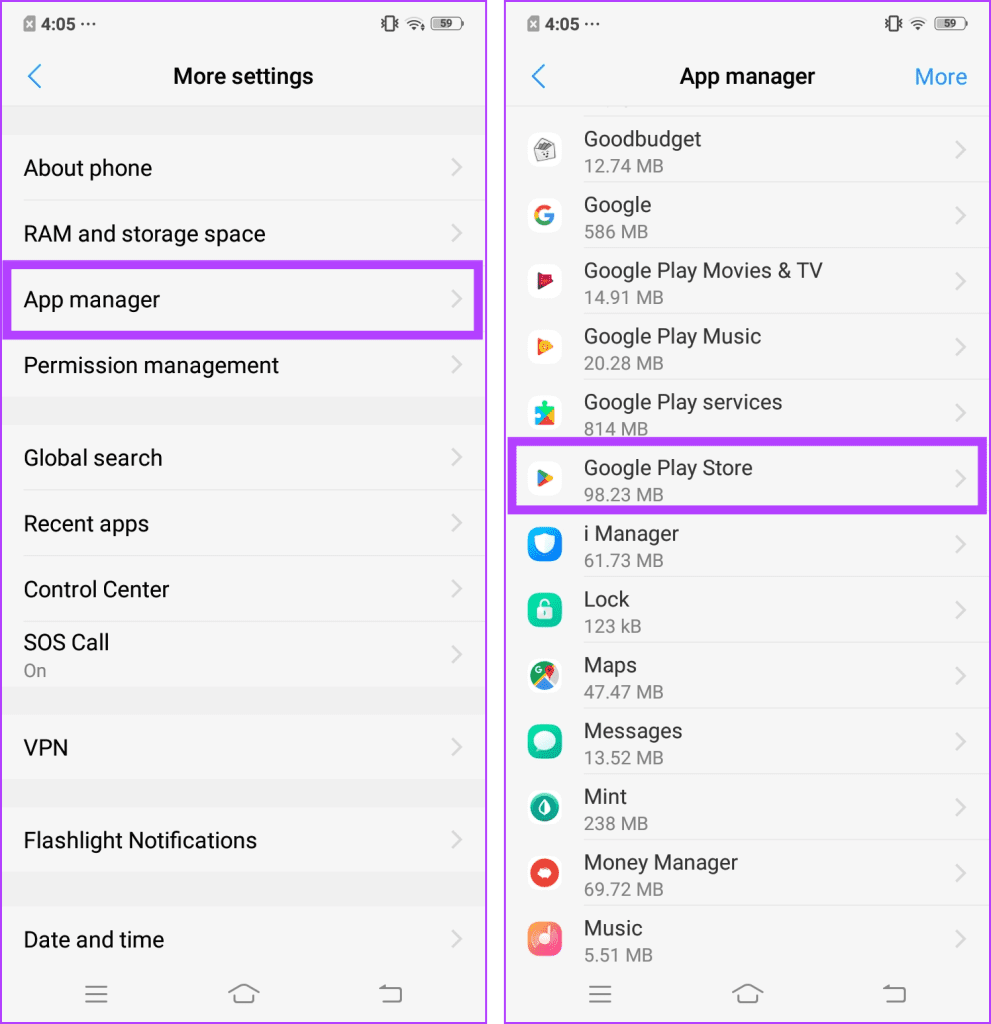
Step 5: Select App manager and go to Google Play Store.
Step 6: Press Force Stop and choose OK.
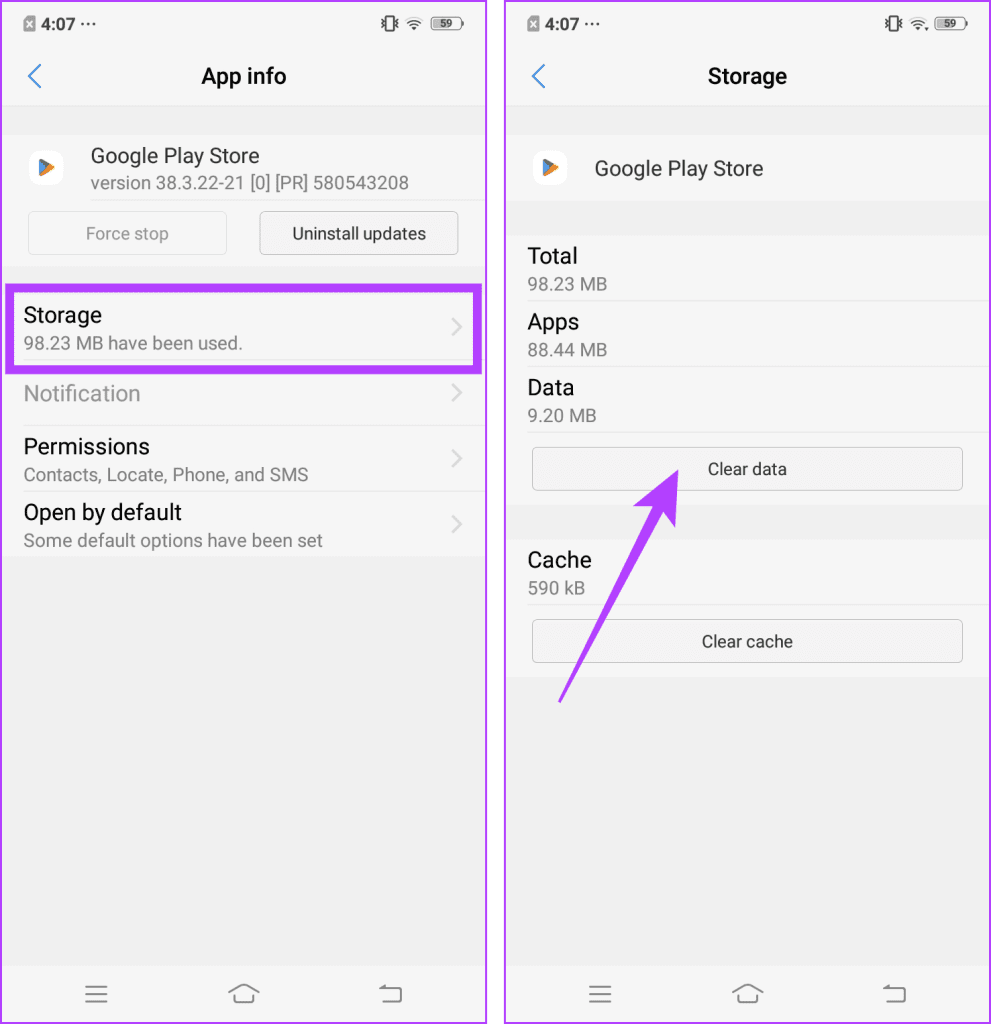
Step 7: Tap Storage and select Clear data. If prompted, confirm by tapping Clear data again.
Note: This will log you out of all your Google accounts on Google Play Services.
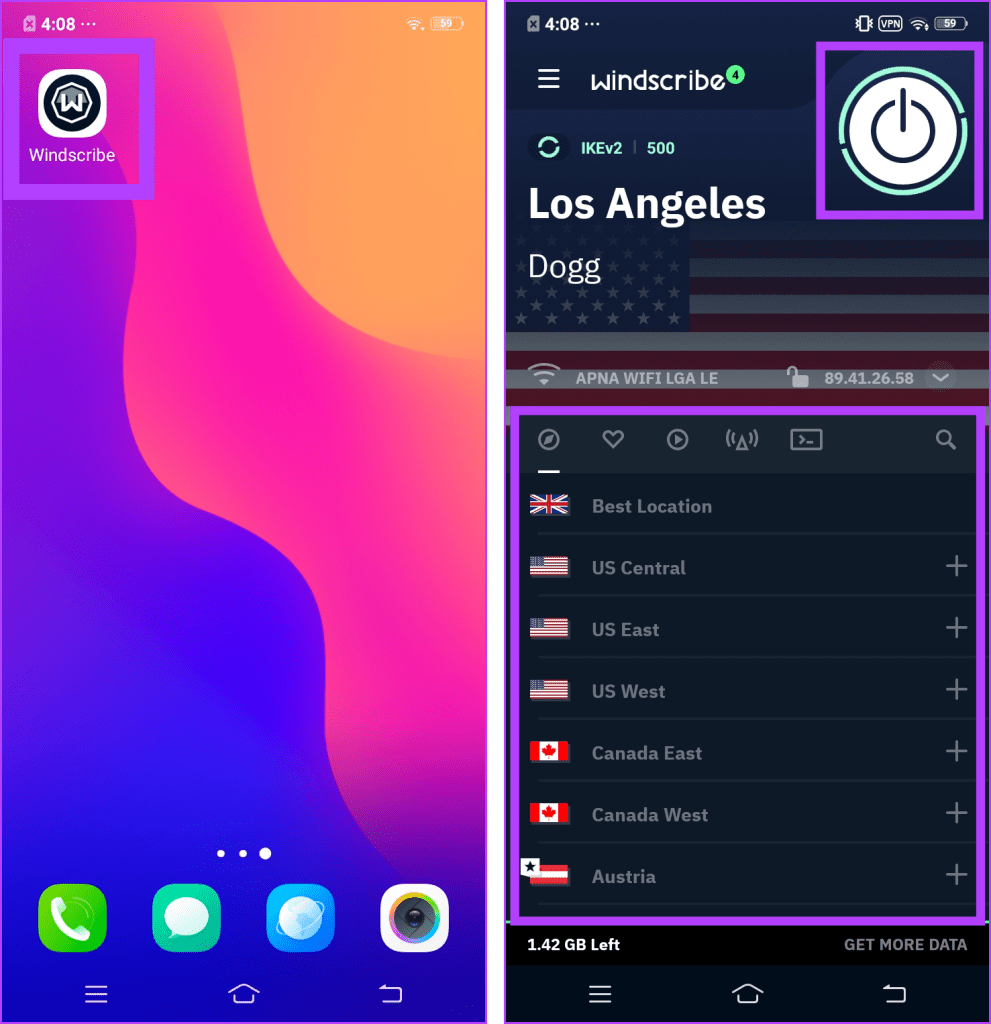
Step 8: Now, open your VPN app. Choose the country you want access to and connect to the VPN.
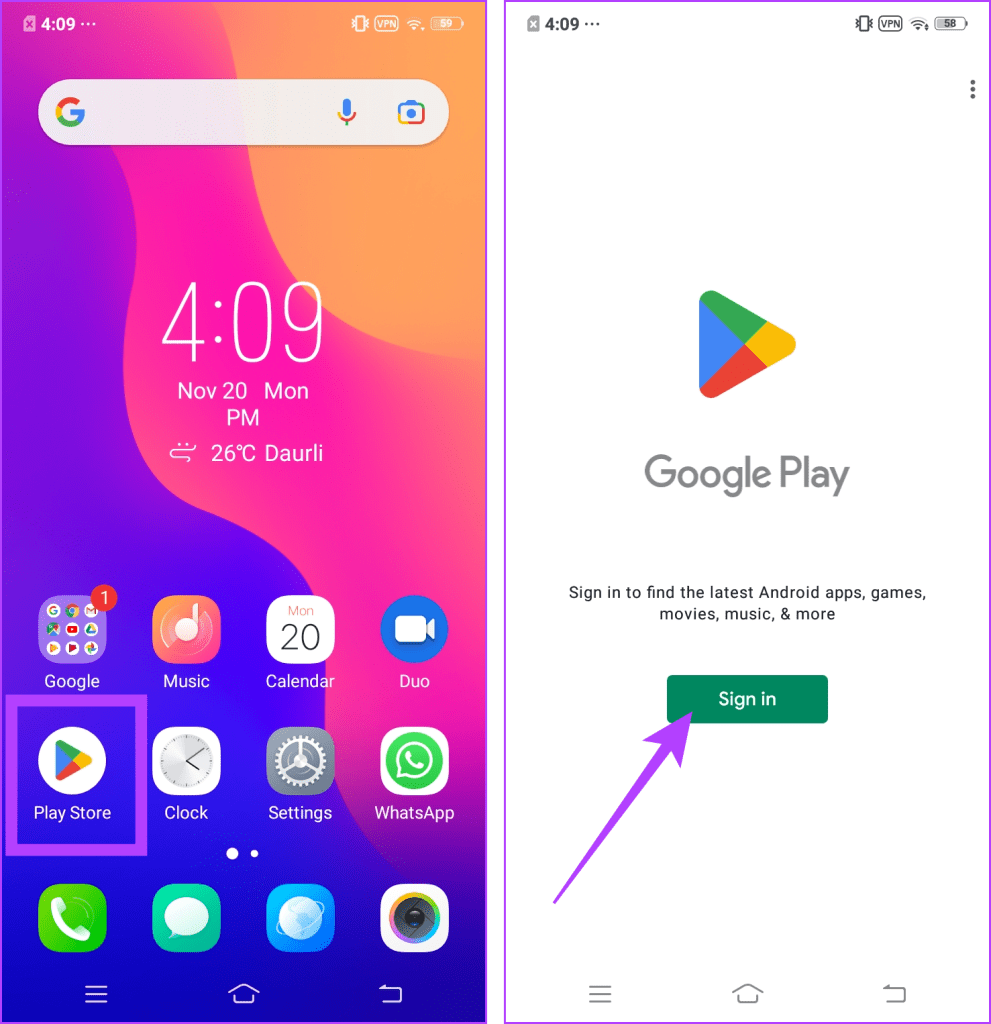
Step 9: Launch the Play Store app and tap Sign in.
Step 10: Wait for a few minutes until Play Store finishes Checking info. Now, tap Create account and complete the process.
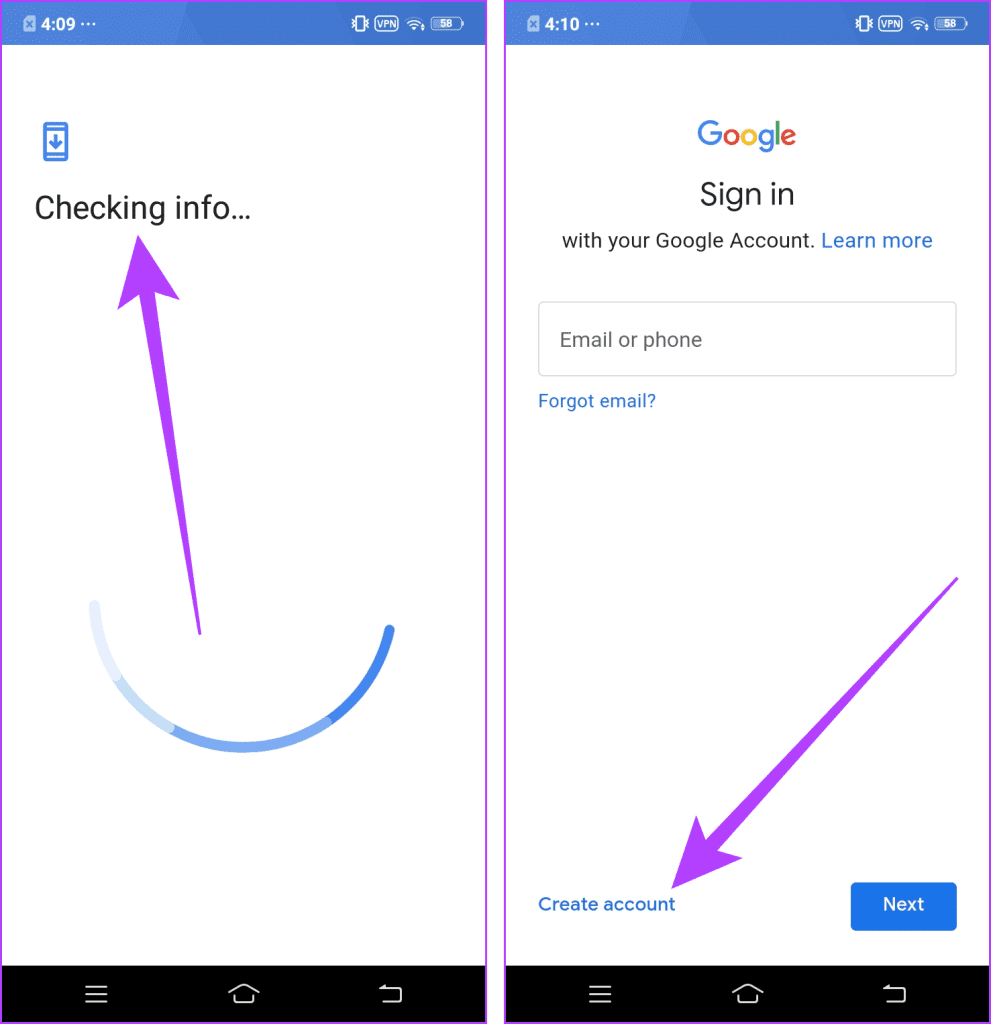
Congratulations! You’ve successfully created an account to access the Play Store for that region. Remember to stay connected to the VPN while trying to access the Play Store for the country.
FAQs on Changing Your Country or Region in the Google Play Store
One of the most prominent reasons why you might not be able to change your Google Play country is if your account is not one year old or if you must have recently changed your country and it hasn’t been a year since then.
There are several possible explanations for why some Google Play websites aren’t available in your nation. Technical limits, government restrictions, and licensing are a few of them.
Location Updated
You may access a wide range of games and apps in the Google Play Store, along with other payment and pricing methods, by changing your nation or area. However, it would be best to exercise caution while selecting your new region, as you can only do it once a year.
Was this helpful?
Last updated on 22 November, 2023
The article above may contain affiliate links which help support Guiding Tech. The content remains unbiased and authentic and will never affect our editorial integrity.

